| INTRO | PARTS |
SETS Moubal Jumbo |
MANUALS Moubal Jumbo |
MARKETING | PRICE LISTS |
BUILDING |
MOUBAL RELATED |
| |
||||||||
|
This page is a "grab bag" of miscellaneous stuff that doesn't fit any of the other categories. Here you will find: • Related construction toys that either predate Mobaco, are a direct copy, or are similar to Mobaco • Articles and booklets by Mobaco collectors about the history of Mobaco • Exhibitions • Miscellaneous • Links to related websites |
||||||||||||||||||||||||||||||||||||||||||||||||||||||||||||||||||||||||||||||||||||||||||||||||||||||||||||||||||||||||||||||||||||||||||||||||||||||||||||||||||||||||||||||||||||||||||||||||||||||||||||||||||||||||||||||||||||||||||||||||||||||||||||||
OTHER SYSTEMS Jump directly to: L'Édifice Pulko Patent Baukasten McLoughlin's Sky-Hi, Ski-Hi and Adolph Engel,Berlin Edilizia El Constructor Infantil (Privilegado) Casitas FRM Donald Arquitecto / Donald Architect Fox Blox Bouw Mee Fabro Okwa Zet-op Wilfried, der kleine Baumeister Corus Hubo EL-4 System Unknown Play Structure MiniPLEX Rabius Design Arckit It is said that "plagiarism is the sincerest form of flattery." Well, Mobaco can be proud. There were many companies that make Mobaco-like toys, here some that I found on the internet. There is even a life-size version of Mobaco, appropriately used for children's play structures! |
||||||||||||||||||||||||||||||||||||||||||||||||||||||||||||||||||||||||||||||||||||||||||||||||||||||||||||||||||||||||||||||||||||||||||||||||||||||||||||||||||||||||||||||||||||||||||||||||||||||||||||||||||||||||||||||||||||||||||||||||||||||||||||||
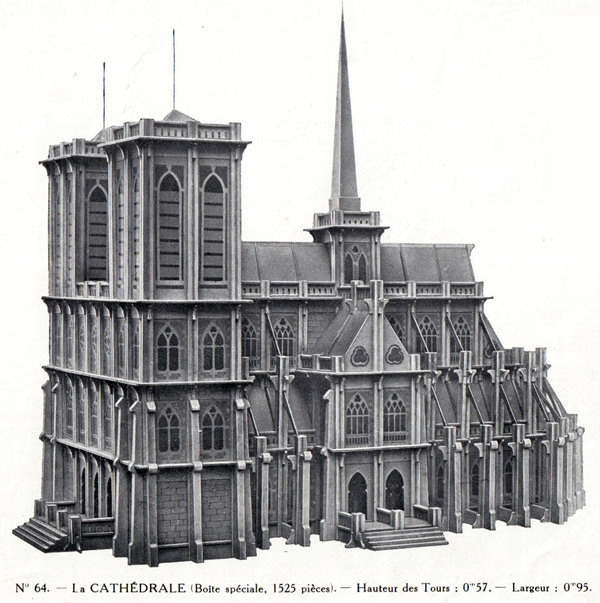
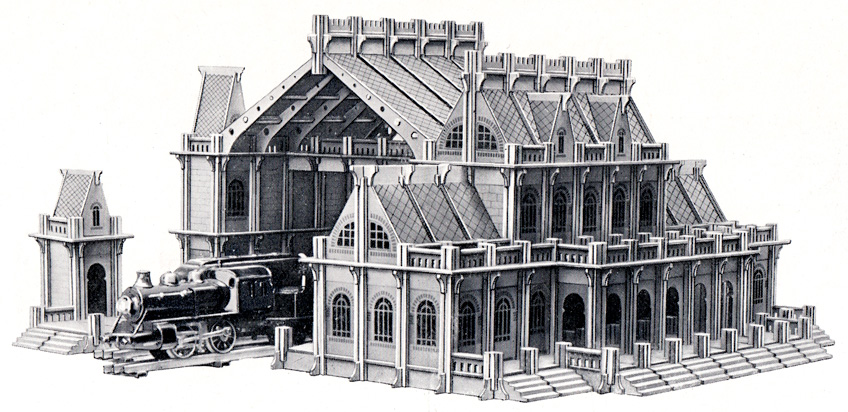
L'ÉDIFICE L'Édifice is a beautiful and elaborate French construction system, produced by the prolific book publisher Albert Méricant in Paris. It is patented in 1917 and finally comes out in 1920. The Pulko prototype (see below) has a few important similarities with the L'Édifice prototype which may suggest that Erich Pulkowski was inspired by L'Édifice when he created Pulko. You can find much, much more about L'Édifice in this dedicated website: www.ledifice.nl Here a couple of large examples from the L'Édifice manual, a cathedral and a train station: |
||||||||||||||||||||||||||||||||||||||||||||||||||||||||||||||||||||||||||||||||||||||||||||||||||||||||||||||||||||||||||||||||||||||||||||||||||||||||||||||||||||||||||||||||||||||||||||||||||||||||||||||||||||||||||||||||||||||||||||||||||||||||||||||
  Scans courtesy of Koos Welling |
||||||||||||||||||||||||||||||||||||||||||||||||||||||||||||||||||||||||||||||||||||||||||||||||||||||||||||||||||||||||||||||||||||||||||||||||||||||||||||||||||||||||||||||||||||||||||||||||||||||||||||||||||||||||||||||||||||||||||||||||||||||||||||||
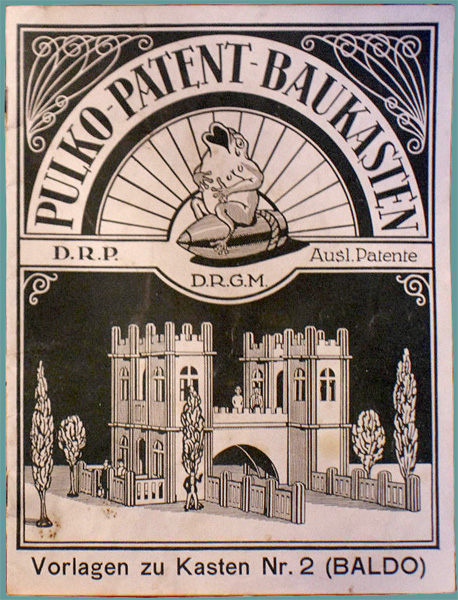
 PULKO PATENT
BAUKASTEN PULKO PATENT
BAUKASTEN Jump directly to: The Pulko Patent Addo (Set 1) - German version Addo (Set 1) - French version Addo (Set 1) - English version Adbal (Make-up set 1a) - German version Baldo (Set 2) - French Baldo (Set 2) - German Manual for Addo (Set 1) - Dutch version Manual for Baldo (Set 2) - German version Pulko parts Miscellaneous finds Building Pulko with LeoCAD Pulko advertisements Mobaco is most likely based on Pulko. Pulko was patented in 1919 by Erich Pulkowski from Dessau and manufactured in Lechenich (near Köln) by "Holzbearbeitungswerk Lechenich, Michael Engels". It was marketed by Carl Josef Bollig & Co., toy exporters from Mönchengladbach. Like Mobaco, Pulko has columns and infill panels. The major difference is that all Pulko parts are made of wood, by hand. Window panels are glued together from three parts of solid wood, doors from two parts. Later the openings are cut out of plywood, such as in the example below. Either way, manufacturing was very labor intensive which probably made the system too expensive.  Model and photo courtesy of H.R. Mobaco's innovation was to stamp these complicated parts from very dense cardboard, using the heavy machinery they normally used to stamp sheet metal, significantly reducing manufacturing cost. Interestingly, Mobaco kept the door, window, fence and crenelation designs of Pulko, despite that they had much more manufacturing freedom. Pulko had three sets and two make-up sets. The principal sets were named Addo, Baldo and Caro, the first letters being A, B, and C. The make-up sets combined two syllables of both adjacent sets: Adbal and Balcar. So far only Addo, Adbal and Baldo have been found. The larger sets, Caro and Balcar, were possibly never produced. Only two Dutch advertisements have been found featuring Pulko, in 1920 and 1922. In 1928, a Pulko set is listed in a department store sale ad in Batavia (Jakarta), Indonesia, so apparently some Pulko was exported to the Dutch colonies. Interestingly, Carl Joseph Bollig had a stand at the Jaarbeurs trade fair in Utrecht, the Netherlands, in the fall of 1921 (from 6 September through 16 September). According to the 1921 Jaarbeurs catalog, on display were "All toys including Pulko Patent construction sets and Aki toys." They occupied three tables, so this was a fairly large display:  Original courtesy of Utrechts Archief Moubal frequently had stands at the Jaarbeurs, and there even is a photo of Mr. van Mouwerik and Mr. Bal at the Jaarbeurs. It is very possible that they visited the Jaarbeurs in 1921 and saw the Pulko display. It's not inconceivable, even likely, that the Mobaco story started here. Mobaco came out in 1924, three years after Pulko was shown at the Jaarbeurs. For many years we were confused about the role of Carl Josef Bollig & Co. In Pulkowski's biography (see below) it says: [Pulkowski] then brought out his “Pulko patent construction kit” at the Carl Josef Bollig & Co toy factory in Lechenich near Cologne. However, we couldn't find a trace of that factory. After extensive research, we found that Bollig was a toy exporter based in Mönchengladbach. The parts were indeed made in Lechenich, but not by Bollig. They were fabricated by Michael Engels, who set up Holzbearbeitungswerk Lechenich (= Woodworking factory Lechenich) to manufacture Pulko. The company was created in April 1920 and closed in May 1922. Pulko was probably manufactured during that two-year period. It is possible that Pulkowski may have had a licensing or cooperation agreement with Moubal. That would also explain why Mobaco was never patented. That agreement may have lasted until 1931, the year that the company "Pulko-Patent-Baukastenwerk Erich Pulkowski" was terminated and the year we see lots of changes in Mobaco. But this is speculative. Pulko sets are very rare. THE PULKO PATENT The German patent was awarded on 12 March 1919, and published on 27 March 1920. Here an English translation. The illustration that accompanies the patent shows some resemblance with Mobaco. The concept of base plate (1), columns with grooves (2) and modular panels (4, 7) is the same, however the upper floor system is different: instead of a double layer made with various floor elements, Pulko creates a single support layer with perforated strips (3, 3a, 3b, 3c, 3d, 3e) that have square "rings" around the columns, on which rest floor panels (5) with corners notched for the posts. In the tower, they show a floor plate with integral holes for posts (6). Mobaco uses a combination of 3 and 6.  Image courtesy of Koos Welling The production version of Pulko is different. As can be seen in the photo above of an actual Pulko building, the finicky details of the ringed strip and the door and window panels have been simplified for ease of fabrication. Columns are now rounded instead of square and beveled on all four sides instead of two, and the perforated strips don't have square rings but straight edges with round holes (made with a drill). The base plate and the upper floor plates also have round holes made with a drill. The design of the door, window, fence and crenelation are quite different from the patent, and strongly resemble Mobaco. To the casual viewer, the buildings in this Pulko display at the Liepzig trade fair of 1922 look like Mobaco: 
Image courtesy of Horst Pulkowski Click here to enlarge image. Interestingly, the bridge and the tower shown in this display have perforated strips with square rings around the columns, like the patent. These were probably prototype models that were taken to this show. A production version of this bridge was sold by De Bijenkorf, a large department store, in 1922, see advertisement. The large house on the left is almost identical with Mobaco model no. 61!  Source: Koos Welling PULKO - ADDO (SET 1) - GERMAN VERSION There are German, French and English versions of this set, although the latter two may just have been prototypes. They all have the same layout, with prominently in the middle a sweating/crying frog sitting on a mortar shell in front of what appears to be a rising sun. The copper ring at the back of the shell shows rifling, which means the shell has been fired. For many years we were baffled about the illustration on the lid (and on the manual), until we learned that Erich Pulkowski was a field artillery officer who developed a scientific method for more accurate firing of shells. He even wrote a book about it. As the diagram below shows, the sun rays may refer to the angle of firing, and the curls to the effects of wind. However, the crying frog with the heart-shaped mouth remains a mystery! Maybe it's a reference to "Glücksfrosch", a lucky frog? Or perhaps a reference to the French who were called "frogs" by the English? The label is printed by Schött AG in Rheydt, which is just outside Mönchengladbach. The manuals are printed by B. Kühlen Kunst- und Verlagsanstalt in Mönchengladbach. This German set has a Dutch manual in it. |
||||||||||||||||||||||||||||||||||||||||||||||||||||||||||||||||||||||||||||||||||||||||||||||||||||||||||||||||||||||||||||||||||||||||||||||||||||||||||||||||||||||||||||||||||||||||||||||||||||||||||||||||||||||||||||||||||||||||||||||||||||||||||||||
Scan of lid and sides: 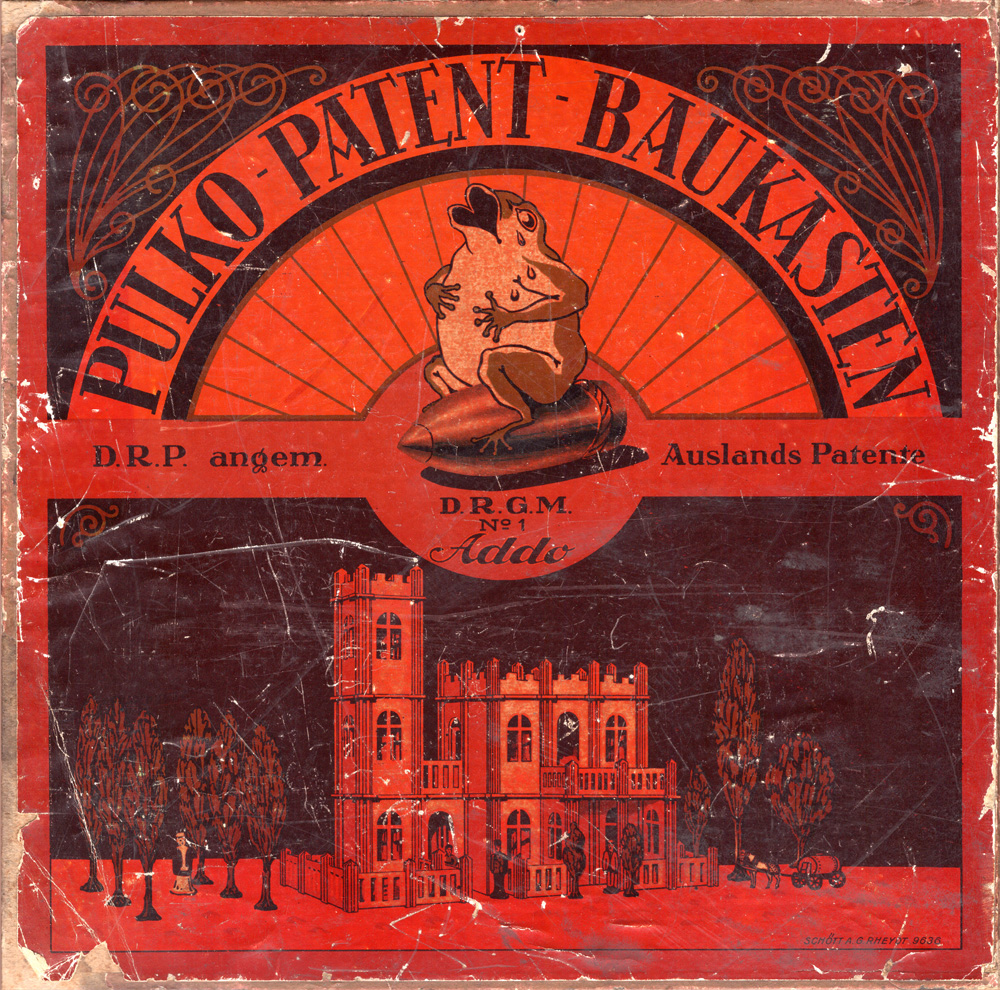 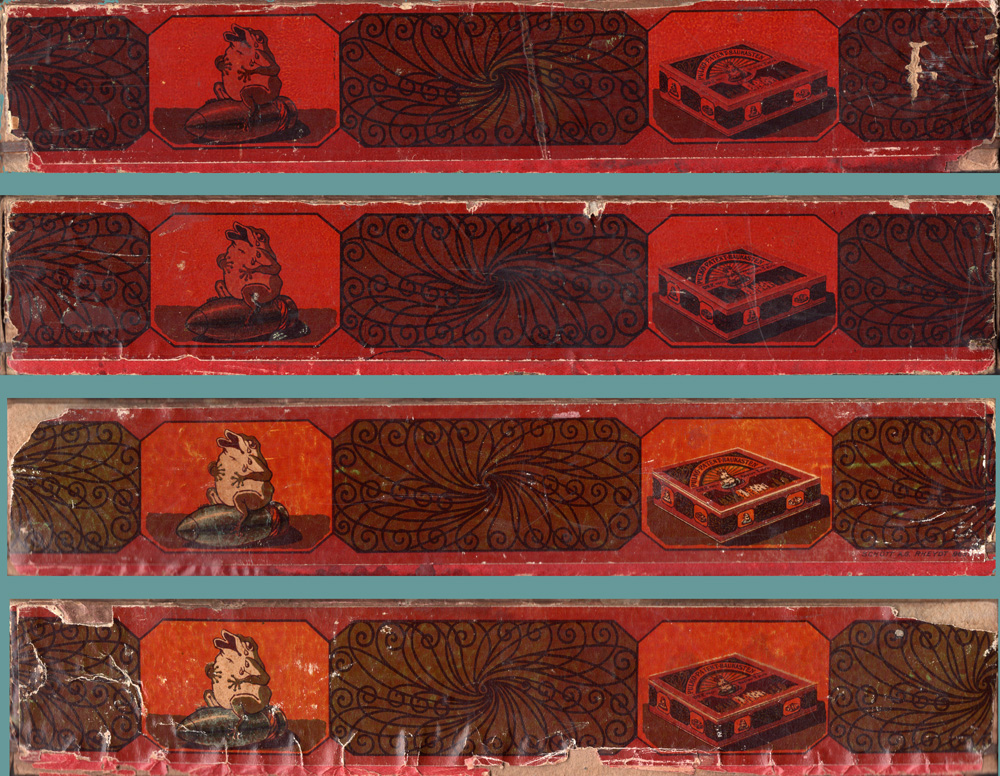 
 Sets courtesy of Barend Westerveld   Images courtesy of Barend Westerveld PULKO - ADDO (SET 1) - FRENCH VERSION The text down the middle of the box translates as "Registered in all the countries of the universe - Models of Set No. 1 - Addo." 
  PULKO - ADDO (SET 1) - ENGLISH VERSION Only a label has been found of the English version. Other than the text, it's identical to the French version.  PULKO - ADBAL (MAKE-UP SET 1a) - GERMAN VERSION This set is essentially a German ADDO box with an ADBAL sticker. On the side is an image of the box, which on its side has an image of the box, which on its side, etc... In Dutch this is called the Droste Effect, referring to a similar recurring effect on tins of cocoa powder made by the Droste chocolate company.   
 Images courtesy of Alex Geelhoed and Henri de Graaf PULKO - BALDO (SET 2) - FRENCH VERSION The box number is handwritten. Below the words JEU DE CONSTRUCTION PULKO is written Breveté, which means Patented:   Contents of this Baldo set:  Photo's courtesy of H.R. PULKO - BALDO (SET 2) - GERMAN VERSION Here a sticker identifying the set is glued over the original identifier. The sticker has the exact same shape as on Set 1a above.  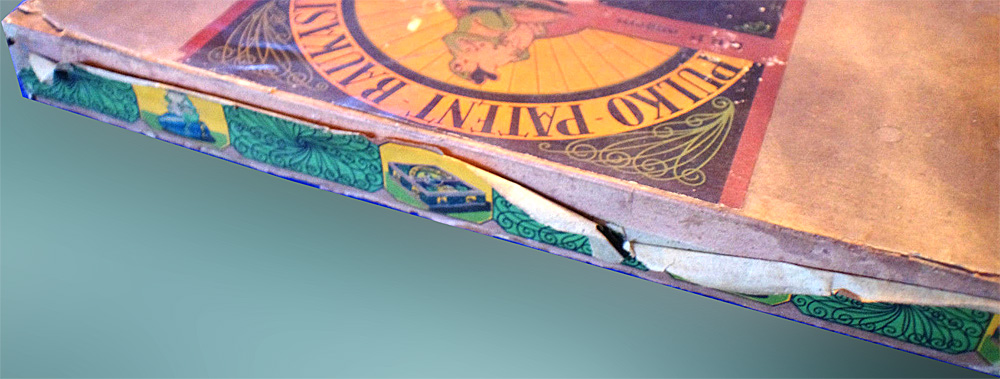 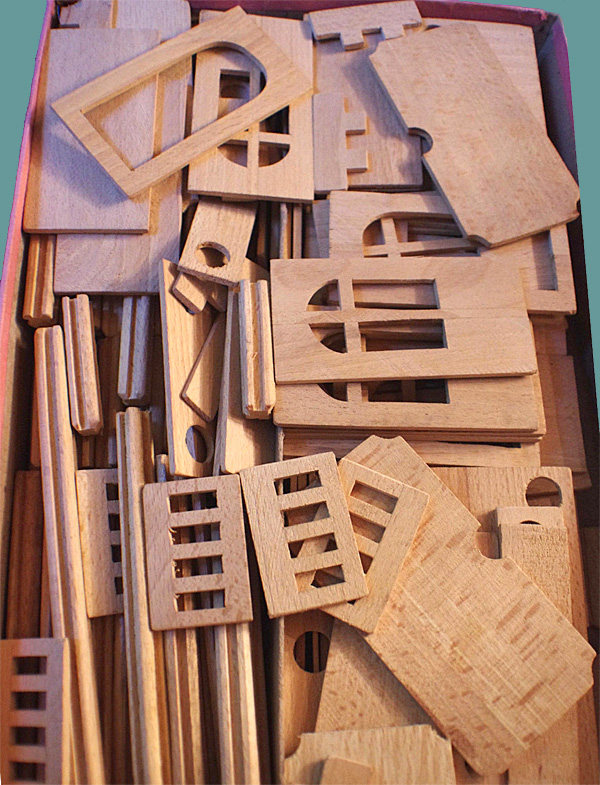
 Set and images found on eBay PULKO MANUAL FOR SET 1 (ADDO) - DUTCH VERSION Pulko instructions are very different from Mobaco manuals. The base plates are not shown. You have to refer to a legend to see which panel goes where. Since Mobaco has a lot more variation in parts, this approach wouldn't have worked for Mobaco. Mobaco's use of numbers stamped on the parts and shown in the construction diagrams makes building in Mobaco relatively easy despite its higher complexity. I think that the building on the cover represents a railway station with an arched passageway over the tracks. Only people with tickets are allowed on the platforms, others are kept out by the fences. It probably requires the Caro Set, as there are no arched parts in the Addo and Baldo sets.  199 x 251 mm
16 pages (including covers) Black & white 8 designs See pages DOWNLOAD PDF  Scans courtesy of Barend Westerveld PULKO MANUAL FOR SET 2 (BALDO) - GERMAN VERSION This booklet has different wording on the cover than the Dutch Addo manual above: the name is Pulko Patent versus just Pulko in the Dutch version, and the patent language in the middle is different. This book features 24 models instead of 8 in the Addo manual. This manual is also printed by B. Kühlen Kunst- und Verlagsanstalt in Mönchengladbach. Mönchengladbach is located ± 60 km north from Lechenich where the toy was manufactured. That is rather far for simple printing work, normally that would be done by a printer near the toy manufacturer. Perhaps there was a special relationship between Kühlen and Pulkowski? 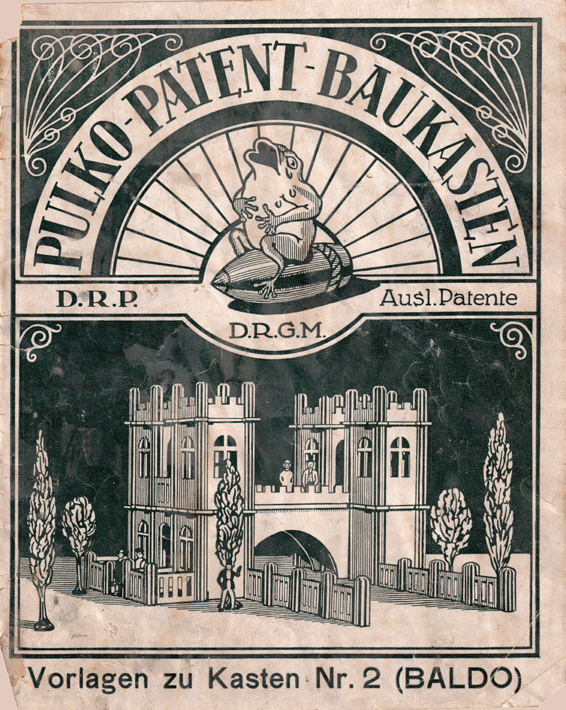 200 x 251 mm 32 pages (including covers) Black & white 24 designs See pages DOWNLOAD PDF (200dpi, 17.7 MB)  Original courtesy of A.G. PULKO PARTS So far we did not find a list with parts contents for each set. Barend Westerveld compiled this table based on the contents of found sets and parts needed to build the models in the manuals. Part numbering is made up. Parts are shown at half size. Parts vary quite a bit in size (hand made). Panels are 3-3.5 mm thick, and columns/posts are rounded squares, 11-12 mm diameter.
PULKO - MISCELLANEOUS FINDS Photo of Pulko bridge with painted background. This is the same bridge as shown at the Leipziger messe above: 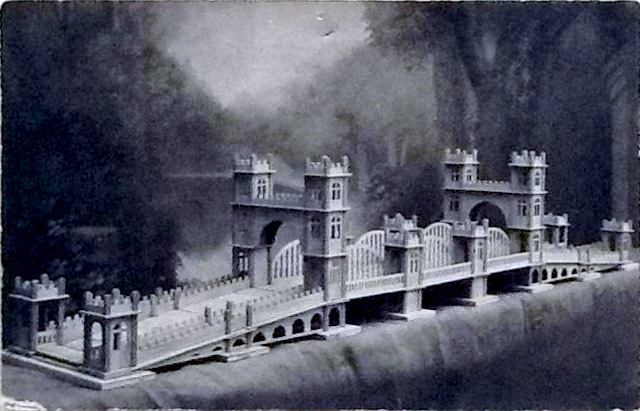 Photo courtesy of Henri de Graaf Invitation to a display by Baumann & Othmer Export & Import at their offices in the Apollo Theater during the Leipziger fair, from 18 august through 3 September 1921, featuring many toys including "Pulko-Patent-Baukastenwerk, Lechenich":   Images courtesy of Frank Bartsch, Historisches Archiv der Stadt Erftstadt While researching Aki, the toy that Bollig also displayed at the Jaarbeurs trade fair, we found that Carl Othmer was Aki's territorial representative for a certain part of Germany. So Othmer knew both Bollig and Kirchner (from Aki). It's likely he brought them together and perhaps even convinced them to have a display at the Jaarbeurs. Below, Erich Pulkowski's biography, with pictures of the man, and his involvement with Pulko:   Images courtesy of google.com The text on the right translates as: "After the First World War he retired from military service as a major in 1919. He became an employee at a bank and looked after young start-ups. He then brought out his “Pulko patent construction kit” at the Carl Josef Bollig & Co toy factory in Lechenich near Cologne. Entire residential landscapes could be created from a kit of fluted round rods and prefabricated wall parts, windows, doors, archways, etc. made of plywood." The title of this book "Am 10. Dezember in Kiernozia: Kopfschuss" translates as "On December 10th in Kiernozia: shot in the head", referring to his being wounded in 1914 in World War 1. This is Amazon's summary of his book: Erich Pulkowski, captain and battery commander of the artillery of the XVII Army Corps (8th Army) under General von Mackensen in the Eastern campaign of the First World War, left three notebooks in which he noted his experiences during his deployment. The entries cover the period from the declaration of war on Russia on August 1, 1914, to his wounding by a shot in the head on December 10 of the same year. Embedded in the diary entries are letters to his wife Auguste in Cologne, his mother Anna in Dessau and reports requested by comrades. They provide a direct insight into everyday life in war and the use of heavy artillery in combat, its devastating effect on the enemy lines and the fate of the population of East Prussia affected by the fighting. Finally, here Pulkowski's book about calibrating field artillery, parts 1 and 2, published in 1913, and reprinted several times. The title "Handbuch für Unteroffiziere und Obergefreite der Fussartillerie" translates as "Handbook for non-commissioned officers and corporals of the foot artillery." Apparently his calibration method became standard operating procedure with all armies worldwide after WW1:  Images courtesy of Lot-tissimo Auctionen BUILDING PULKO WITH LeoCAD Koos Welling developed a Pulko library for LeoCAD, a free 3D program that runs on Windows, MacOS and Linux. Below an example featuring all 8 ADDO models. Koos also recreated the parts shown in the original patent, with the ringed connection strips, and made them with a laser cutter. For more information see Koos' website.  Image courtesy of Koos Welling SKY-HI / SKI-HI |
||||||||||||||||||||||||||||||||||||||||||||||||||||||||||||||||||||||||||||||||||||||||||||||||||||||||||||||||||||||||||||||||||||||||||||||||||||||||||||||||||||||||||||||||||||||||||||||||||||||||||||||||||||||||||||||||||||||||||||||||||||||||||||||
McLoughlin Brother's Sky-Hi was invented by Walter Stranders of New York, who filed for a patent on 18 July 1884. In the patent application he states that it is his original invention. The patent was granted on 3 February 1885. On the date of the patent, Walter Stranders assigned it to Peter G. Thomson, Cincinnati, Ohio, a well known publisher of children's books and toys. Around 1889 P.G. Thomson was purchased by McLoughlin brothers, who presumably acquired the rights to Sky-Hi. Since this set is by McLoughlin, it must be from 1889 or later. Perhaps Sky-Hi inspired Pulko or L'Édifice? A key difference with Pulko is that Sky-Hi buildings are closed, while Pulko (and Mobaco) have openings, increasing the play value. Sky-Hi was featured in an exhibition by the Canadian Center for Architecture in Montreal 1991-92 called Potential Architecture: Construction Toys from the CCA Collection, together with many other historic construction toys. The Canadian Center for Architecture also did a nice write-up about Ski-Hi and several other construction toys. The wooden box measures 31 x 29 x 7 cm.  Image courtesy of the Canadian Center for Architecture (CCA) in Montreal, Canada There is a variation on this set called Ski-Hi (instead of Sky-Hi) with a more obvious Japanese motif. It probably pre-dates the above version as it closely resembles the patent application below. Perhaps this set was published by P.G. Thomson in Cincinnati, which would date it between 1885 (the year of the Patent) and 1889 (the year McLoughlin bought P.G. Thomson):  Image courtesy of the Canadian Center for Architecture (CCA) in Montreal, Canada Image from the Patent application. The Japanese inspiration is rather obvious, including Japanese characters on the deck panels. However, according to a Japanese acquaintance, the characters are gibberish 😊: 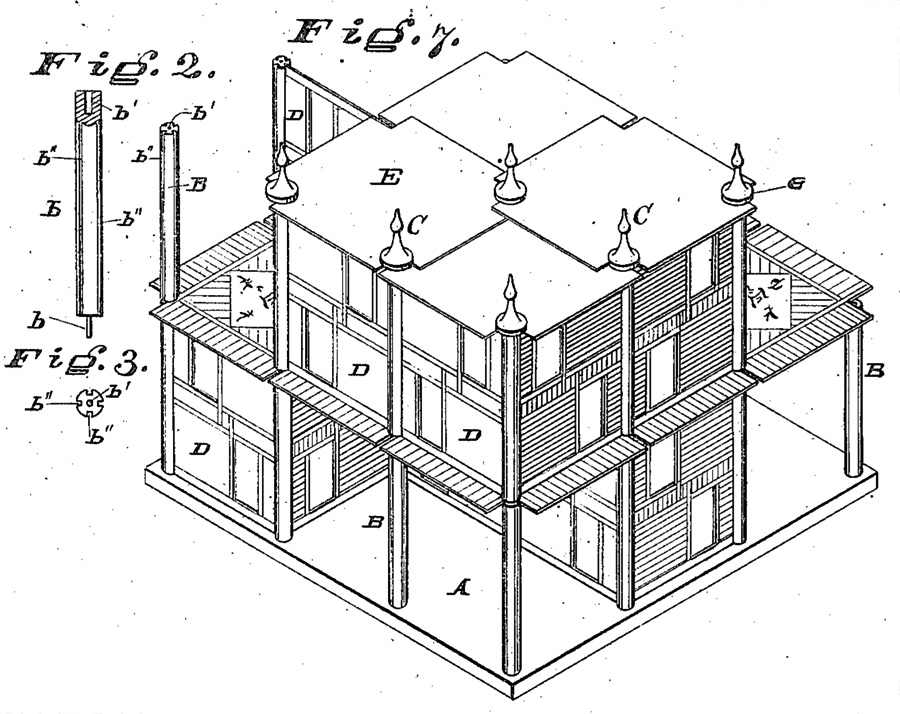 Image courtesy of the US Patent Office These sets are very rare. SET BY ADOLPH ENGEL, BERLIN There is a German-made set made by Adolph Engel, Berlin (AEB), that resembles the above system very much. Adolph Engel was a printer, publisher and toy company founded in Berlin on October 1st, 1848. On the flap of the box lid is printed Made in Germany. A British law from August 1887 required such a mention on all goods imported into Britain, so this set was likely produced after August 1887. That may mean that it was a license from P.G. Thomson (if made before 1889, see history of Sky-Hi above) or from McLoughlin Brothers (if made starting in 1889, when McLoughlin purchased P.G. Thomson). A key difference with Ski-Hi and Sky-Hi is that the Adolph Engel set has wall and floor panels that are two and three modules wide. Also, the width-height ratio of the walls is different from Ski-Hi and Sky-Hi. If you have further information about the Adolph Engel construction sets, please contact me (see Home page for contact info). Model made with Adolph Engel Berlin construction set: 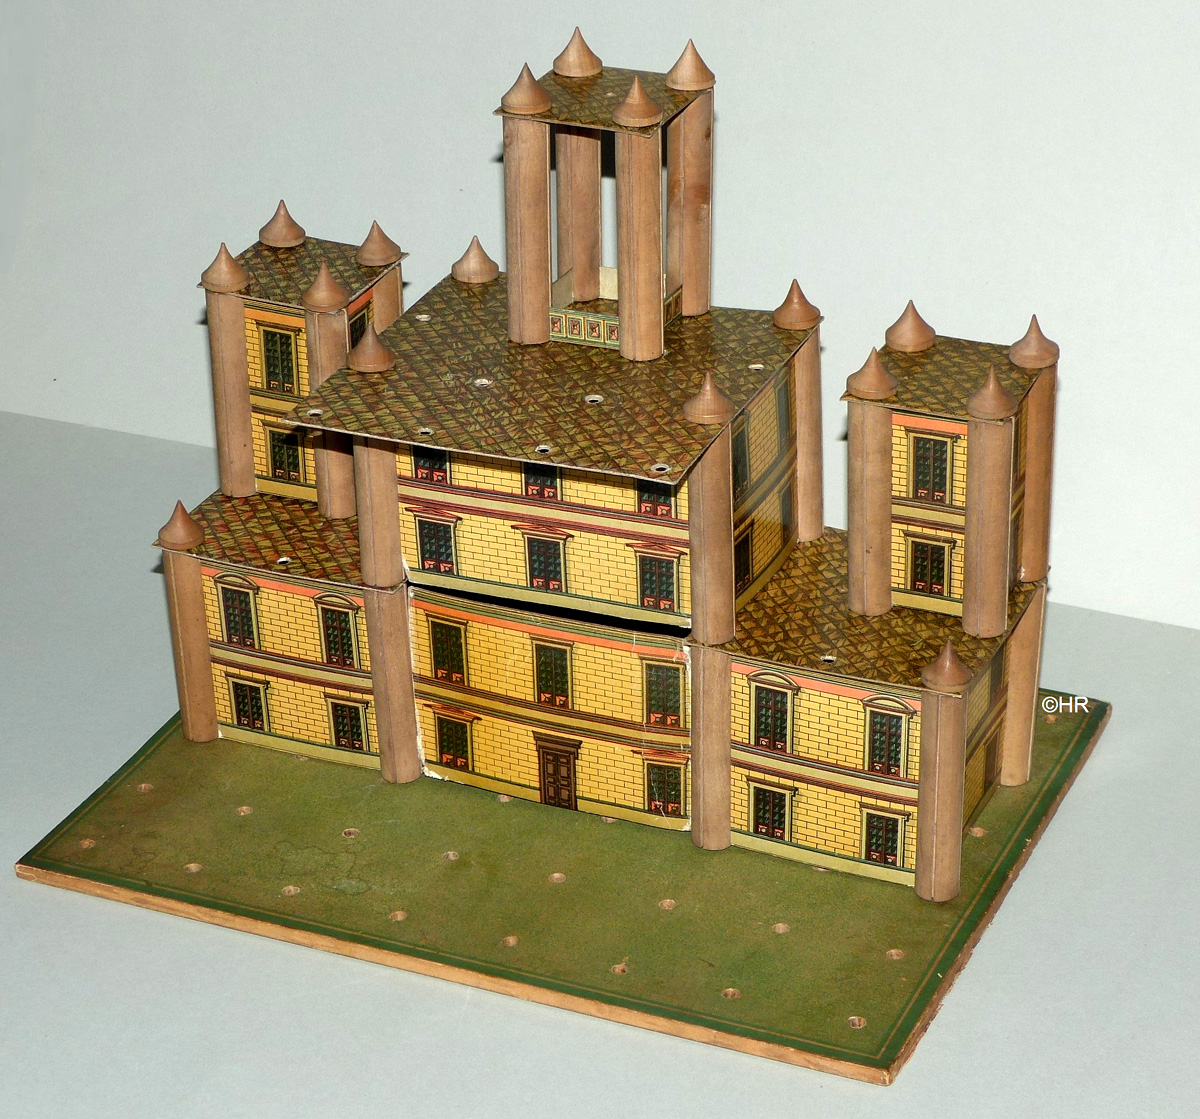 Box lid: 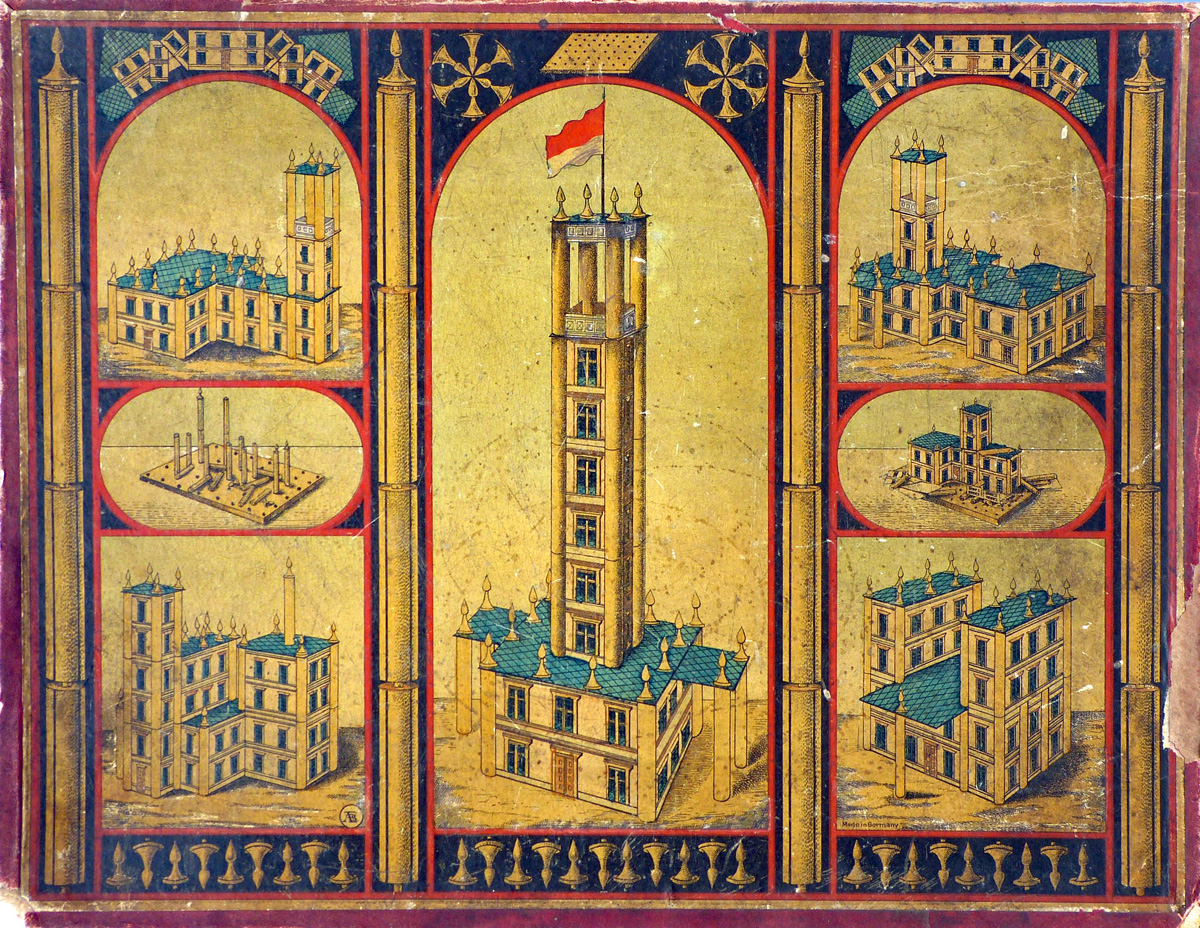 The AEB monogram is visible in the corner of the bottom-left image. It looks like this: Contents of the box after removing the ground plate (see photo of model above for the ground plate):  Pages from the manual:  All photo's courtesy of H.R. |
||||||||||||||||||||||||||||||||||||||||||||||||||||||||||||||||||||||||||||||||||||||||||||||||||||||||||||||||||||||||||||||||||||||||||||||||||||||||||||||||||||||||||||||||||||||||||||||||||||||||||||||||||||||||||||||||||||||||||||||||||||||||||||||
EDILIZIA by Fabbrica Giocattoli MB (= Mario Biffignandi) - 1929 |
||||||||||||||||||||||||||||||||||||||||||||||||||||||||||||||||||||||||||||||||||||||||||||||||||||||||||||||||||||||||||||||||||||||||||||||||||||||||||||||||||||||||||||||||||||||||||||||||||||||||||||||||||||||||||||||||||||||||||||||||||||||||||||||
 Edilizia is a colorful all-wooden Italian
construction system similar to Mobaco, except that the
foundation system is based on a grid of
interlocking strips rather than a base plate
with holes: Edilizia is a colorful all-wooden Italian
construction system similar to Mobaco, except that the
foundation system is based on a grid of
interlocking strips rather than a base plate
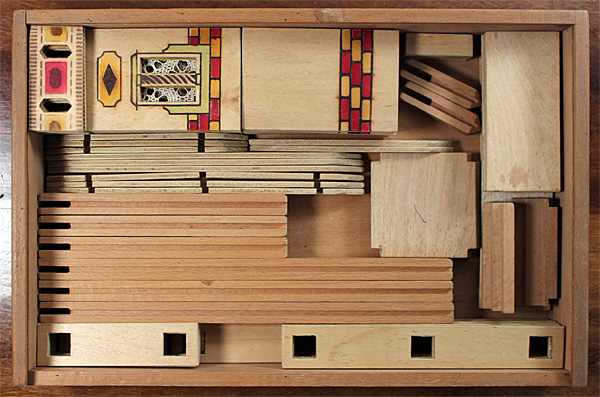
with holes: Columns have a cross-shaped slot at the bottom to fit over intersections in the grid This is very similar to L'Édifice:  Ground floor panels are supported by small plates that fit into slots in foundation strips A1, A3 and A5. Since the ground floor is up 21 mm, there are stairs to provide access. They fit exactly between foundation strips and have cut-outs for the columns: 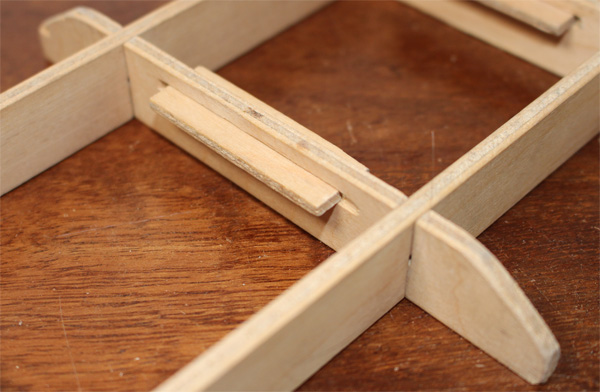 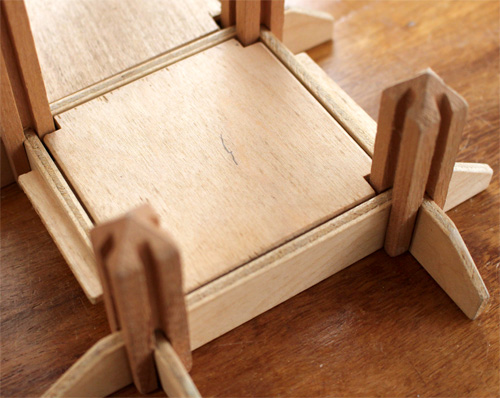  Upper s Roofs are always flat. Walls come in four flavors, closed, with a window, with a door or 1/3rd high as a guardrail. A colorful pattern is printed on each, on one side only. All in all, the system only has 23 different parts compared with appr. 200 for Mobaco After a long search I discovered what the MB in Fabbrica Giocattoli MB stands for. What helped narrow down the search was that the red manual (see below) was printed by a printer in Rome. In a 1932 industry directory I found Mario Biffignandi, Architettura in legno (architecture in wood), via Castelfidardo 50, Roma. That this is indeed the right person was confirmed by a listing for the 1929 Barcelona International Fair (see more below), mentioning that Mario Biffignandi won a Bronze Medal for a toy: Found in "La partecipazione italiana all'Esposizione internazionale di Barcelona, 1929" EDILIZIA SETS So far I have found two Edilizia boxes, both a Set no. 1. From the manual it's clear that there were three progressively larger sets, Nos. 1, 2 and 3 with respectively 91, 146 and 196 parts. Both boxes are wood with dovetail corners, with a plywood bottom and a slide-out plywood lid with an brown halftone photograph glued to it of an administrative-looking building made with Edilizia. The two boxes contain slightly different wall parts. For instance, the older version of the door part has a wider opening and an oval top, while the newer door opening is narrower and has a circular top. In the older set, windows have one or three openings, while in the newer set they have two openings. The models featured in the manual as well as the image on the box lid have windows with three openings. 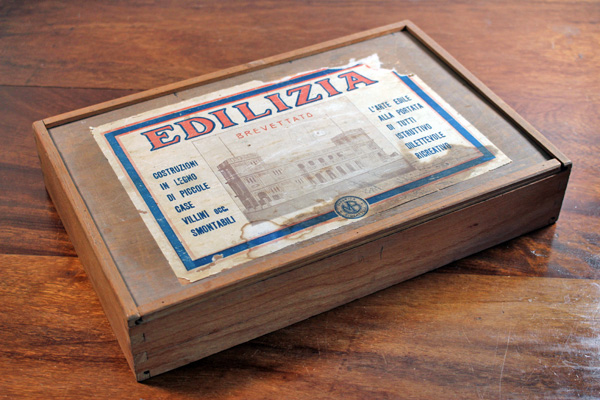
 
 If you have a set, I'd love to get pictures. Please contact me. BOX ART The text next tot the imaged reads: COSTRUZIONI IN LEGNO DI PICCOLE CASE VILLINI ecc. SMONTABILI L'ARTE EDILE ALLA PORTATA DI TUTTI ISTRUTTIVO DILETTEVOLE RICREATIVO which translates as: Wooden construction of small houses, villa's, etc. Can be disassembled The art of building accessible to all Instructive Pleasant Recreational The building shown on the lid has a passing resemblance with the noeclassical Montecitorio Parliament building in Rome, rear side, upper part, designed by architect Ernesto Basile and completed in 1927. It has similar tri-partite windows, tri-partite balustrades, towers at each end, 9 bays in between, and arched openings in the towers. In the model, the balcony has been widened to five bays and the towers to two bays. A second possibility is that the model was inspired by the building which housed the printer of the manual, Stabilimento Luigi Salomone, which was located at Via Ostiense n. 75, corner of Via Pellegrino Matteucci in Rome's Ostiense neighborhood. It is conceivable that they were an investor in this venture and that Mario Biffignandi honored them by featuring their building on the box. The building was demolished during a bombardment in 1944. Unlike the model, the building isn't quite symmetrical, but the five tall windows of the printing hall, the corner tower with the arched entry and the flag pole are shown in the model. If you know of another building the model resembles, please let me know! 
.jpg)
.jpg) Stabilimento Luigi Salomone, Rome Montecitorio Parliament building, Rome Image from Rerum Romanorum Image from Wikipedia EDILIZIA PARTS Parts are shown at half size.
Module size is 80 mm, compared to 57.5 mm for Mobaco, and panel height is 106 mm, compared to 102 mm for Mobaco. Posts are 14.5 mm square (Mobaco has ±12.5 mm) with 4.2 mm-wide grooves to accommodate the 3.5 mm-thick wall panels. The grooves at the bottom of the posts are slightly wider, 4.5 mm, to fit over the foundation strips which are 4.2 mm thick. It turns out that in practice the wall panels are a few mm too narrow, they tend to fall out of the grooves. In the diagram below, a secondary line shows what size the panels should be to avoid this. Also the height should be slightly adjusted so 3 guardrails parts are the same height as a wall. Finally, the stairs are only 19.5 mm high while the ground floor is 21 mm high. This could be fixed by making the stair risers 7 mm instead of 6.5 mm. Wall panels are relatively wider than Mobaco, which gives Ediliza buildings more of a regal feeling, more stature. The visible part of Edilizia wall panels is 65.5 wide x 106.5 mm high, with a ratio of 1:1.63, while for Mobaco it is 45 x 102 mm with a ratio of 2.27, making Mobaco 1.4x narrower.  EDILIZIA MANUALS I know of two versions of the manual for Set no. 1. Only the cover is different, contents are the same. Version 1, the older version, has an art nouveau border and "Brevettato" (Patented) stamped on the cover. Inside are two red stamps, "Medaglia d'Argento, 1a Mostra del Gioccattolo Italiano - Milano" and "Medaglia d'Argentino, Esposizione Internazionale di Barcellona, 1929" meaning Silver Medal at the First Toy Fair in Milan, Italy and Silver Medal at the 1929 Barcelona International Fair (Spain). Version 2 has an art deco border, a more modern typeface and layout, and printed on the cover is "Giocattolo Brevettato" and "Premiato alla 1a Mostra del Giocattolo Italiano - Milano" meaning Patented Toy and Awarded at the First Italian Toy Exhibition in Milan. 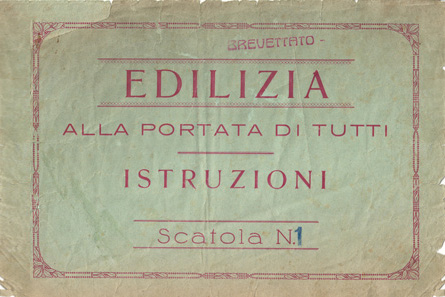 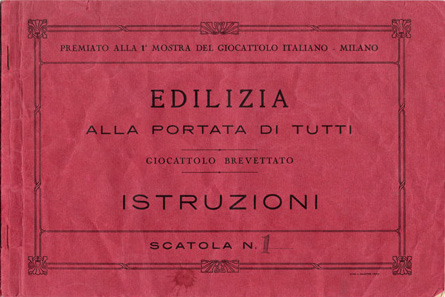 On both manuals, the set number is hand-stamped with a rubber stamp, suggesting that the same cover was used for all sets. Inside both manuals is the same text. It appears the text was written for presentation at the fairs (because of "which our factory presents") and was also used in the manuals:
MANUAL FOR SET 1 - VERSION 1: 313 x 251 mm 18 pages (including covers) Black & white 7 designs See pages DOWNLOAD PDF  Scans courtesy Barend Westerveld MANUAL FOR SET 1 - VERSION 2: 313 x 251 mm 18 pages (including covers) Black & white 7 designs See pages DOWNLOAD PDF  Scans courtesy CM DATING EDILIZIA
In order to arrange a stand at the Barcelona fair, the prototype must have been ready early in 1929. After the positive reception at the fair, it must have taken them a few months to create the tooling to punch out the door and window openings as well as the holes in the connecting strips, so the first sets to market were, at the earliest, just in time for the 1929 Christmas season. I speculate that production of the manuals was already underway when they received their medals, so they added a mention to the early manuals with hand stamps. It is unclear how long Edilizia was in production. Italy saw a deep economic crisis in 1931, and I wouldn't be surprised if Fabbrica Giocattoli MB did not survive much beyond that. At least they are still listed in a 1932 industry directory. If you have more info about this company, please contact me! |
||||||||||||||||||||||||||||||||||||||||||||||||||||||||||||||||||||||||||||||||||||||||||||||||||||||||||||||||||||||||||||||||||||||||||||||||||||||||||||||||||||||||||||||||||||||||||||||||||||||||||||||||||||||||||||||||||||||||||||||||||||||||||||||
BUILDING AN EDILIZIA HOUSE Below the construction of building no. 7 from the Set 1 manual. The instructions only show the foundation layout, one elevation and a list of parts, and you figure out the rest yourself. 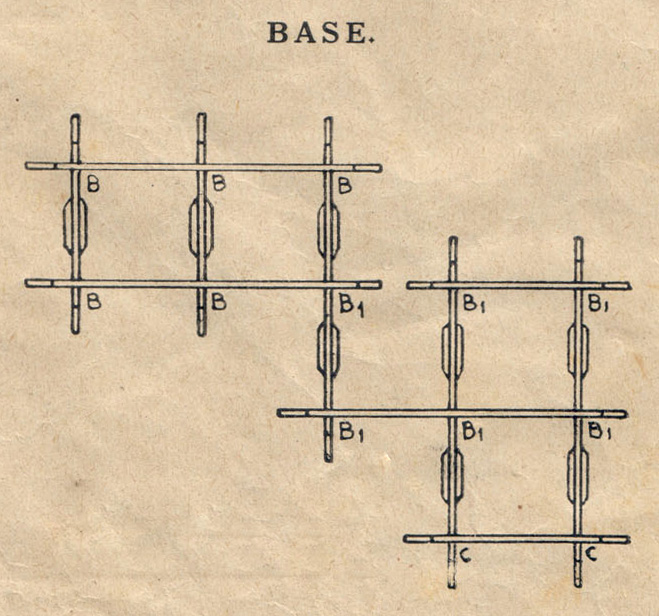
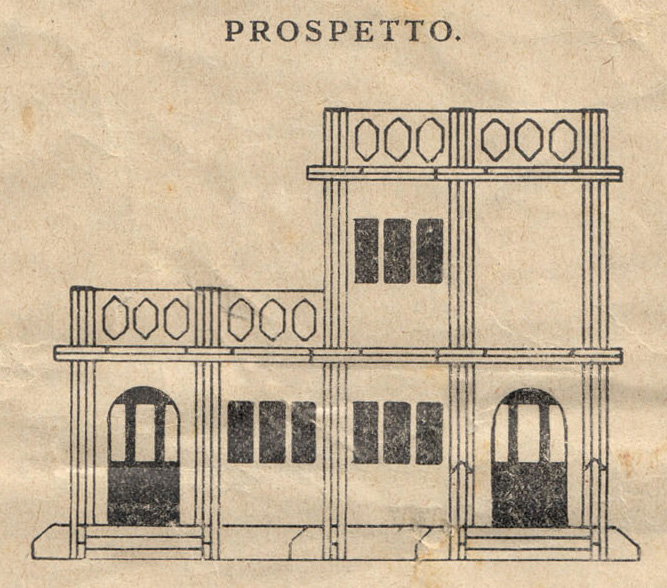
 Scans courtesy of Barend Westerveld Note that in this set, some doors and windows have little curtains glued to the inside, probably added by the owner of the set.   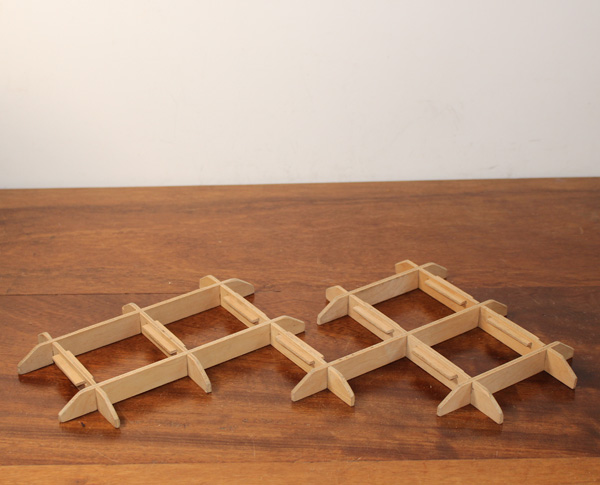 Place foundation strips with upper slots Add foundation strips with lower slots Insert floor support plates in horizontal slots 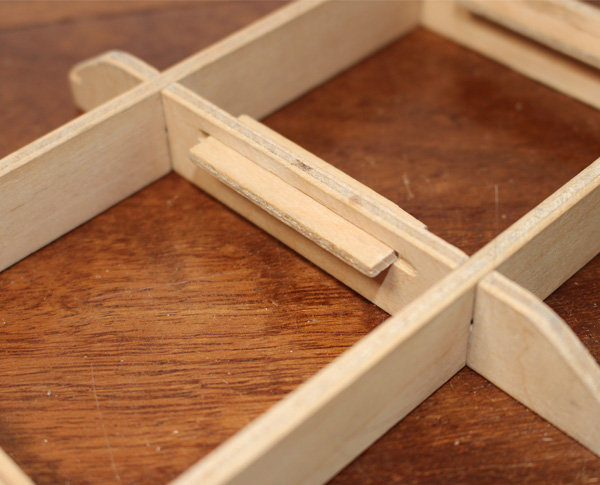 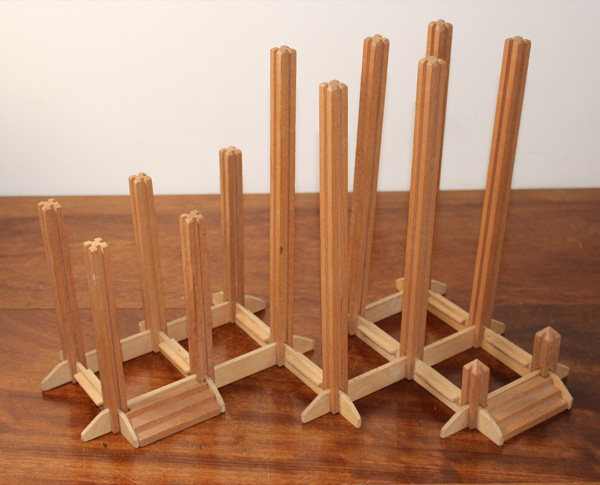  Detail of floor support plates Place columns over intersections, and set stairs Place first floor floor panels (only 4 provided)   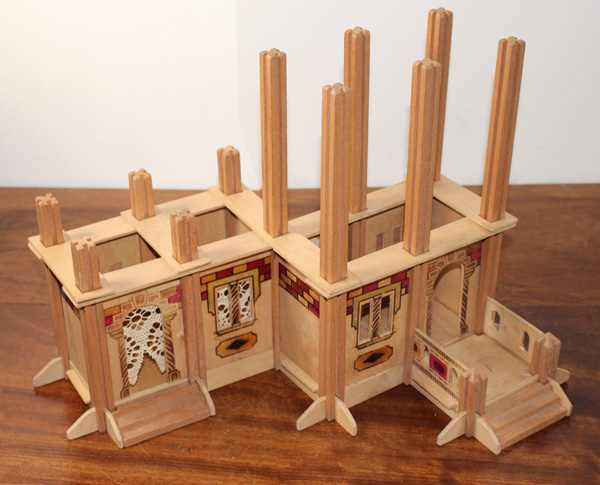 Slide wall panels down the slots in the posts Place first layer of connecting strips Place second layer of connecting strips   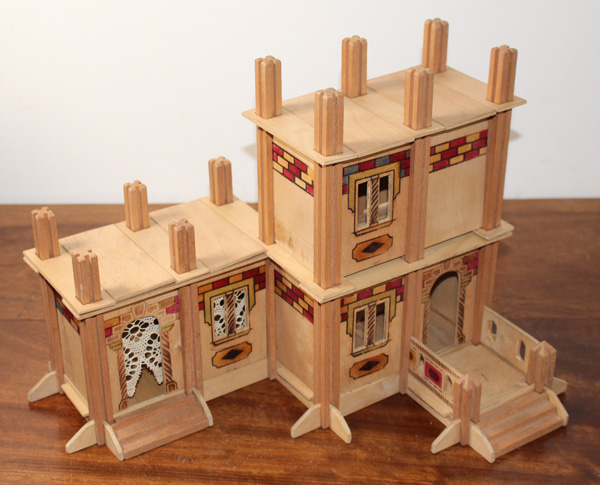 Slide down upper wall panels First layer of second floor, with connecting strips Fill floor gaps with floor strips   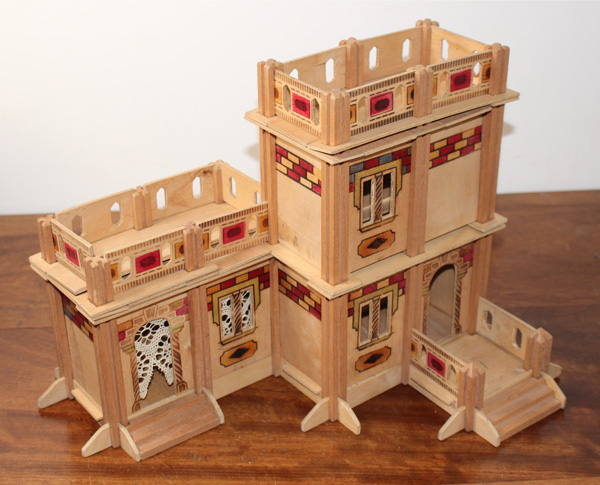 Detail of floor strips between connecting strips Second layer of connecting strips & floor strips Place guardrails, and admire your work! VIRTUAL BUILDING WITH EDILIZIA You can virtually build your own Edilizia buildings using Koos Welling's LeoCAD library of parts. Here all models from Set no. 1:  Modeling and image courtesy of Koos Welling Here the building featured on the box lid:  Modeling and image courtesy of Koos Welling |
||||||||||||||||||||||||||||||||||||||||||||||||||||||||||||||||||||||||||||||||||||||||||||||||||||||||||||||||||||||||||||||||||||||||||||||||||||||||||||||||||||||||||||||||||||||||||||||||||||||||||||||||||||||||||||||||||||||||||||||||||||||||||||||
EL CONSTRUCTOR INFANTIL (PRIVILEGIADO) |
||||||||||||||||||||||||||||||||||||||||||||||||||||||||||||||||||||||||||||||||||||||||||||||||||||||||||||||||||||||||||||||||||||||||||||||||||||||||||||||||||||||||||||||||||||||||||||||||||||||||||||||||||||||||||||||||||||||||||||||||||||||||||||||
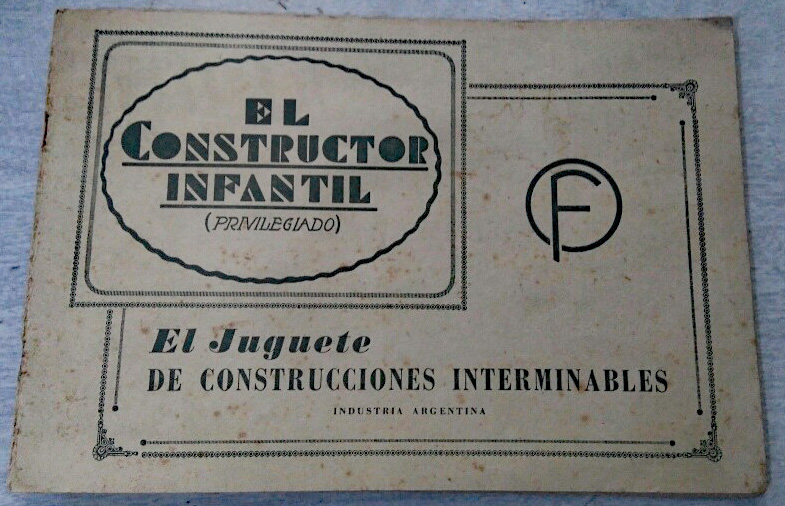
Haga clic aquí para la traducción al español. Click here for Spanish translation  El
Constructor Infantil (Privilegiado) was probably El
Constructor Infantil (Privilegiado) was probablyproduced under license from van Mouwerik en Bal by Occhipinti & Ferreri (OF) in Buenos Aires, Argentina. It was a direct copy of Mobaco, even the part numbers are the same. But the manuals were different. In her book Diccionario de Juguetes Argentinos (Dictionary of Argentine Toys, p. 171), Daniele Pelegrinelli writes that José Occhipinti toured Europe in 1934 in search of products that could be made in Argentina. He visited Prague, Nuremberg, and Brussels, and "spent weeks and weeks observing how products were prepared, assembled, corrected, controlled, even how they were packaged. From that trip comes El Constructor Infantil, inspired by a Dutch toy." José Occhipinti, a business man, joined with Salvador Ferreri, a 3rd generation cabinet maker, to start Occhipinti & Ferreri in 1932. "OF" made a wide variety of quality wood toys including trucks, miniature kitchen utensils, trolleys, party games, yachts with automatic steering, pianitos, furniture for dolls, bowling games, forklifts and many more, including El Constructor Infantil, and later El Constructor Infantil (Privilegiado). They closed in 1965. OF probably brought the first sets to market around 1937. Image from Museo del Juguete, San Isidro, Argentina Initially, it was just called El Constructor Infantil. I understand that the moniker (Privilegiado) was added after World War 2. A key difference with Mobaco is that El Constructor Infantil's cardboard was thinner, 1.5 mm instead of 2.5 mm, and thus the grooves in their columns. Initially the panels had similar colors to Mobaco, but later the panels were more colorful. The core was tan, with a colored paper on both sides. Click here for more detail on parts. Base plates were made of plywood instead of fiberboard, with stamped out holes. In the above photograph a cardboard plate is glued underneath the plywood to prevent columns from falling through. This is something Mobaco did for a short time, but quickly discontinued as it caused their base plates to bend. Other than this image, I have not seen any El Constructor Infantil base plates with cardboard glued to the bottom, so it may have been short lived as well. It appears that initially there were 4 sets, but ultimately, there were 6 sets, named Caja no. 1 through 6. The sets came in different-sized boxes covered in red paper with gold printing, which is quite hard to read (and photograph). Interestingly, each set had a different size base plate. In addition to the 6 sets, you could purchase 5 make-up sets ("Caja para ampliar") that contained the parts to expand to the next Set up. I have not come across any such make-up sets. You could also purchase spare parts. Initially, there were different manuals for different sets, with a loose-leaf drawing of all the parts, but later all sets had the same manual, with models for all six sets (see further below), and a drawing of the parts on the last page. Also, a parts list was shown in the manual. Except for Sets 2 and 5, all images below are from internet auctions sites, mostly from Mercado Libre. For every set, the first image of the box lid is shown at the same scale (50% at 72dpi), for comparison. Boxes were larger than comparable Mobaco boxes, which made storage of parts easier. With Mobaco you must really do your best to fit everything into the box, but with El Constructor Infantil you could just throw the parts into the box and it would fit. Interestingly, an Argentinian psychologist named Arminda Aberastury developed a therapy for children using El Constructor Infantil. She published a book about it called "El Juego de Construir Casas - Su interpretación y valor diagnóstico" which translates as The House Building Game - Its interpretation and diagnostic value. Below the chronology of sets that I could distill from what I've seen so far. It's definitely preliminary, with a lot of questions about the early period. Type "g" appears to be an anomaly and is perhaps from a transition period. If you have information to add, or corrections, please let me know!  |
||||||||||||||||||||||||||||||||||||||||||||||||||||||||||||||||||||||||||||||||||||||||||||||||||||||||||||||||||||||||||||||||||||||||||||||||||||||||||||||||||||||||||||||||||||||||||||||||||||||||||||||||||||||||||||||||||||||||||||||||||||||||||||||
| EL
CONSTRUCTOR INFANTIL (PRIVILEGIADO) - SET NO. 1 This set has a 3 x 3-hole base plate and 49 parts. The base plate is 175 x 175 mm. You can build 5 models with it. It is similar to Mobaco Set 00, which also has a 3 x 3 base plate and 49 parts.   Source: Mercado Libre, Argentina |
||||||||||||||||||||||||||||||||||||||||||||||||||||||||||||||||||||||||||||||||||||||||||||||||||||||||||||||||||||||||||||||||||||||||||||||||||||||||||||||||||||||||||||||||||||||||||||||||||||||||||||||||||||||||||||||||||||||||||||||||||||||||||||||
| EL CONSTRUCTOR
INFANTIL (PRIVILEGIADO) - SET
NO. 2 This set has a 4 x 4-hole base plate and 120 parts. The base plate is 225 x 225 mm. It is somewhat similar to Mobaco Set 0, which also has a 4 x 4 base plate and 111 parts. The lid states that you can build 15 chalets, which includes the models of Set 1. The box lid measures 235 x 232 mm. 
     Scans & photo's: CM OLDER VERSIONS: The lid only mentions 8 models (instead of 15) and a price of $6.90 (pesos?). There is no image pasted on the lid. Unreadable to the left of the price is the mention of Set No. 2. I also found a similar Set No. 3 (see below).  Source: Mercado Libre, Argentina Here a similar older box without illustration, also with 8 models, but no price is mentioned. The paper is now red. This is probably a later set than the version with price above:  Source: Mercado Libre, Argentina |
||||||||||||||||||||||||||||||||||||||||||||||||||||||||||||||||||||||||||||||||||||||||||||||||||||||||||||||||||||||||||||||||||||||||||||||||||||||||||||||||||||||||||||||||||||||||||||||||||||||||||||||||||||||||||||||||||||||||||||||||||||||||||||||
| EL CONSTRUCTOR
INFANTIL (PRIVILEGIADO) - SET NO. 3 This set has a 5 x 4 hole base plate and 206 parts. The base plate is 280 x 225 mm. It is somewhat similar to Mobaco Set 1, which only has a 4 x 4 base plate and 174 parts (starting in 1936). The lid states that you can build 25 chalets, which includes the models of Sets 1 and 2.   Source: Mercado Libre, Argentina EARLIER VERSION OF SET NO. 3 WITH DIFFERENT MANUAL AND SEPARATE REFERENCE SHEET: In earlier sets, there was a separate reference sheet with drawings of all the parts. This way, you didn't have to flip back and forth between the reference sheet printed on the inside of the back cover of the manual and the model you were building. The cover of this reference sheet indicates that there were 4 sets available. The lid mentions a sales price of $9.90 (pesos?), and the ability to build 24 models. Later Sets no. 3 could build 25 models. The included manual was only for Sets No. 3 and No. 4, but it appears to have included models for Sets 1 and 2. This set only has a 4 x 4 base plate. Perhaps the 5 x 4 base plate was introduced later when they created the 6-set series? The illustration on the lid is set in a "frame" that connects to the oval frame around the name. In later sets the two are disconnected (as shown above).   Manual for Sets 3 and 4. The first page shows models for smaller sets: 
 Below the reference sheet with all the parts. It states on the cover: "Drawing of the different parts that make up the 4 series of constructions and numbered to facilitate execution."   Source: Mercado Libre, Argentina LATER VERSION OF SET NO. 3 THAN ABOVE: The lid no longer mentions the price. There is still a loose leaf drawing with all the parts, alluding to 4 different sets. The manual cover is more modern. Unfortunately the photo's don't show the entire item: 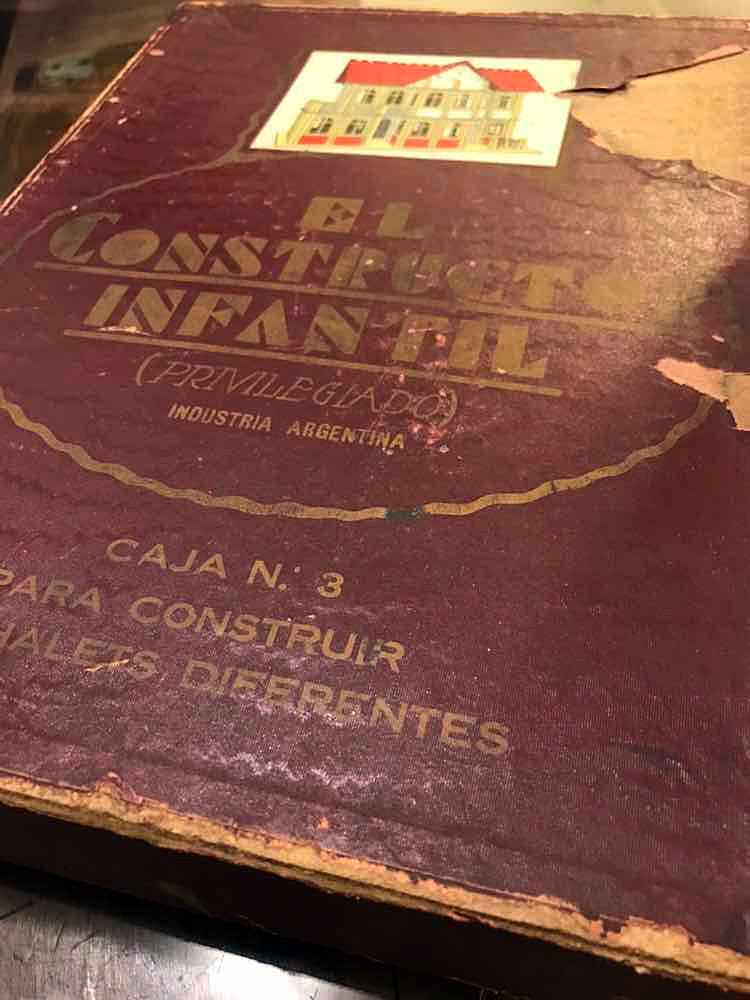 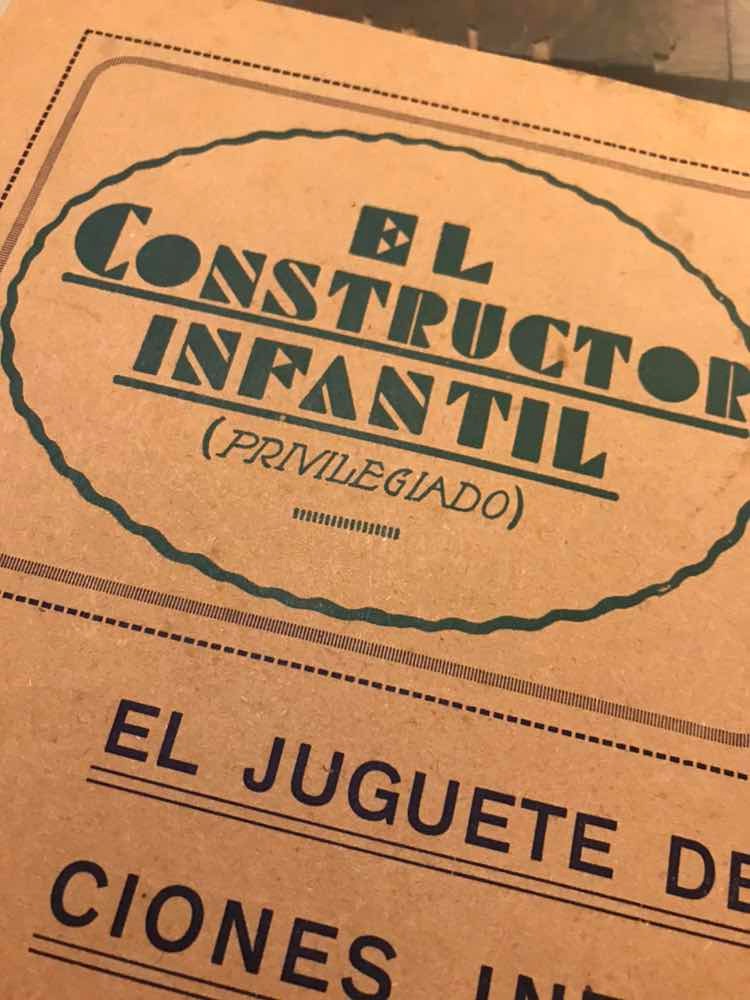 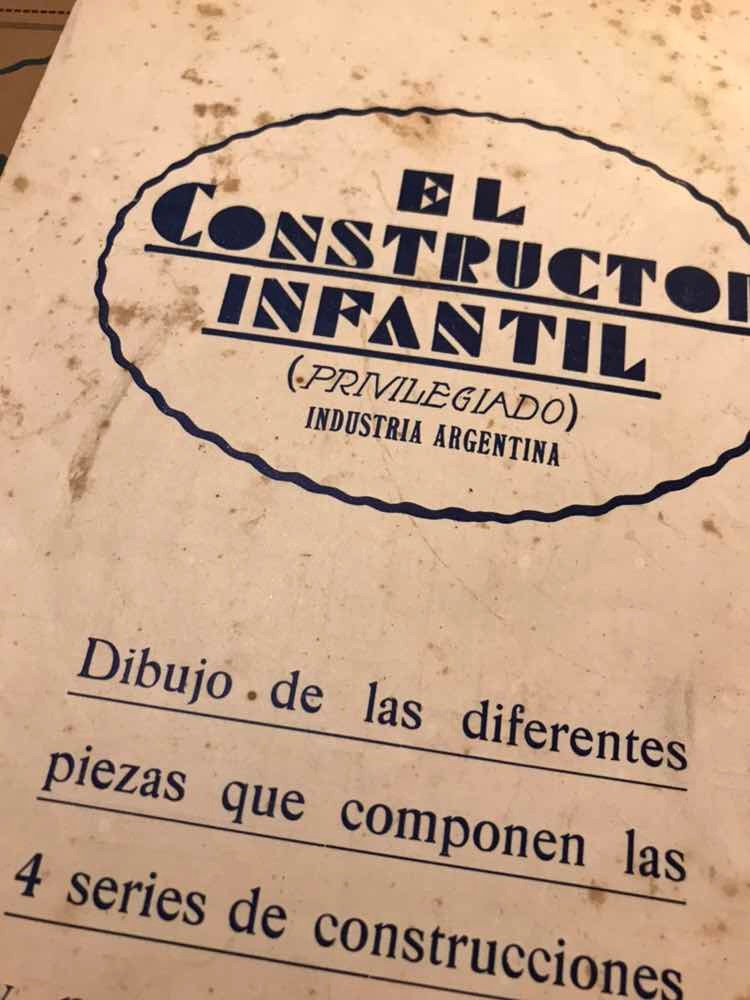 Source: Mercado Libre, Argentina LATEST SET NO. 3, WITH BRIGHT PARTS COLORS: This set must have come after the first Set No. 3 shown above:  Source: Mercado Libre, Argentina COLORFUL SET NO. 3: I came across this Set No. 3 with colored columns and base plate. It could be that an enterprising parent painted these, but the colors match the cardboard very well so I think this may actually have been done by OF as a way to make the sets more enticing: 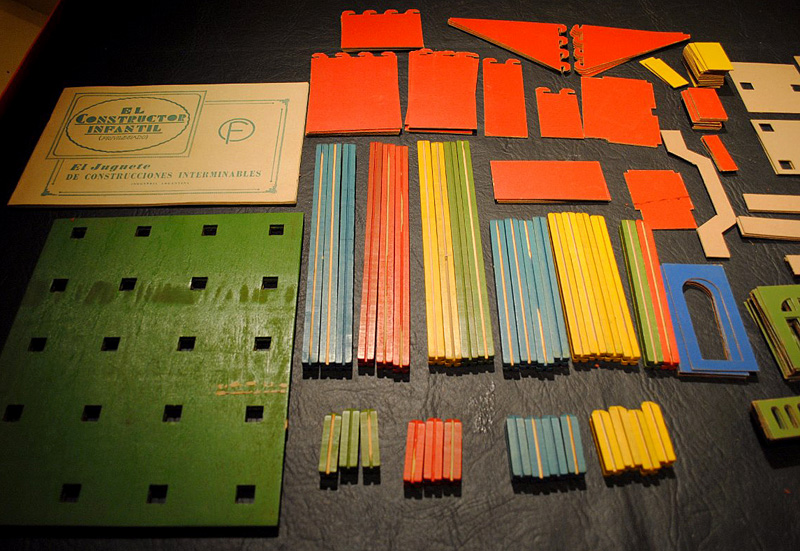 Source: Mercado Libre |
||||||||||||||||||||||||||||||||||||||||||||||||||||||||||||||||||||||||||||||||||||||||||||||||||||||||||||||||||||||||||||||||||||||||||||||||||||||||||||||||||||||||||||||||||||||||||||||||||||||||||||||||||||||||||||||||||||||||||||||||||||||||||||||
| EL CONSTRUCTOR INFANTIL
(PRIVILEGIADO) - SET NO. 4 This set has a 6 x 4 hole base plate and 278 parts. The base plate is 335 x 225 mm. It falls in between Mobaco Set 1 and Set 2. Mobaco Set 1 has a 4 x4 base plate and 174 parts while Mobaco Set 2 has an 8 x 4 base plate and 454 parts. The lid states that you can build 35 chalets, which includes the models of Sets 1, 2 and 3. The manual is the later version with models for Sets No. 1 through No. 6. The parts are very colorful. In this example, the frame around the illustration on the lid still connects with the oval frame around the name. This would be Type "h" as designated in the chronology table above. 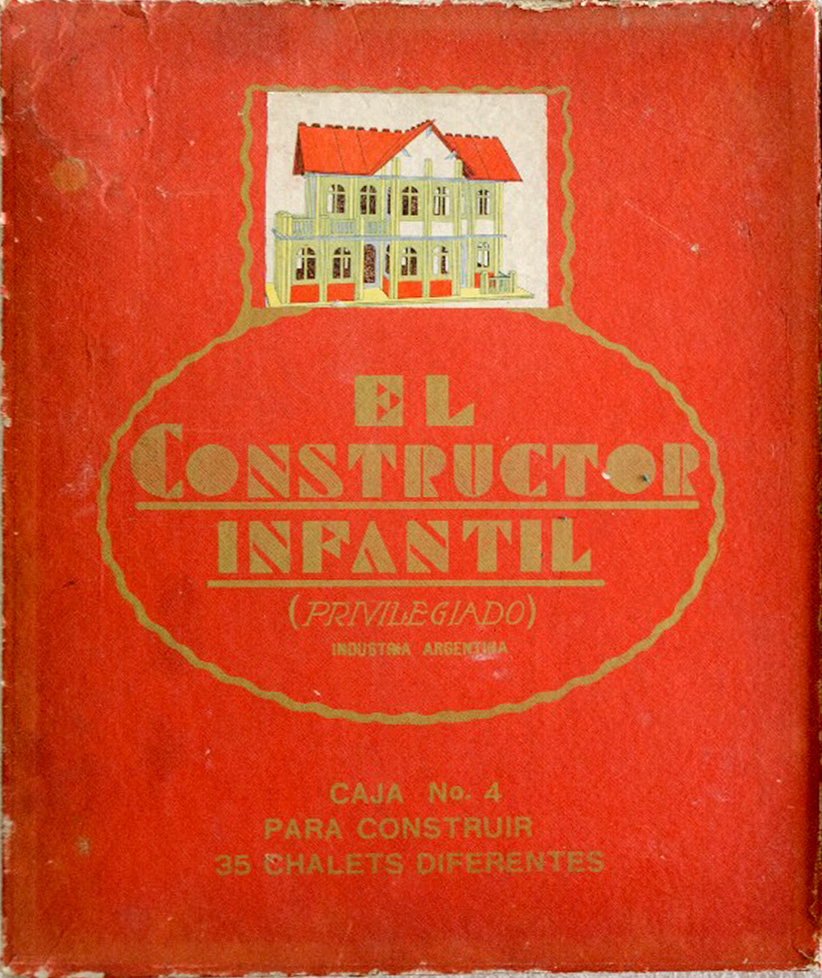   Source: Mercado Libre, Argentina OLDER SET NO. 4 WITH MORE SUBDUED COLORS In earlier sets, colors were more subdued: the doors were warm gray instead of blue, the yellow parts where off-white, the green parts a pale green, the red parts a pale red and the tan parts a warm gray, as shown in this Set No. 4. This set came with the later manual for Sets No. 1-6.  
 Source: Mercado Libre, Argentina |
||||||||||||||||||||||||||||||||||||||||||||||||||||||||||||||||||||||||||||||||||||||||||||||||||||||||||||||||||||||||||||||||||||||||||||||||||||||||||||||||||||||||||||||||||||||||||||||||||||||||||||||||||||||||||||||||||||||||||||||||||||||||||||||
| EL CONSTRUCTOR INFANTIL
(PRIVILEGIADO) - SET NO. 5 This set has a 7 x 4 hole base plate and 372 parts. The base plate is 390 x 225 mm. It is smaller than Mobaco Set 2 which has a larger 8 x 4 base plate and 454 parts. The lid states that you can build 45 chalets, which includes the models of Sets 1, 2, 3 and 4. To the right, the bottom of the box. These are both scans: |
||||||||||||||||||||||||||||||||||||||||||||||||||||||||||||||||||||||||||||||||||||||||||||||||||||||||||||||||||||||||||||||||||||||||||||||||||||||||||||||||||||||||||||||||||||||||||||||||||||||||||||||||||||||||||||||||||||||||||||||||||||||||||||||

 The lid measures 400 x 300 x 50 mm high. The bottom box is 65 mm high, together appr. 68 mm high. The base plate just fits into the bottom box:   The illustration on the lid was exactly the same illustration as the Mobaco drawing for model no. 38 (on the right), including the same small errors! On the colored El Constructor Infantil illustration you can even see the remnants of the line indicating the base plate on the Mobaco drawing: 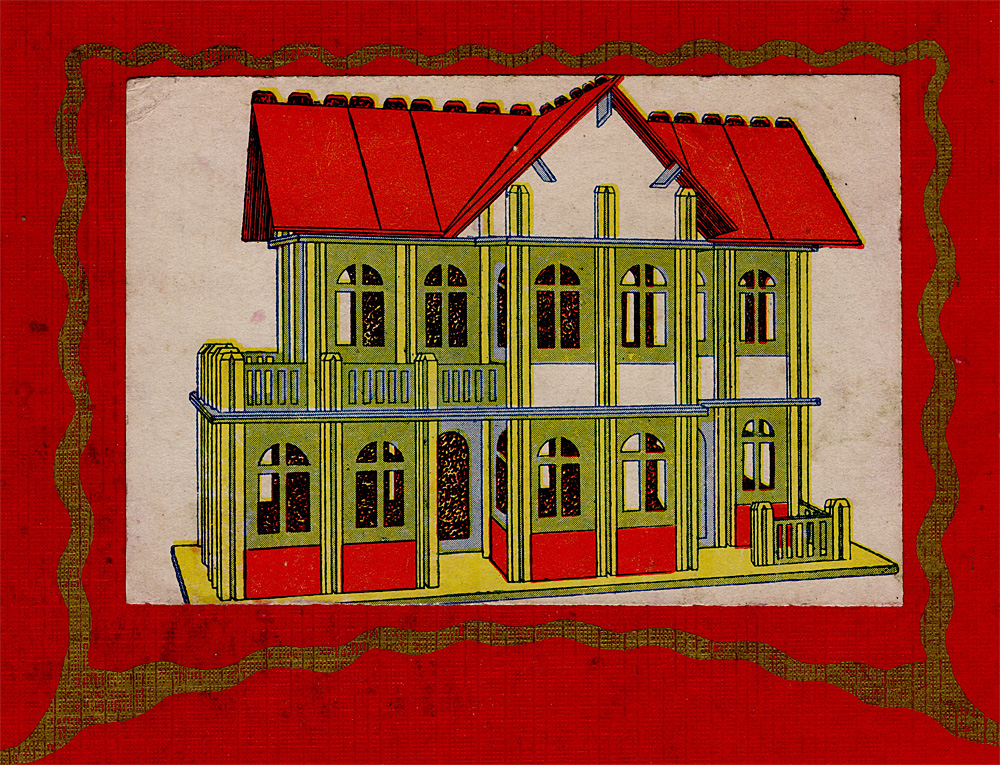
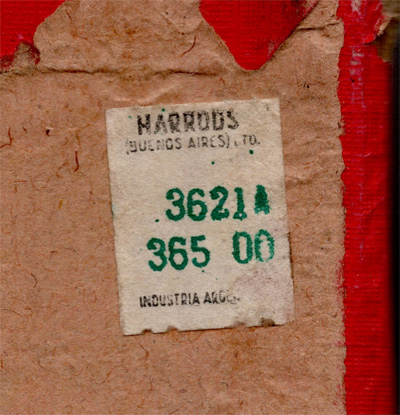
 The corners were reinforced with corner staples below the red paper. This set was sold at Harrods in Buenos Aires for 365.00 pesos: 
 Scans and photo's: CM |
||||||||||||||||||||||||||||||||||||||||||||||||||||||||||||||||||||||||||||||||||||||||||||||||||||||||||||||||||||||||||||||||||||||||||||||||||||||||||||||||||||||||||||||||||||||||||||||||||||||||||||||||||||||||||||||||||||||||||||||||||||||||||||||
| EL CONSTRUCTOR
INFANTIL (PRIVILEGIADO) - SET NO. 6 This set has an 8 x 4 hole base plate and 461 parts. The base plate is 445 x 225 mm. It is similar to Mobaco Set 2 which also has an 8 x 4 base plate and 454 parts. You can build all 55 chalets in the manual. [No images found yet - please let me know if you have this set!] |
||||||||||||||||||||||||||||||||||||||||||||||||||||||||||||||||||||||||||||||||||||||||||||||||||||||||||||||||||||||||||||||||||||||||||||||||||||||||||||||||||||||||||||||||||||||||||||||||||||||||||||||||||||||||||||||||||||||||||||||||||||||||||||||
MANUAL FOR EL CONSTRUCTOR INFANTIL (PRIVILEGIADO) SETS 1 THROUGH 6 This large manual was used in all later sets. In Sets 1 and 2 the manual was folded to fit in the box. 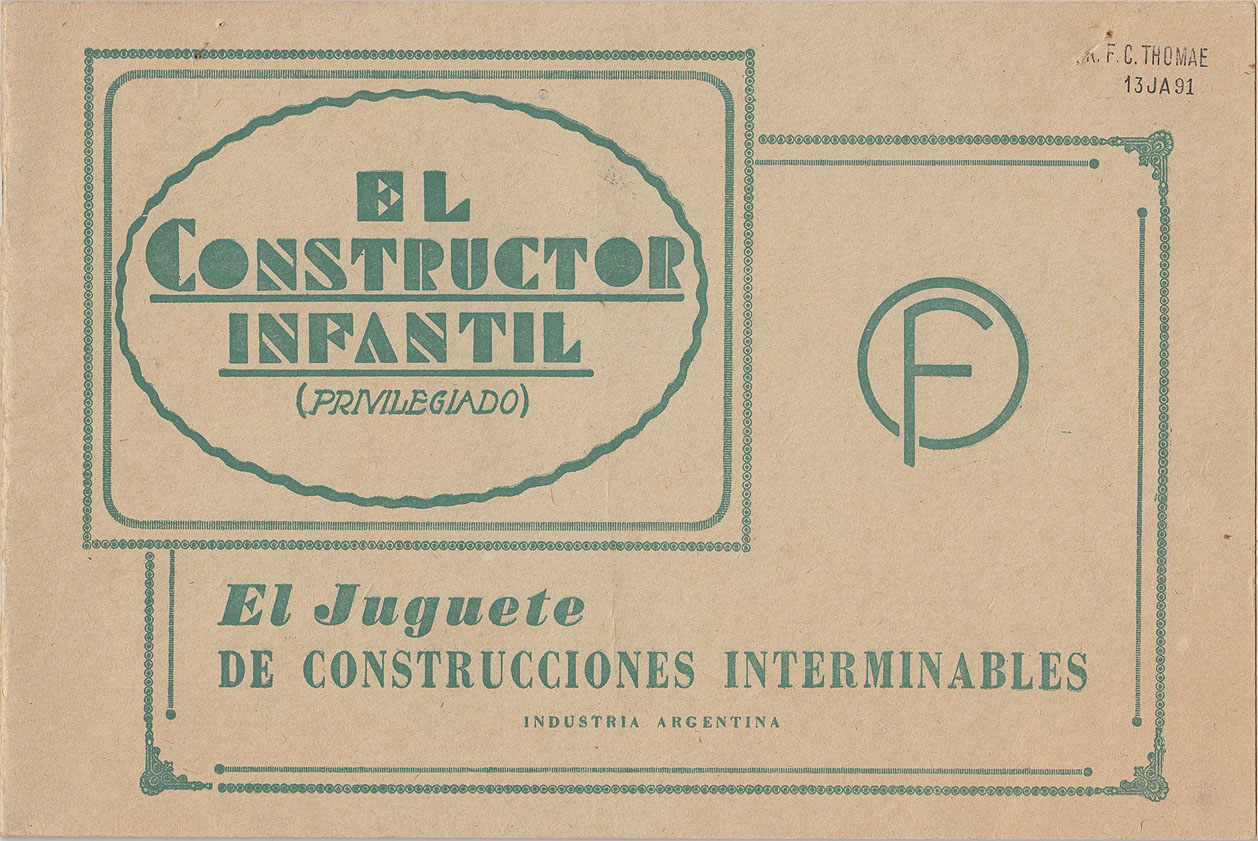 268 x 178 mm 40 pages (including covers) Covers: green and white Inside: brown & white 55 designs, as follows: • 5 designs for Set No. 1 • 10 designs for Set No. 2 • 10 designs for Set No. 3 • 10 designs for Set No. 4 • 10 designs for Set No. 5 • 10 designs for Set No. 6 See pages DOWNLOAD 200DPI PDF 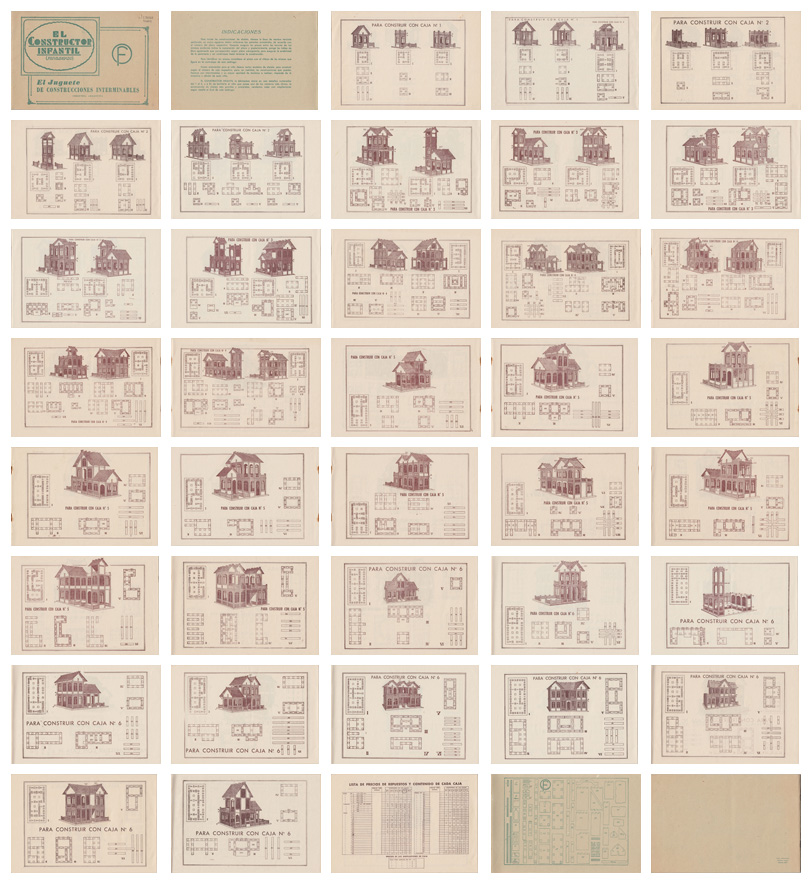 Scans: CM |
||||||||||||||||||||||||||||||||||||||||||||||||||||||||||||||||||||||||||||||||||||||||||||||||||||||||||||||||||||||||||||||||||||||||||||||||||||||||||||||||||||||||||||||||||||||||||||||||||||||||||||||||||||||||||||||||||||||||||||||||||||||||||||||
| 3D PRINTED PARTS This toy was brought to my attention by Luis Manterola in Argentina, who created a digital library of all El Constructor Infantil parts for 3D printing. It's available on Thingverse. The image of the column shows how thin the slots for the panels are. 3D printed panels will fit in the wider grooves of Mobaco columns, but Mobaco panels will not fit in the narrower grooves of El Constructor Infantil's 3D printed columns. Luis printed a large number of parts for his kids to play with. The result is great and the possibilities endless! 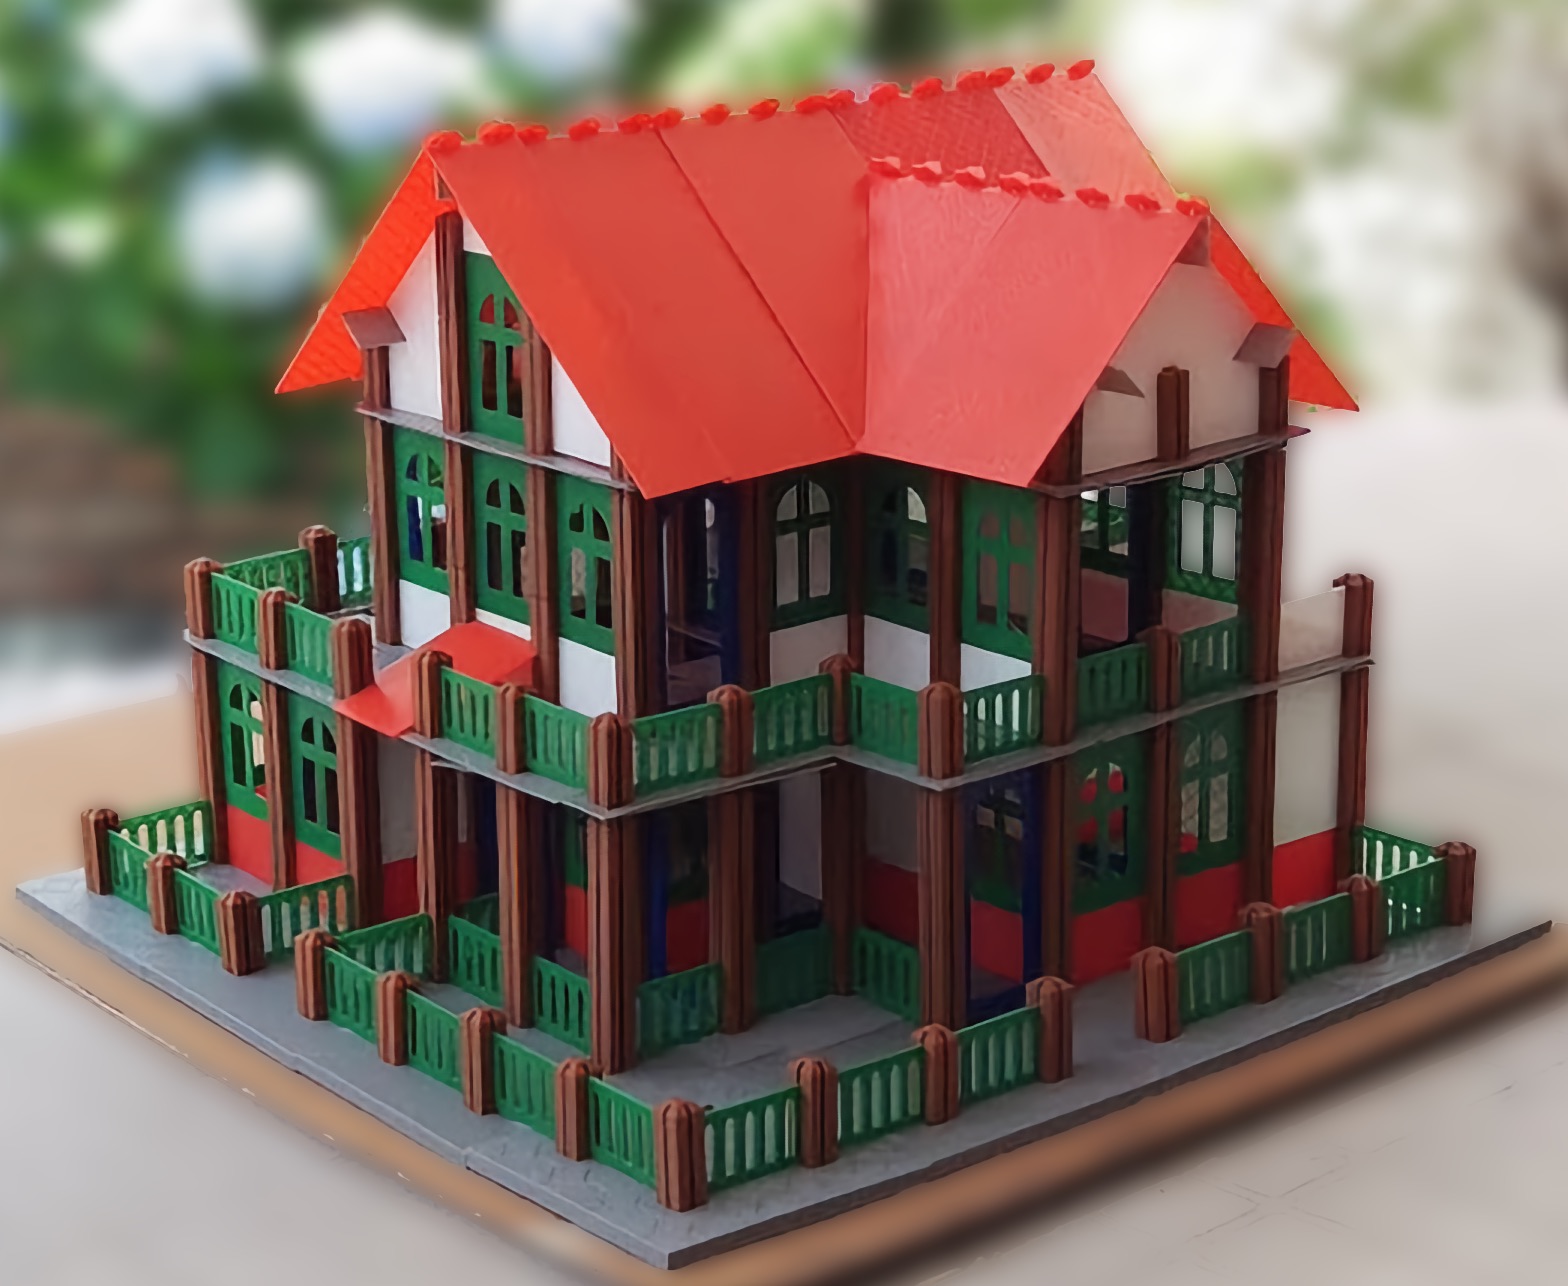
   Images courtsey of Luis Manterola |
||||||||||||||||||||||||||||||||||||||||||||||||||||||||||||||||||||||||||||||||||||||||||||||||||||||||||||||||||||||||||||||||||||||||||||||||||||||||||||||||||||||||||||||||||||||||||||||||||||||||||||||||||||||||||||||||||||||||||||||||||||||||||||||
CASITAS FRM Casitas FRM is also made in Argentina. It was launched in 2016 by Florencia Ruiz Moreno, and as of this writing (2022) is still in production. It is inspired by El Constructor Infantil. The owner writes: "I remembered El Constructor Infantil from my childhood at my grandfather's, 45 years ago. Because I didn't have the original Mobaco or Constructor Infantil I made the prototype from memory." It's a colorful system, with a few differences from Mobaco/El Constructor Infantil: roof pitches are lower, there is a new gate with diagonals, and there is a new stairway, which adds to the play value of the toy. Also, they don't have Mobaco's double floor layers which is possible because the cardboard material is much thinner. Left the "House of Tiger Island", right a fee-lance building: 
 There are just 17 different cardboard parts and three columns sizes:  The makers regularly organize play afternoons for kids. Much fun is had by all!    You can purchase a Casita set in a cardboard box, or in a luxury version in two wooden boxes. In the latter, the blue base plate acts is the lid for one of the boxes, and the other lid is transparent, showing off the colorful parts. Both versions have 64 cardboard parts, 30 columns and a base plate, and can build the House of Tiger Island:   All images courtesy of Casitas FRM Sets are also sold online. In 2022, a set in a cardboard box cost 5,800 pesos (~47 euro), and in wooden boxes 6,500 pesos (~53 euro). In addition, you can buy extra columns in five lengths, extra base plates and extra sets of cardboard parts. For more info, visit their Facebook or Instagram page. |
||||||||||||||||||||||||||||||||||||||||||||||||||||||||||||||||||||||||||||||||||||||||||||||||||||||||||||||||||||||||||||||||||||||||||||||||||||||||||||||||||||||||||||||||||||||||||||||||||||||||||||||||||||||||||||||||||||||||||||||||||||||||||||||
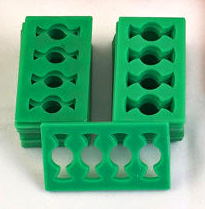
DONALD ARQUITECTO / DONALD ARCHITECT This toy was manufactured by Manufactura de Juguetes M. Bartrès in Barcelona, Spain, under license from the Walt Disney Corporation in the 1960's and 1970's. There appear to have been two series. In the first series, columns were made of wood, and the panels and base plates from cardboard. In the later series all parts were plastic. The information here was collected from several auction sites. I have not been able to find original source documentation, so information about dates must be taken with a grain of salt. FIRST SERIES - WOOD & CARDBOARD Columns seem a bit thicker than Mobaco, and the cardboard thinner. The base plate also appears thinner. Openings in cardboard are smaller than in Mobaco, probably to compensate for the weaker panel material. There seem to be no interlocking roof panels, rather the roof panels were held in place by protruding column ends. Design of the green fence parts is more elaborate than Mobaco's simple slots. In addition to Donald building a house, the three little pigs adorn the box. Rolls of drawings rest in the corner of Donald's office. The main title is in English, with a much smaller Spanish title below it.  Image courtesy of todocoleccion SECOND SERIES - ALL PLASTIC These sets are very colorful. The base plates are bright green, columns are red, wall panels white, railings green and floor plates and roof sections are bright red. The box has a different illustration with a more prominent Donald, the name is only in Spanish, and there are perspectives of several buildings, some of which are much larger than the set could build. The top example needs a base plate with 7 holes, while there were only 6! Apparently there were three different sets. I have not yet seen Set 1. Sets 2 and 3 were in an identical box measuring 30 x 41 cm (roughly A3 size), the only difference being a round gold sticker glued on the top-left part of the illustration with the set number. The bottom box was partitioned. Most areas were raised, notably below the green base plate. Like the post-war Jumbo Mobaco sets, these boxes contained a lot of air! |
||||||||||||||||||||||||||||||||||||||||||||||||||||||||||||||||||||||||||||||||||||||||||||||||||||||||||||||||||||||||||||||||||||||||||||||||||||||||||||||||||||||||||||||||||||||||||||||||||||||||||||||||||||||||||||||||||||||||||||||||||||||||||||||
Set number
2
Set number 3
 Images courtesy of catawiki Left the copyright notice, and right several models shown on the lid: 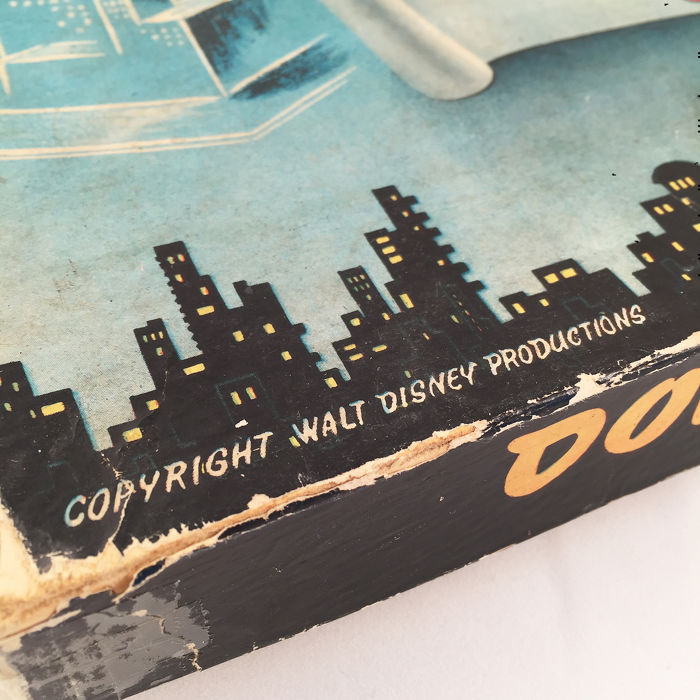
 Images courtesy of catawiki It appears all sets had the same instruction manual, which showed models for Sets 1, 2 and 3. Strangely, the illustrations didn't show columns. Here a few pages found on the internet: 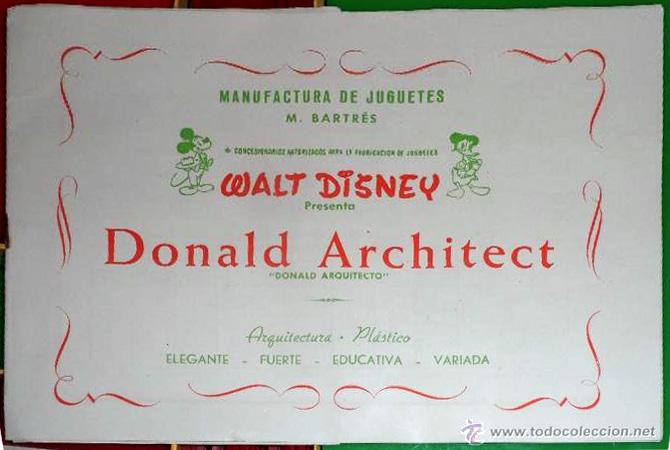 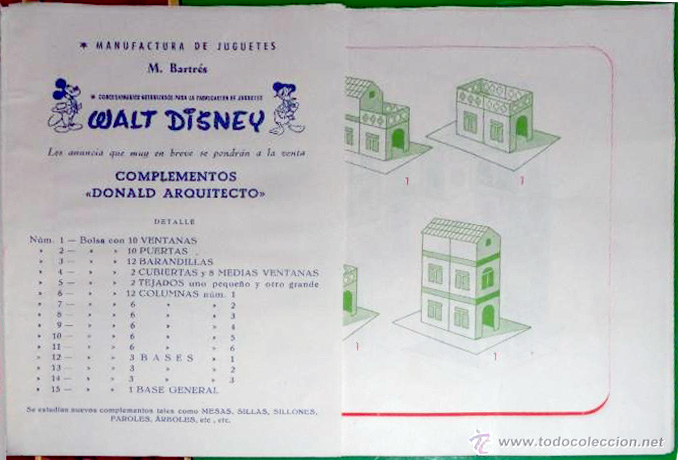 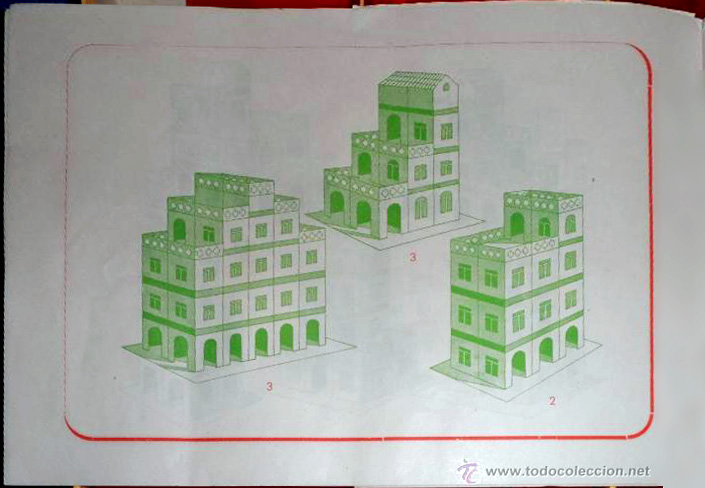   Booklet images courtesy of todocoleccion The parts list was a loose sheet. The one found in the above manual is probably for Set 2. It shows 17 types of parts, in these quantities:
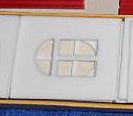
It is unclear what the "half windows" might be. My guess is that this refers to the gable-end walls with the peaked top and rounded window. Below, photographs of the parts. On the left, the front and back of the base plate with 4 x 6 holes. As the boxes were 30 cm wide, these base plates would have been appr. 29 cm long, and the columns were thus spaced appr. 48 mm on center, compared to 57 mm for Mobaco. Based on the illustrations in the manual, Set 1 may have had a base plate with 4 x 3 holes. On the right, the three types of floor plates. The photo shows that the floor plates had a thinner edge so adjacent plates could overlap without thickening the floor. This innovation reduced the number of unique parts necessary for different floor layouts: 
 Images courtesy of todocoleccion and catawiki Below the six column lengths. The shortest could support a railing/fence, the tallest 4 stories plus a railing. On the right a railing/fence: 
 Images courtesy of todocoleccion Below left, a screen, a window with a rectangular upper pane, a door and a gable end wall (to be used with the peaked roof). There is a slight recess around window and door openings, suggesting trim. To the right a picture of a window with a curved upper pane from another set. On the far right the longer roof section. The roof pitch is appr. 41 degrees, as compared to 45 degrees in Mobaco. The shorter roof section would fit between four columns and the longer roof would extend that to another four columns, so both roofs together would fit between two rows of four columns (= 3 squares). You'd need 4 gable end walls to support the two roof sections. 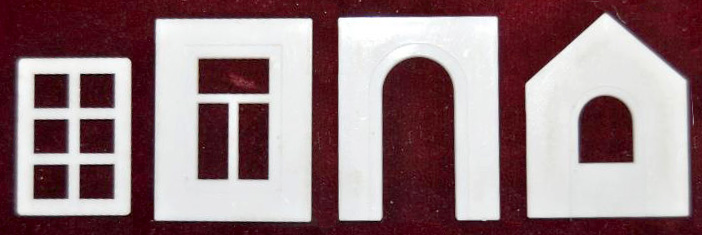
 Images courtesy of todocoleccion Note that the solid wall panels shown in the building illustrations don't appear in any of the sets I found on the internet, nor do they appear in the parts list. Also, it's not clear what was used for the walls below the gutter line of the sloped roofs, the height of which is determined by the gable end panels. Perhaps railings with a gap above them? Here a model made with a Number 3 set: 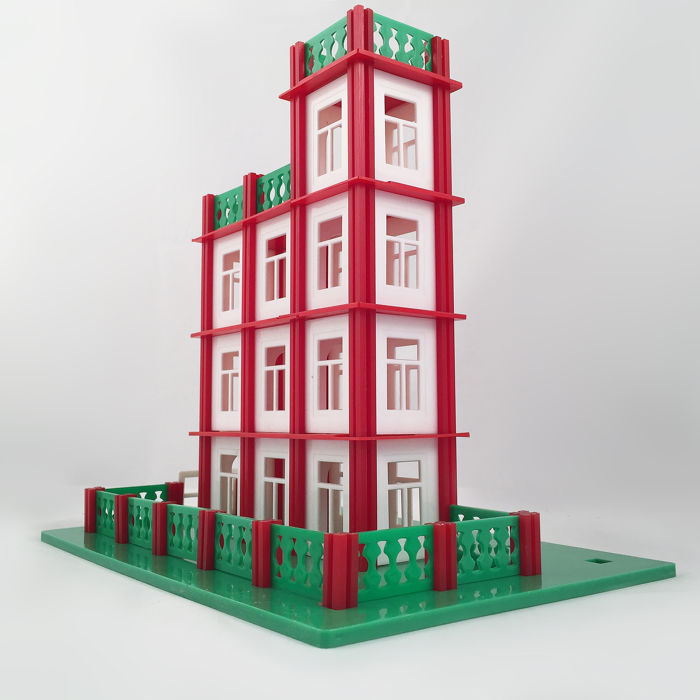  Images courtesy of catawiki |
||||||||||||||||||||||||||||||||||||||||||||||||||||||||||||||||||||||||||||||||||||||||||||||||||||||||||||||||||||||||||||||||||||||||||||||||||||||||||||||||||||||||||||||||||||||||||||||||||||||||||||||||||||||||||||||||||||||||||||||||||||||||||||||
FOX BLOX |
||||||||||||||||||||||||||||||||||||||||||||||||||||||||||||||||||||||||||||||||||||||||||||||||||||||||||||||||||||||||||||||||||||||||||||||||||||||||||||||||||||||||||||||||||||||||||||||||||||||||||||||||||||||||||||||||||||||||||||||||||||||||||||||
FOX BLOX - SET 2 - LACQUERED Set 2 contained 100 pieces in a plywood box. Applied to the sliding lid was a colorful sticker with a colorized photograph of a fenced Fox Blox house with a couple of children, a dog, some potted plants and a tree  Image found on eBay The box measured 38 cm x 25 cm x 11,5 cm (15" x 10" x 4-1/2") and was full of parts. There were no partitions to organize the parts. Note: the set owned by the CCA, which is from the 1950's, is listed as being 46 cm x 30 cm x 12 cm. As can be seen, the grooves were dove-tailed, allowing for secure connections between the infill pieces and the columns. This is fundamentally different from Mobaco, where infill panels were held in place through confinement: the posts were secured in place by the holes in the ground plate and the floor plates, and once the panels were inserted in the grooves they could not escape. The columns in this set have square corners. In some other sets the corners are rounded. It appears those are found in post-war sets.  Image found on eBay The Canadian Center for Architecture (CCA) has a lacquered Set 2 with a manual in its collection, which was on display in the "Dream houses, toy homes" exhibition in 1995-96. Here you get a glimpse of the manual, which shows the Set 3 house with garage:  Image courtesy of the Canadian Center for Architecture (CCA) Their model shows that you could actually build the house shown on the lid (except for the decorations):  Image courtesy of the Canadian Center for Architecture (CCA) FOX BLOX - SET 3 - LACQUERED Set no. 3 contained 200 parts and added a 2-car garage to the house. The house was taller than in Set no. 2, there were doors, and the windows had green trim. In addition to the decorations shown on Set no. 2, this picture also shows a table with a sofa and a chair, a cat on the fence and a tractor in the garage, none of which were included in the set. Although this was a modular system, it's not clear how much variation was actually possible.  Image found on Pinterest The box measured 47.5 cm x 30 cm x 15 cm (18-5/8" x 11-3/4" x 6"), which is roughly double the volume of the Set no. 2 box.    Images found on Worthpoint If you know more about this system, or have manuals, I'd love to hear from you! See the home page for contact information. |
||||||||||||||||||||||||||||||||||||||||||||||||||||||||||||||||||||||||||||||||||||||||||||||||||||||||||||||||||||||||||||||||||||||||||||||||||||||||||||||||||||||||||||||||||||||||||||||||||||||||||||||||||||||||||||||||||||||||||||||||||||||||||||||
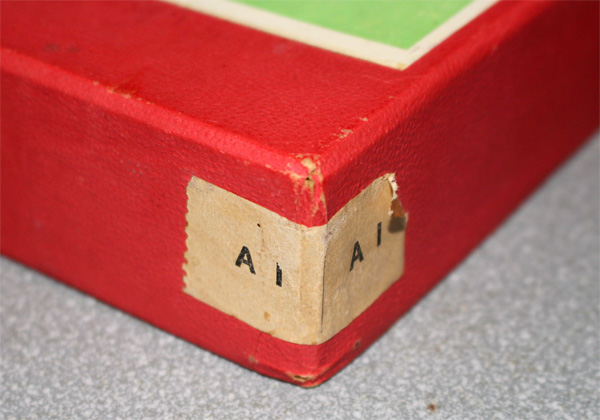
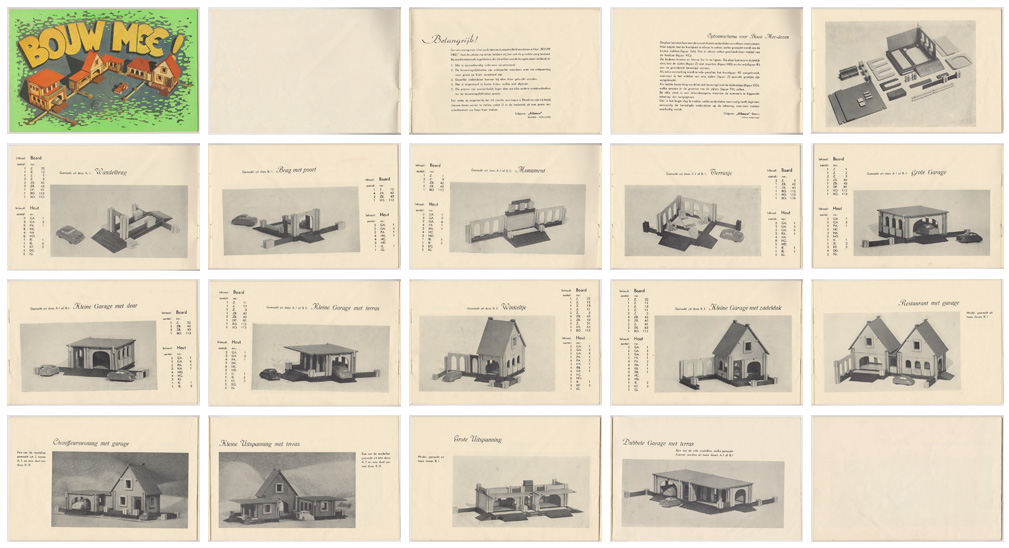
BOUW MEE Bouw Mee, which loosely translates as Let's Build, is a cross between Mobaco and ELBA. It was produced by Albouw in Baarn, The Netherlands, owned by a Mr. Scholten and his partner. Albouw designed two Sets, A1 and B1. Sales, marketing and distribution were done through S.I.O. which had its sales office in Amsterdam at Herengracht 25. S.I.O. stands for Speelgoed Industrie Overijssel - Toy Industry Overijssel (Overijssel is a province in the east of The Netherlands). Most of S.I.O.'s designs were developed by Rokus van Blokland (1926-2018) and his wife Corry van Blokland-Mobach (1929), although they did not design Bouw Mee. Both sets A 1 and B 1 have the same manual. The manual mentions that they are in the process of expanding the range, but I don't think any other sets were ever made. Both sets are in the same box, the only differentiator is a sticker with A 1 or B 1 in the corner of the lid. Set A 1 cost fl. 5.90 and set B 1 cost only one guilder more, fl. 6.90. The same illustration by an unknown artist is used on the box and the manual.  Set courtesy of Leen Kalden DATING We found no "hard" data as to when Bouw Mee was put to market, nor how long it was produced. But there are some clues. By all indications it was a post-war product. The typography of the logo, the cars in the illustrations, the "modern" spelling of the text and the bright red box date this as a late 1940's, early 1950's product. One of the versions of the manual (see below) was printed by Drukkerij Sint Gregoriushuis in Zeist. Henri de Graaf found that this companty started printing under that name in 1949. So that manual must be from 1949 or later. Ron van Blokland, who manages his parent's legacy, found photographs of a trade fair in 1953 where Bouw Mee was displayed at S.I.O.'s stand. Since Bouw Mee sets are very rare today, they must have been produced for a short time. Based on the above, my estimation is that they were produced from about 1950 through about 1953. Here a photo of Albouw's workshop at Nieuw Baarnstraat nr. 7, Baarn, as seen from the courtyard:  Photo courtesy of of Stichting Groenegraf Baarn Photo's of S.I.O.'s stand at a 1953 trade fair, with details showing Bouw Mee:  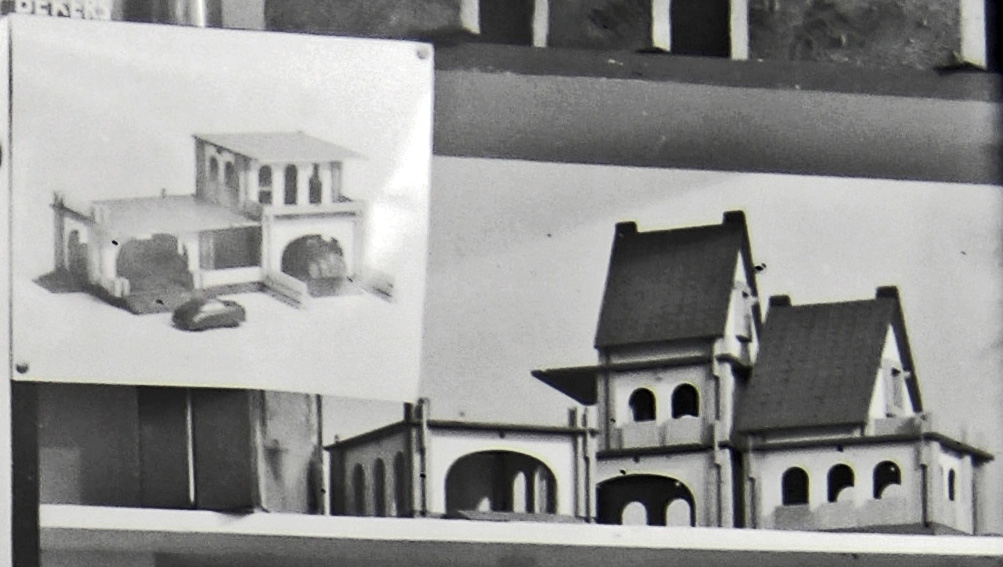 Photograph by Rokus van Blokland, courtesy of Ron van Blokland   Photograph by Rokus van Blokland, courtesy of Ron van Blokland |
||||||||||||||||||||||||||||||||||||||||||||||||||||||||||||||||||||||||||||||||||||||||||||||||||||||||||||||||||||||||||||||||||||||||||||||||||||||||||||||||||||||||||||||||||||||||||||||||||||||||||||||||||||||||||||||||||||||||||||||||||||||||||||||
BOUW MEE - SET A 1 The box is partitioned with an area for small parts. There are also versions of the box without any partitioning. Ther box is plenty big for the number of parts. Unlike Mobaco putting the parts back into the box is not a chore. In addition to a manual, each box has a fold-out "architectural" drawing showing the parts, sometimes a warranty leaflet and sometimes a contents list. |
||||||||||||||||||||||||||||||||||||||||||||||||||||||||||||||||||||||||||||||||||||||||||||||||||||||||||||||||||||||||||||||||||||||||||||||||||||||||||||||||||||||||||||||||||||||||||||||||||||||||||||||||||||||||||||||||||||||||||||||||||||||||||||||
 Scan of lid courtesy of Leen Kalden 
 Set courtesy of Leen Kalden |
||||||||||||||||||||||||||||||||||||||||||||||||||||||||||||||||||||||||||||||||||||||||||||||||||||||||||||||||||||||||||||||||||||||||||||||||||||||||||||||||||||||||||||||||||||||||||||||||||||||||||||||||||||||||||||||||||||||||||||||||||||||||||||||
| BOUW
MEE - SET B 1 This set was found on Marktplaats. The box and the large fold-out plan are identical to Set A 1. A parts list is glued to the inside of the lid, which was used for the Parts table below. The set also came with a warranty leaflet (see below).     Images courtesy of Marktplaats |
||||||||||||||||||||||||||||||||||||||||||||||||||||||||||||||||||||||||||||||||||||||||||||||||||||||||||||||||||||||||||||||||||||||||||||||||||||||||||||||||||||||||||||||||||||||||||||||||||||||||||||||||||||||||||||||||||||||||||||||||||||||||||||||
FULL SIZE PARTS DRAWING In each set is a large fold-out drawing with the parts shown at full scale. To save space, some parts are "stacked" on the drawing and require a bit of studying to figure out which size is which number. For some parts the end view is also shown, see A, B, C D, E and G. The drawing mentions that a patent has been filed for ("octrooi aangevraagd") but we haven't found that yet. Click here for a 300dpi scan.  Drawing courtesy of Leen Kalden The parts fit nicely on the drawing:  Image courtesy of Leen Kalden BOUW MEE WARRANTY LEAFLET Translation: If you discover an error of any kind in this set, please send the set to the "ALBOUW" IN BAARN stating your complaint and the correct address of the sender. You will immediately receive a new set. Although the pre-delivery check is very strict, it is unavoidable that in sporadic cases deviations may occur. 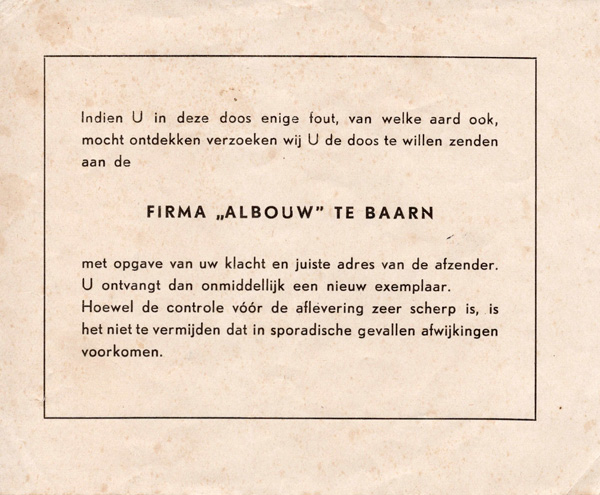 Scan courtesy Rien ten Bos BOUW MEE PARTS In the table below, parts are shown at 50% of actual size. Part numbers are from the "plan" drawing. Certain parts have not been found yet and are shown with a detail of the plan drawing. Parts found in sets but not on the drawings are highlighted in red. Contents of Set B1 are shown. A contents list of set A1 has not yet been found. The nomenclature of parts is not very systematic. For cardboard panels the letters are (sometimes) a Dutch abbreviation, as explained in the manual. For wood parts, the second letter designates the grouping (from A through G). Specifically: Cardboard: BO = Bodem DP = Dak, Plat (incl. gordingen) DS = Dak, Schuin TD = Tussen Dak (my guess) Z = Zijden (wanden) ZB = Zijden Buiten (groene stroken) Wood: GA = Pijler (bruine pijler) HA = Pijler (korte pijler) PA = Pijler (lange pijler) DB = Halve pijler RB = Halve pijler (met inkepingen) HC = Hoekje MD = Muurtje IE = Inrij KF = Kruisfiguur DG = Dakhoekjes (korter stokje) IG = Dakhoekjes (langere stokje)
|
||||||||||||||||||||||||||||||||||||||||||||||||||||||||||||||||||||||||||||||||||||||||||||||||||||||||||||||||||||||||||||||||||||||||||||||||||||||||||||||||||||||||||||||||||||||||||||||||||||||||||||||||||||||||||||||||||||||||||||||||||||||||||||||
BOUW MEE MANUAL This same manual was used in Set A 1 and Set B 1. There are two known versions, with one minor difference. One version has the name of the printer on the last page, the other does not. We don't know which version came first and arbitrarily assigned the version below without the printer name as Version A. VERSION A 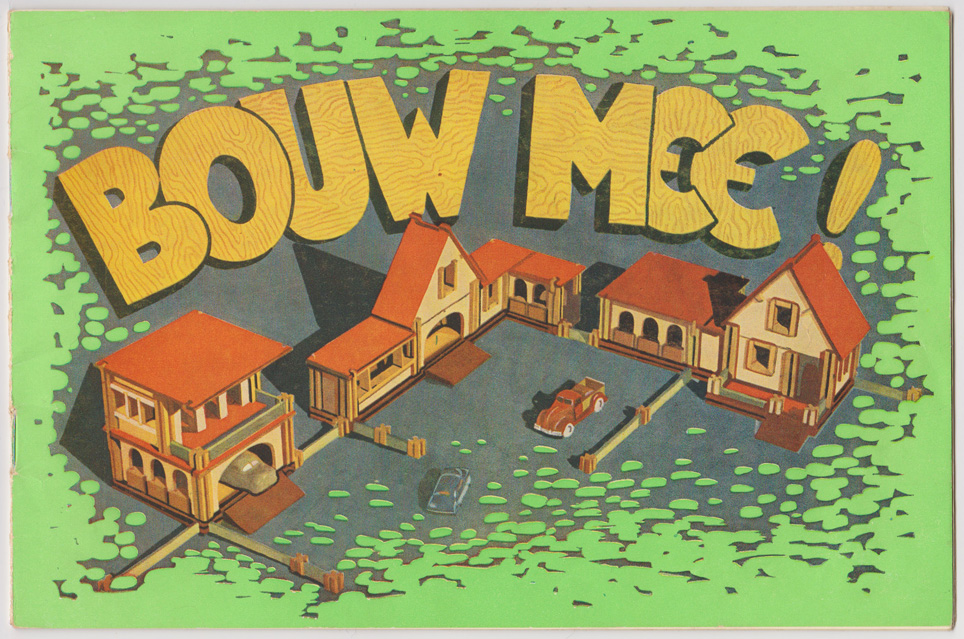 240 x 156 mm 20 pages (including covers) Front cover: 4-color Inside: black & white 14 designs See pages DOWNLOAD PDF |
||||||||||||||||||||||||||||||||||||||||||||||||||||||||||||||||||||||||||||||||||||||||||||||||||||||||||||||||||||||||||||||||||||||||||||||||||||||||||||||||||||||||||||||||||||||||||||||||||||||||||||||||||||||||||||||||||||||||||||||||||||||||||||||
 Images courtesy Leen Kalden VERSION B This version has the printer name on the back cover: Drukkerij Sint Gregoriushuis in Zeist. Henri de Graaf did some research and found that this companty started printing under that name in 1949. So this Version B must date from 1949 or later.  240 x 156 mm 20 pages (including covers) Front cover: 4-color Inside: black & white 14 designs See pages DOWNLOAD PDF  Images courtesy of Henri de Graaf BOUW MEE SALES BROCHURE This marketing brochure shows what could be built with Bouw Mee. The last page shows S.I.O.'s address in Amsterdam. Much of the content is the same as in the building manuals above. Price for Set A 1 was fl. 5.90 and for Set B 1 was fl. 6.90, only one guilder more. Note: The scans are not complete, there should be 12. One page appears to have been scanned twice. Perhaps the missing pages were blank? 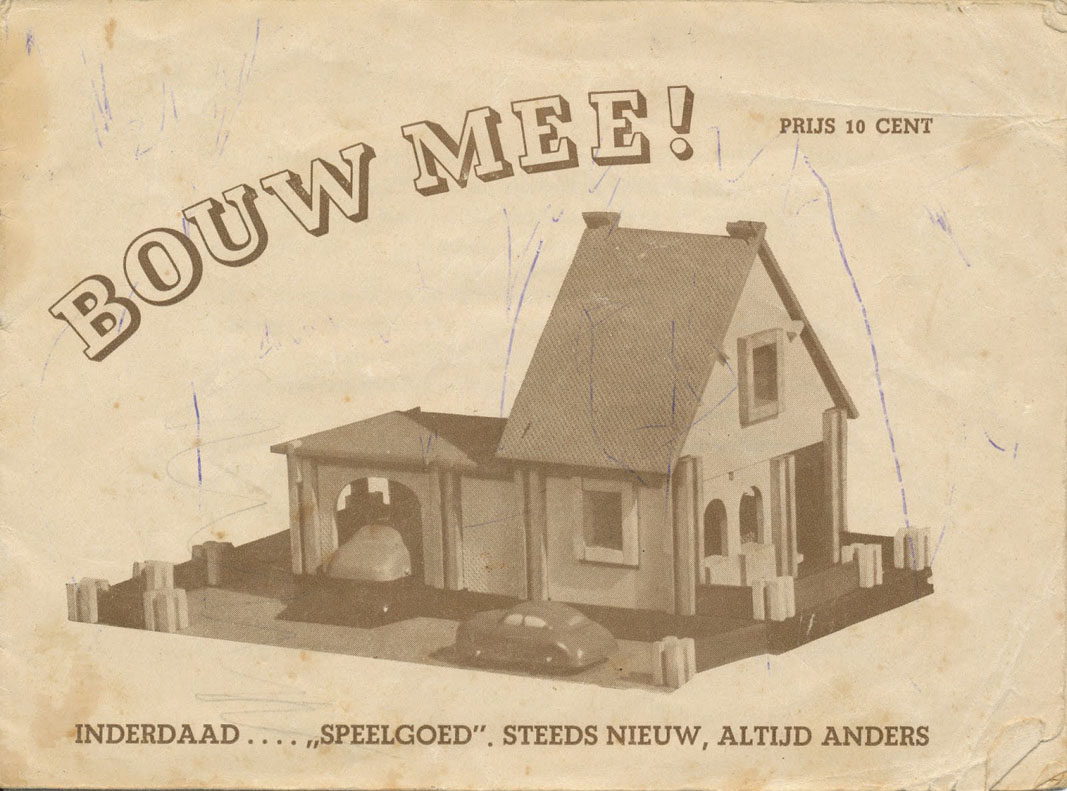 Size unknown 12 pages (including covers) Brown printing See pages DOWNLOAD PDF  Images courtesy of Stichting Groenegraf Baarn |
||||||||||||||||||||||||||||||||||||||||||||||||||||||||||||||||||||||||||||||||||||||||||||||||||||||||||||||||||||||||||||||||||||||||||||||||||||||||||||||||||||||||||||||||||||||||||||||||||||||||||||||||||||||||||||||||||||||||||||||||||||||||||||||
BUILDING WITH BOUW MEE Koos Welling digitized Bouw Mee for use with LeoCAD. See retrobuildingtoys.nl for more information. He found it to be a nice construction system allowing for quite a bit of variation with a limited number of parts. Rather than having a ground plate like Mobaco, the foundation is made with columns connected at the corners with little wood tiles (part HC) on which floor plates are rested. Additonal support can be made with small pood pegs (parts DG and IG), which can also be used to connect columns. Corner posts are held in place by jamming wall panels into the grooves. Flat roofs are held in place with small wood pegs inserted into the column grooves. Sloping roofs are interconnected with hooks at the ridge and held in place by gravity. 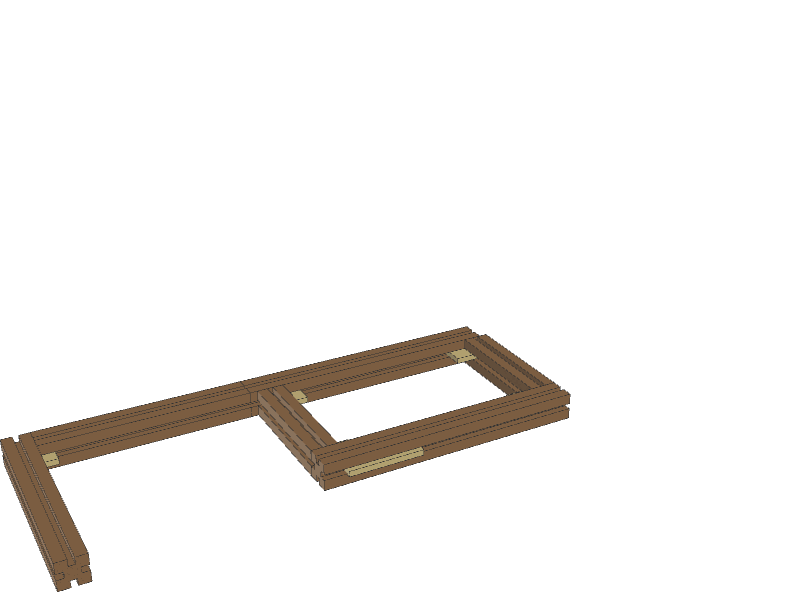 Animation courtesy of Koos Welling The illustration on the cover as well as in the manual were built with prototype parts, some of which did not end up in the final production sets. For instance, the ground floor wall panel with a window opening shown in the right-most building on the manual cover is not shown on the parts drawing, nor does it appear in any set. In LeoCAD, Koos created a new wall panel for that, see below. Note that the window frame installation is shown incorrectly on the drawing: the jambs are used as header and sill. The correct way is shown in the digital image on the left: 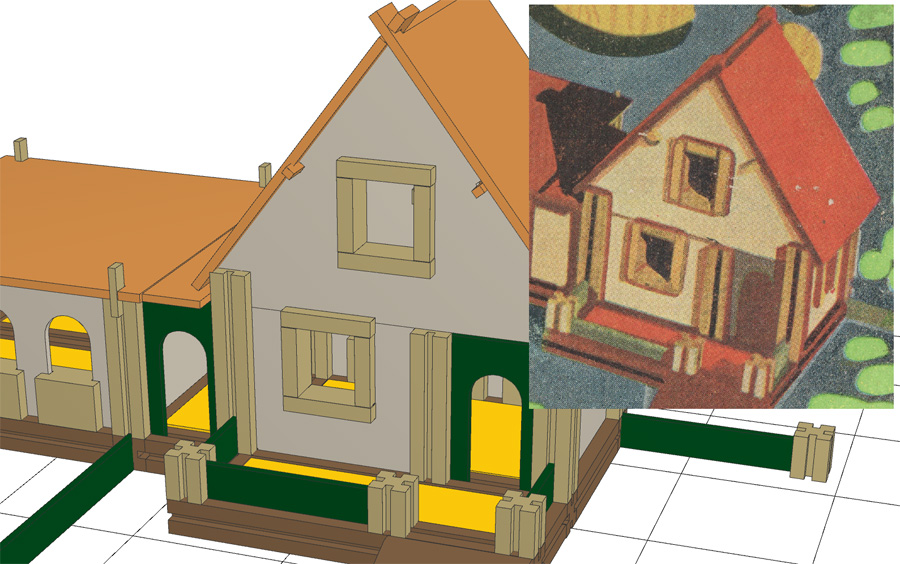 Image courtesy of Koos Welling Also, the windows with three openings as shown on the cover art (second floor of the left building and left wing of the middle building) cannot be built as shown, although Koos found a workaround using standard window frame parts RB 1 and DB 1, with some help from peg IG: 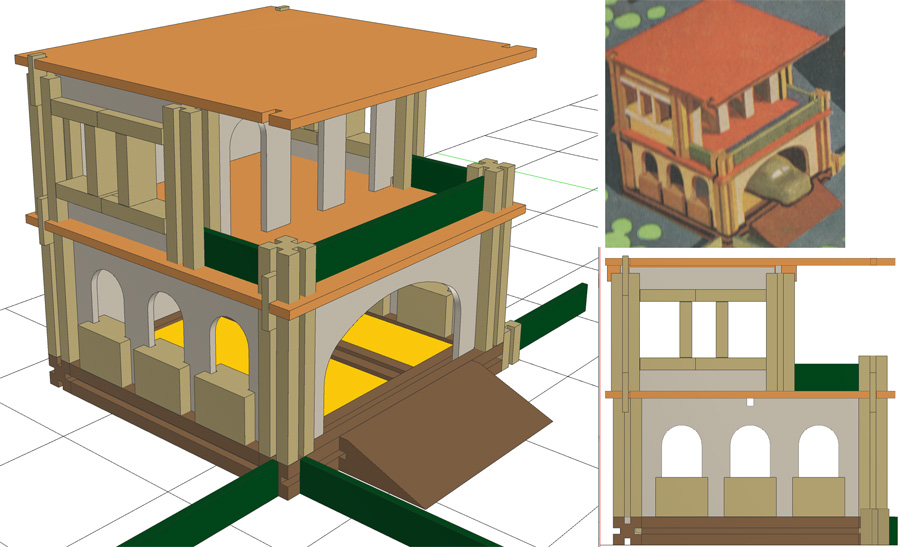  Images courtesy of Koos Welling Sizewise, Bouw Mee is comparable with Jumbo Mobaco, as illustrated by this LeoCAD drawing by Koos Welling:  Image courtesy of Koos Welling |
||||||||||||||||||||||||||||||||||||||||||||||||||||||||||||||||||||||||||||||||||||||||||||||||||||||||||||||||||||||||||||||||||||||||||||||||||||||||||||||||||||||||||||||||||||||||||||||||||||||||||||||||||||||||||||||||||||||||||||||||||||||||||||||
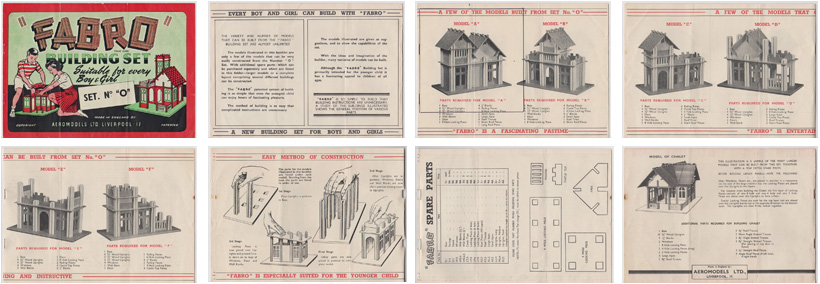
FABRO FABRO was a Mobaco look-alike made by Aeromodels in Liverpool, England. According to the Wakefield Council's Museum Collection Online, this system dates from around 1940. In an early version of the box, the label stated "Contains over 200 finished parts • Simple to build • Unbreakable • Over 100 different models can be built":  Image courtesy of www.meccanoindex.co.uk Later this text was covered with a sticker with Set No. "0". This suggests that there may have been a Set No. 1, but I haven't found that yet. Nor is there an allusion to other sets in the Manual for Set No. "0". However, the two models shown on the box lid and on the manual cover have a 4 x 4 base plate, while the base plate in Set 0 had 4 x 2 holes, so perhaps there exists (or they planned to release) a set with a larger base plate. Note: it appears that in the above box lid, a label was stuck over the oblique text and removed, so this box was likely an example with the label. Here and example of Set No. "0" with the label:  Image from Wakefield Council's Museum Collection Online Parts were very colorful and roofs had a tile pattern printed on them. Parts could be purchased directly from Aeromodels. The manual contained a parts list and their prices. There were 17 different parts, compared to appr. 200 for Mobaco. All parts except the base plate were sold in lots of 3, 6 or 12 units. Interestingly, you could order uprights at any length up to 2 feet:  Parts had an odd numbering system. Fortunately, the construction manual listed the parts needed for each model using parts descriptions rather than part numbers, so these numbers may have been principally for internal use. Because of the small number of different parts in Fabro this approach was workable, but for Mobaco a simple numbering system made much more sense. Note the color difference in the set below with the parts in the set above from the Wakefield Council's Museum, which are much brighter: 
 Images from eBay Below the manual for Set 0. There is no dating info anywhere in the manual. The illustrations on the cover and on the last page show windows with round uppers, while the photographs of the models inside the booklet all have square uppers. Also, the doors shown on the cover and on the last page are full-size Mobaco doors (4" tall), while the model photographs show shorter doors. The story height of the models is 2-7/8" (as compared to 4" for Mobaco), the height of the window part, and the doors and wall panels have the same size. The doors in the model photographs look like cut-off Mobaco doors. However, the actual doors did have a strip along the bottom of the opening, as seen on the photo of the Wakefield Council's Museum set above. Floor panels were not gray like Mobaco, but red, the same color as the roof panels. The "white" parts initially were a pale tan and later bright yellow. Crenelated panels were green instead of grey in Mobaco. The base plate had 4 x 2 holes, a size that doesn't exist in Mobaco. I have no further information on this system. I didn't find any ads in the British Newspaper Archive, nor did I find the patent that is alluded to on the label, nor did I find the Fabro name in the UK Registry of Trade Marks. If you know more, please contact me (see Home page). |
||||||||||||||||||||||||||||||||||||||||||||||||||||||||||||||||||||||||||||||||||||||||||||||||||||||||||||||||||||||||||||||||||||||||||||||||||||||||||||||||||||||||||||||||||||||||||||||||||||||||||||||||||||||||||||||||||||||||||||||||||||||||||||||
FABRO SET NO. 0 MANUAL  246 x 174 mm 8 pages (including covers) Cover: black, red, green Inside: black, red 6 designs See pages DOWNLOAD PDF |
||||||||||||||||||||||||||||||||||||||||||||||||||||||||||||||||||||||||||||||||||||||||||||||||||||||||||||||||||||||||||||||||||||||||||||||||||||||||||||||||||||||||||||||||||||||||||||||||||||||||||||||||||||||||||||||||||||||||||||||||||||||||||||||
 Images courtesy Leen Kalden |
||||||||||||||||||||||||||||||||||||||||||||||||||||||||||||||||||||||||||||||||||||||||||||||||||||||||||||||||||||||||||||||||||||||||||||||||||||||||||||||||||||||||||||||||||||||||||||||||||||||||||||||||||||||||||||||||||||||||||||||||||||||||||||||
OKWA ZET-OP BOUWDOOS VOOR KLEINE ARCHITECTEN (= OKWA Zet-op construction set for small architects) This Mabaco-like system has pegs in the ends of the columns so you can stack them. The plates are plastic. The roof halves are held together by a longer square rod. A major difference with Mobaco is the lack of ground plates. The parts are quite large, resulting in relatively big buildings. Because there is no ground plate, parts are only held together sideways by the floor plate above. As a result, buildings are a bit rickety. Parts without a floor plate above are knocked over easily. "Zet op" means "set up" or "put it on", a reference to their column system. The logo could also be read as "Zet-ze-op" which means "go for it!" The system was launched in the fall of 1969. So far, I have found images of one set (two versions) and Accessory Sets 1, 2 and 3. OKWA stands for Okkerse Waddinxveen. Okkerse is a family name and Waddinxveen is a small town in the west of The Netherlands, near Gouda, not far from The Hague. The OKWA brand name was used from 1940 onwards by the toy factory of G. Okkerse. Rien ten Bos writes that the Okkerse family established the factory in 1901. It was, to his knowledge, the first real wooden toy factory in the country. In the 1930's they started manufacturing play stores. In the 1950's they were big in doll houses. By the 1960's they were the largest toy manufacturer in the Netherlands, making a wide variety of wooden toys, board games and card games. Production ceased in October 1976. At that time the factory had 53 employees and was run by G.J.C. Okkerse, then 43 years old, who had joined his grandfather's company 20 years before. |
||||||||||||||||||||||||||||||||||||||||||||||||||||||||||||||||||||||||||||||||||||||||||||||||||||||||||||||||||||||||||||||||||||||||||||||||||||||||||||||||||||||||||||||||||||||||||||||||||||||||||||||||||||||||||||||||||||||||||||||||||||||||||||||
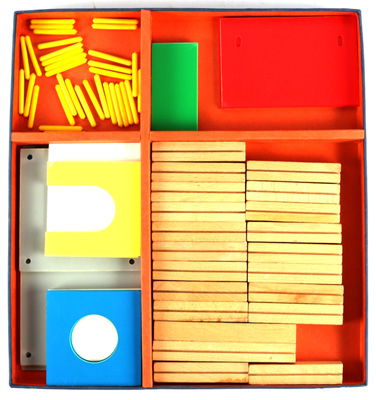
| OKWA ZET-OP SET The box is 38 x 40 cm / 15" x 15-3/4". 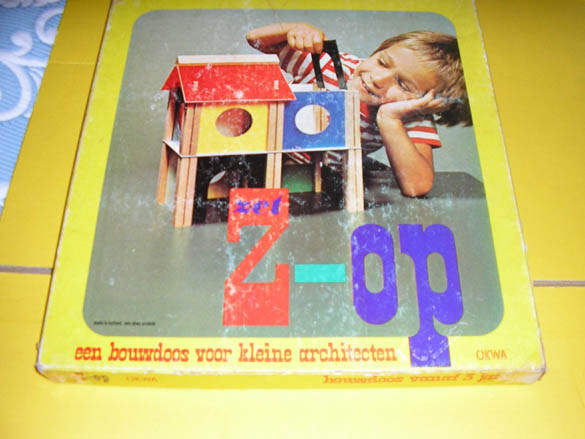  Image courtesy Rien ten Bos Image courtesy HONGS 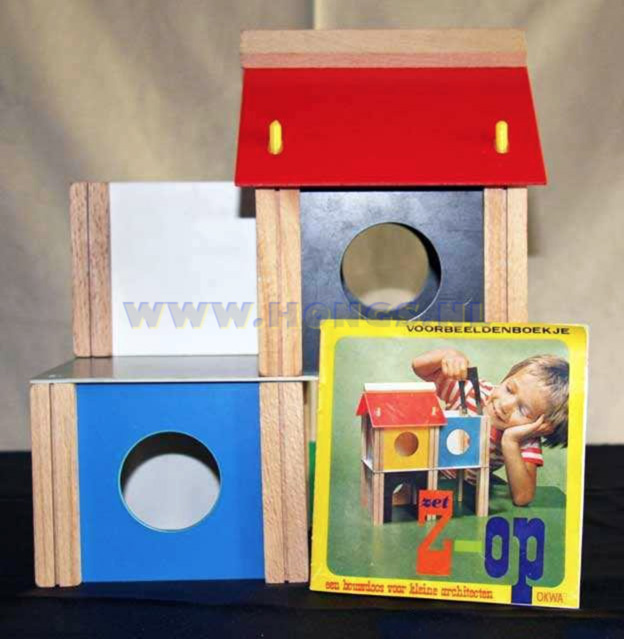  Image courtesy HONGS Image courtesy HONGS Here a (later?) version with a blue box, orange lining and orange inserts inside the box and a manual with a playing child on the cover and a bright colored band ialong the top of the pages. The building on the right is euphemistically called "Villa with garden"! 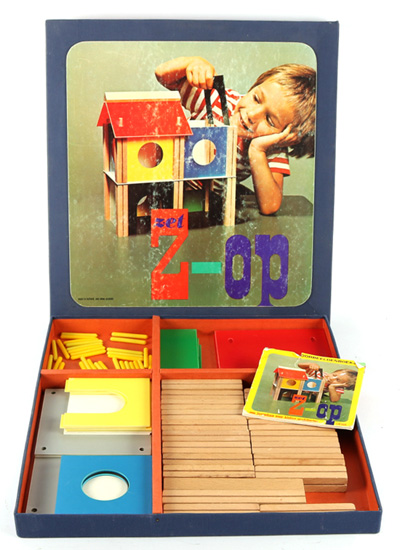
 Images courtesy of Koos Welling, from parelsbreda.nl |
||||||||||||||||||||||||||||||||||||||||||||||||||||||||||||||||||||||||||||||||||||||||||||||||||||||||||||||||||||||||||||||||||||||||||||||||||||||||||||||||||||||||||||||||||||||||||||||||||||||||||||||||||||||||||||||||||||||||||||||||||||||||||||||
| OKWA ZET-OP ACCESSORY SETS As outlined in the manual below, there were three accessory sets and two accessory bags, specifically: Accessory Set 1: 2 gray plastic floor sheets and 1 complete roof Accessory Set 2: 2 white panels, 2 blue panels with hole, 2 yellow door panels, 2 green half-panels (all plastic)= Accessory Set 3: 8 wood columns Accessory Bag 4: 20 plastic pens Accessory Bag 5: 2 gray plastic floor sheets OKWA ZET-OP ACCESSORY SET 1   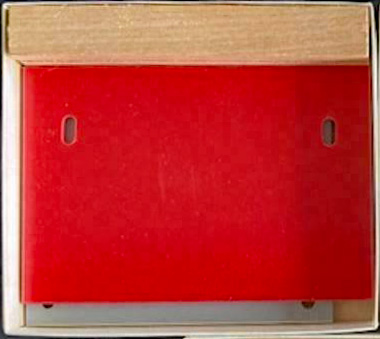 Images courtesy HONGS and Marktplaats OKWA ZET-OP ACCESSORY SET 2   Images courtesy Marktplaats OKWA ZET-OP ACCESSORY SET 3 
 Image courtesy Koos Welling from smullenvanspullen.nl, and Marktplaats OKWA ZET-OP MANUAL - VERSION C There are at least three versions of the manual: A. with plain orange cover (see above) B. with colored cover with child playing, and with a colored band along the top of each page (see above) C. same cover, but colored rectangles around the photo's and text in 4 languages This is version C. The last page outlines the contents of the 5 available accessory sets/bags. Those were necessary to build the models on pages 19-22.  129 x 129 mm 24 pages (including covers) Cover: CMYK Inside: black + spot colors (or CMYK) 28 designs See pages DOWNLOAD PDF  Scans courtesy of Barend Westerveld FALL 1969 ARTICLES These fall 1969 articles announce the launch of Zet-Op. Left from Nederlands Dagblad, 3 December 1969, right from De Tijd, 22 November 1969. 
 Source: delpher.nl |
||||||||||||||||||||||||||||||||||||||||||||||||||||||||||||||||||||||||||||||||||||||||||||||||||||||||||||||||||||||||||||||||||||||||||||||||||||||||||||||||||||||||||||||||||||||||||||||||||||||||||||||||||||||||||||||||||||||||||||||||||||||||||||||
WILFRIED - DER KLEINE BAUMEISTER Wilfried sets were manufactured by Heller & Co (HECO) in Wutha [Farnroda] near Eisenach, 200 km north-east of Frankfurt. It is a straight copy of Mobaco. The drawings are identical to the 1931 Gnomes manual. From the description it appears there were two sets, No. 1 and No. 2, and the manual below was for both. Models shown in the booklet are the same as in Mobaco Sets 00 and 0, specifically models 002-005 from Set 00 and Models 01-04 from Set 0. Inside the cover is this text (in German): Wilfried's Heco construction kit, the ingenious toy for boys and girls.On the back cover it states "legally protected ("gesetzlich geschützt"). The printer was Grafischer Betrieb Carl Kaestner in Eisenach, which relocated to Steinau an der Straße in 1960. Dating is uncertain, but must be somewhere between 1931 and 1960. If before the war, it was a product of (Nazi) Germany. If after the war, it was a produced in the DDR (East Germany). Most likely it was a pre-war product. I don't have pictures of the accompanying set. |
||||||||||||||||||||||||||||||||||||||||||||||||||||||||||||||||||||||||||||||||||||||||||||||||||||||||||||||||||||||||||||||||||||||||||||||||||||||||||||||||||||||||||||||||||||||||||||||||||||||||||||||||||||||||||||||||||||||||||||||||||||||||||||||
WILFRIED MANUAL FOR SETS 1 AND 2 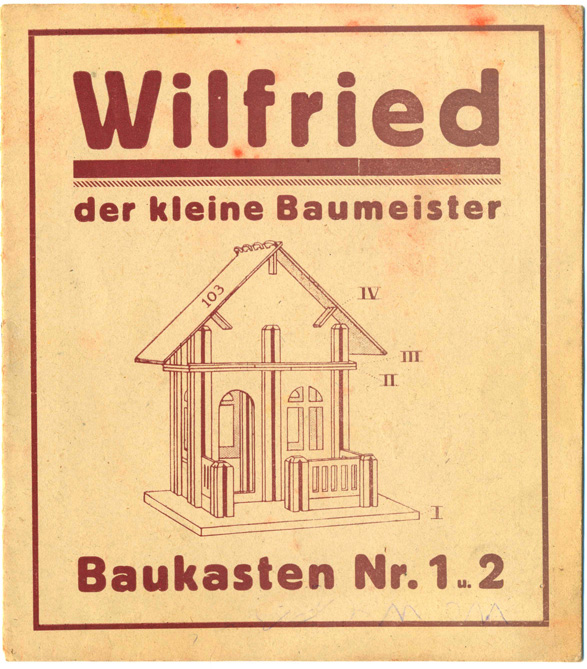 147 x 167 mm 8 pages (including covers) Printing: B&W (dark brown ink) 8 designs See pages DOWNLOAD PDF |
||||||||||||||||||||||||||||||||||||||||||||||||||||||||||||||||||||||||||||||||||||||||||||||||||||||||||||||||||||||||||||||||||||||||||||||||||||||||||||||||||||||||||||||||||||||||||||||||||||||||||||||||||||||||||||||||||||||||||||||||||||||||||||||
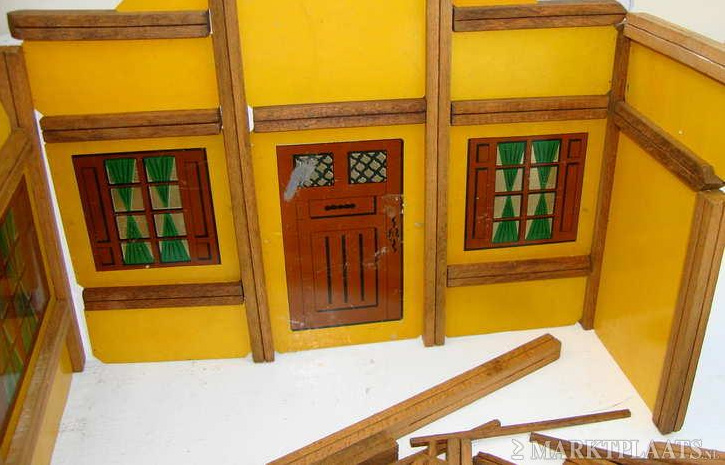
 Scans courtesy Leen Kalden From an auction site, below an image of a Wilfried set and manual, possibly from a later date. The manual cover is in color and the typeface is more playful than the above booklet. The parts appear to be slightly bent, indicating thinner cardboard than Mobaco. They are glossier than Mobaco parts. The door is green rather than gray/black. The green and black parts are made with light-colored cardboard faced with colored paper. The base plate is thinner than Mobaco. The photo of the model shows columns that are not inserted into the base plate, and they are spaced too far to actually fit in the holes. Also, the windows do not quite sit on top of the panel below, indicating that the panels jam a bit. This could be the result of bent panels, of bent columns or tight grooves. The latter would also explain why the columns don't quite fit, so that's probably the issue. The Set number is unreadable on the manual. Since the base plate has 4 x 4 holes, it can't be a Set no. 1 which had 3 x 3 holes, as shown above. Also, there are more parts than in a Set no 2, including roof panels, so it can't be a Set No. 2 either. Possibly it's a Set no. 3. The model shown on the cover of the manual requires triangular roof panels which aren't included in this set, so there was possibly a Set No. 4 with triangular roof panels with which you could build that house. The house on the cover is very similar to Mobaco model no. 23 from Mobaco Set No. 1, but it's drawn from a different angle and has fewer fence parts than the Mobaco version (see below right). The illustration on the cover was possibly made by HECO and not by Moubal. There is an error in the drawing: the rear wall suggests three panels, but there are only two! Although the text in the circle on the manual cover is illegible, I believe it says "3 u 4" (meaning 3 and 4), similar to the "1 u. 2" on the cover of the manual above. 
For comparison:  Mobaco Model no. 23 Image courtesy of Leen Kalden |
||||||||||||||||||||||||||||||||||||||||||||||||||||||||||||||||||||||||||||||||||||||||||||||||||||||||||||||||||||||||||||||||||||||||||||||||||||||||||||||||||||||||||||||||||||||||||||||||||||||||||||||||||||||||||||||||||||||||||||||||||||||||||||||
CORUS WOOD-METAL CONSTRUCTION SYSTEM When I found a box with metal plates and wood columns on a secondhand site I had no idea what it was. Thanks to Tony Knowles I learned it's a French system call Corus, which was introduced around 1924 (the same time that Mobaco was introduced), although others claim it was introduced in 1948. It was made bij Batimétal in Paris. They also made other metal toys such as an aluminum airplane with a catapult (Météore) and a humoristic electric train with 5 funny cast aluminum characters designed bij Albert Dubout and made by Cocoalu (Train Électrique 1900). On some boxes the manufacturer is shown as being MAE. |
||||||||||||||||||||||||||||||||||||||||||||||||||||||||||||||||||||||||||||||||||||||||||||||||||||||||||||||||||||||||||||||||||||||||||||||||||||||||||||||||||||||||||||||||||||||||||||||||||||||||||||||||||||||||||||||||||||||||||||||||||||||||||||||
 Source: Marktplaats |
||||||||||||||||||||||||||||||||||||||||||||||||||||||||||||||||||||||||||||||||||||||||||||||||||||||||||||||||||||||||||||||||||||||||||||||||||||||||||||||||||||||||||||||||||||||||||||||||||||||||||||||||||||||||||||||||||||||||||||||||||||||||||||||
| The Corus system consists of
brightly printed metal plates set into
grooved wooden columns, similar to Mobaco.
But instead of using a base plate and
perforated strips to hold everything
together, Corus uses a system of spring
clips. This allows for complex geometries
and results in models that are pleasing to
the eye. Like many other systems, windows
and doors are not open, so the inside of
buildings is not accessible for play. For lots more info on Corus, please download Tony's excellent overview. Tony maintained the Other Systems Newsletter with many fun toys to peruse. Sadly, Tony passed away in 2022, but his work is continued by Timothy Edwards who has an amazing overview with hundreds of construction toys, well worth a visit: 'Other' Constructional and Allied Systems Manuals and Brochures |
||||||||||||||||||||||||||||||||||||||||||||||||||||||||||||||||||||||||||||||||||||||||||||||||||||||||||||||||||||||||||||||||||||||||||||||||||||||||||||||||||||||||||||||||||||||||||||||||||||||||||||||||||||||||||||||||||||||||||||||||||||||||||||||
Below a picture of a Corus set with the
manual and a lay-out sheet. The box was large, appr. 50
cm wide. On the right a Corus building: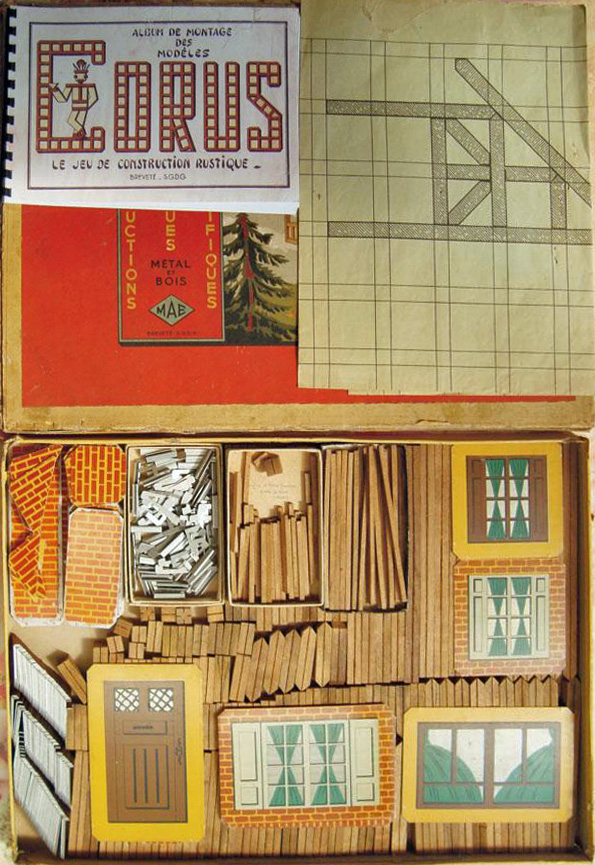
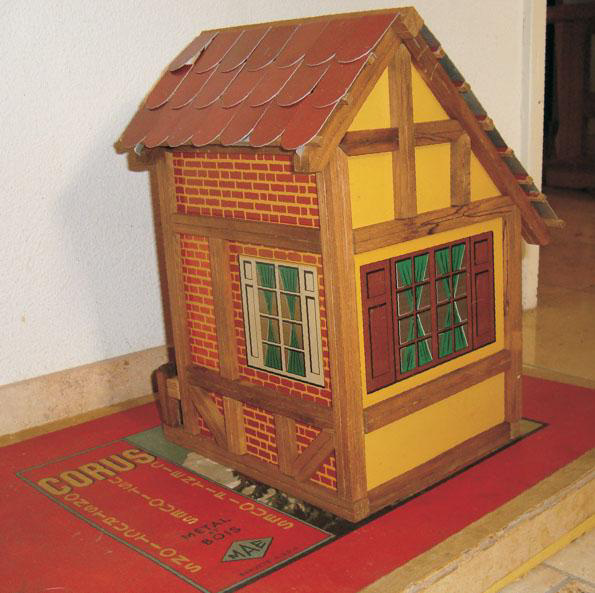  Photo's courtesy Timothy Edwards CORUS PARTS Wall panels are printed on both sides. One side has a brick pattern, the other side has a solid ochre "stucco" finish.
|
||||||||||||||||||||||||||||||||||||||||||||||||||||||||||||||||||||||||||||||||||||||||||||||||||||||||||||||||||||||||||||||||||||||||||||||||||||||||||||||||||||||||||||||||||||||||||||||||||||||||||||||||||||||||||||||||||||||||||||||||||||||||||||||
CORUS MANUAL FOR SETS 00, 0 AND 1 The manual has a thorough 8-page (!) explanation on how to put things together. Building a Corus model required more insight and dexterity than assembling a Mobaco building. Here a translation of the first page:
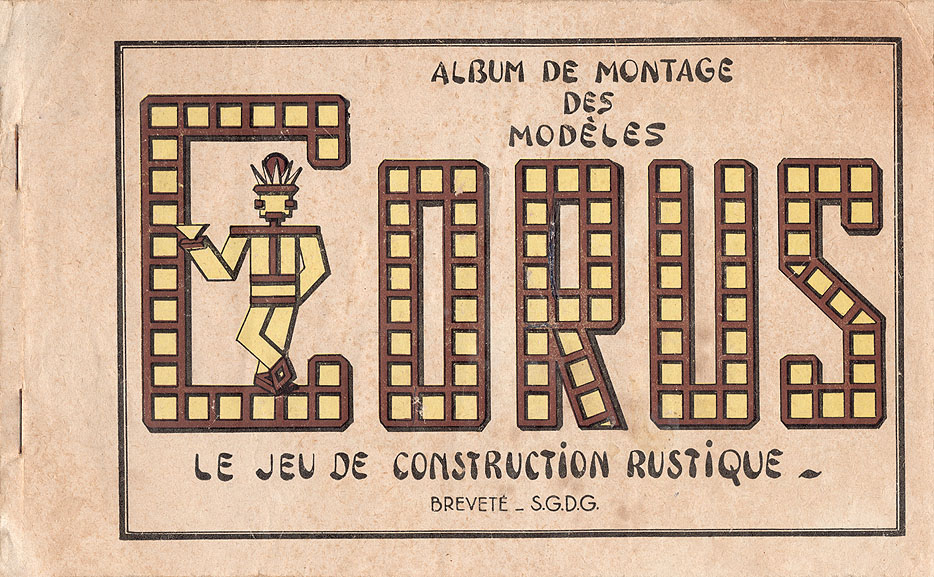 247 x 153 mm
26 pages (including covers) - last two pages missing Cover: black, brown, yellow Inside: black 17 designs for Set 00 3 designs for Set 0 3 designs for Set 1 Several designs with more parts See pages DOWNLOAD 300dpi PDF (25 MB)  Original courtesy of Koos Welling HUBO EL-4 SYSTEM Hubo is a Dutch chain of do-it-yourself products. In 1978, they sold an ingenious do-it-yourself furniture system consisting of grooved posts and infill panels. Their catalog showed several examples, but you could make whatever you imagined. There were three base elements, as shown on the right page below: - a square post with 4 grooves, available in four lengths: 21 cm, 28 cm, 35 cm and 270 cm. - a flat bar with a single groove, 35 cm long - 7 cm-wide infill planks, in three lengths: 40 cm, 83 cm and 260 cm So the "module" was 43 cm x 43 cm x 7 cm. The posts were appr 5 x 5 cm and the distance between the grooves 3 cm. Planks were glued and screwed into the grooves. Screw holes were pre-drilled in the square posts. All you needed was a screwdriver and wood glue, and for more adventurous assemblies, a saw. |
||||||||||||||||||||||||||||||||||||||||||||||||||||||||||||||||||||||||||||||||||||||||||||||||||||||||||||||||||||||||||||||||||||||||||||||||||||||||||||||||||||||||||||||||||||||||||||||||||||||||||||||||||||||||||||||||||||||||||||||||||||||||||||||
    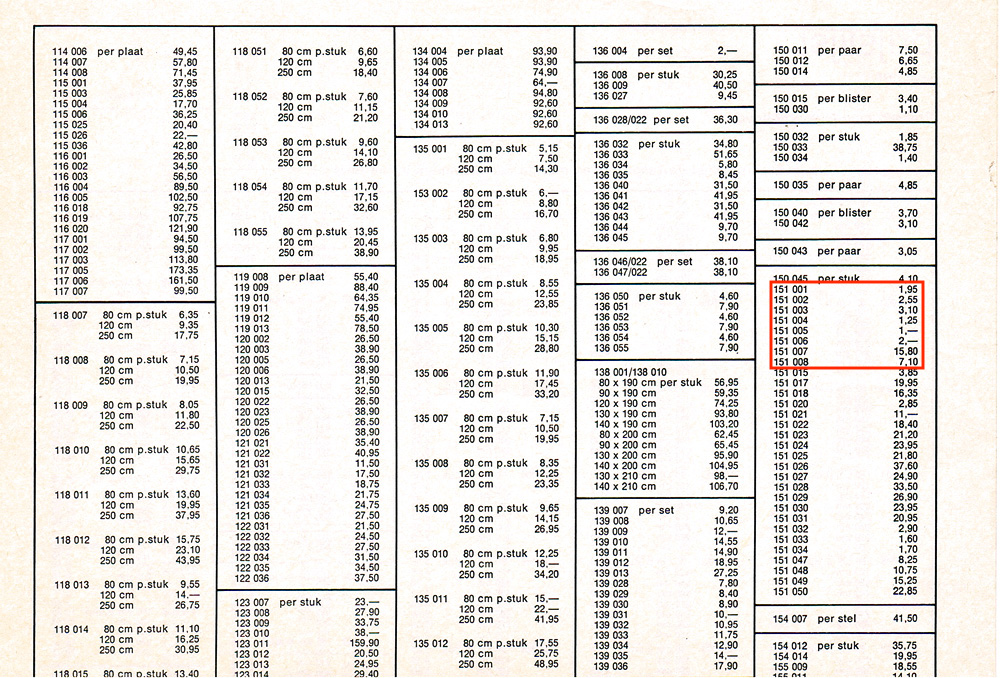 Scans courtesy of Robj Schiff |
||||||||||||||||||||||||||||||||||||||||||||||||||||||||||||||||||||||||||||||||||||||||||||||||||||||||||||||||||||||||||||||||||||||||||||||||||||||||||||||||||||||||||||||||||||||||||||||||||||||||||||||||||||||||||||||||||||||||||||||||||||||||||||||
PLAY STRUCTURE I'm not sure where I found these pictures of a play structure that uses Maboco-like columns.   |
||||||||||||||||||||||||||||||||||||||||||||||||||||||||||||||||||||||||||||||||||||||||||||||||||||||||||||||||||||||||||||||||||||||||||||||||||||||||||||||||||||||||||||||||||||||||||||||||||||||||||||||||||||||||||||||||||||||||||||||||||||||||||||||
MINIPLEX In the early 2000's, MiniPLEX, a small Dutch company in Ede, started producing an all-wood version of Mobaco. They made a complete Mobaco set named Ridderhof, which came with a birch chest, instructions, and more than 200 parts. The flat parts were made from 3 mm plywood that was cut on a large self-made CNC table that could accommodate 5' x 5' plywood panels (152 cm x 152 cm). Unfortunately, it is no longer produced. |
||||||||||||||||||||||||||||||||||||||||||||||||||||||||||||||||||||||||||||||||||||||||||||||||||||||||||||||||||||||||||||||||||||||||||||||||||||||||||||||||||||||||||||||||||||||||||||||||||||||||||||||||||||||||||||||||||||||||||||||||||||||||||||||
    Images courtesy of MiniPLEX |
||||||||||||||||||||||||||||||||||||||||||||||||||||||||||||||||||||||||||||||||||||||||||||||||||||||||||||||||||||||||||||||||||||||||||||||||||||||||||||||||||||||||||||||||||||||||||||||||||||||||||||||||||||||||||||||||||||||||||||||||||||||||||||||
RABIUS DESIGN Mobaco has entered the digital age. Niels Rabius of Rabius Design in Delft created a 3D-CAD library of Mobaco. With it, any size "model" can be virtually built, there are no limits to the number of parts! |
||||||||||||||||||||||||||||||||||||||||||||||||||||||||||||||||||||||||||||||||||||||||||||||||||||||||||||||||||||||||||||||||||||||||||||||||||||||||||||||||||||||||||||||||||||||||||||||||||||||||||||||||||||||||||||||||||||||||||||||||||||||||||||||
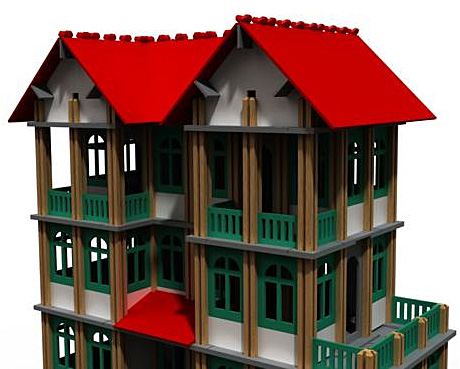  Images courtesy of Rabius Design |
||||||||||||||||||||||||||||||||||||||||||||||||||||||||||||||||||||||||||||||||||||||||||||||||||||||||||||||||||||||||||||||||||||||||||||||||||||||||||||||||||||||||||||||||||||||||||||||||||||||||||||||||||||||||||||||||||||||||||||||||||||||||||||||
ARCKIT  Image courtesy of Arckit Arckit is a new construction system from Ireland, introduced in 2014. Although different in conception, Arckit also makes buildings. But much more refined than Mobaco. An important similarity with Mobaco is that you build with modularized elements that are a single story high. The scale of Arckit models is 1:48, and is based on a 1.2 m square grid. So each module is 25 mm wide and 50 mm high, compared to 2-1/4" x 4" = 57 x 102 mm for Mobaco. This would make Mobaco about 2x larger, except that the width-height ratio of the modules isn't the same, so an exact comparison is not possible. But on the whole, Mobaco is roughly twice the size of ArcKit.   Images courtesy of Arckit A major difference is that Mobaco works with structure and infill (a concept further developed for real buildings by architect John Habraken in the 1960's), while Arckit elements are load bearing. Arckit has 26 components, with more to come: 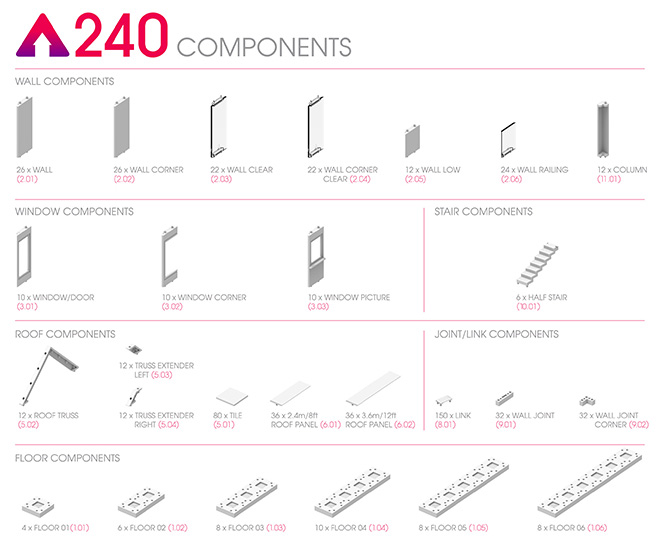 Image courtesy of Arckit Arckit also plans to release component files for 3D printing, so you can make special parts yourself on a (home) 3D printer. Also, using (free) SketchUp 3D software, you can build your own Arckit buildings after downloading Arckit components from the SketchUp library. As these pictures show, Arckit models are clearly "modern". In that sense, Arckit is a worthy 21st century successor to Mobaco! Kits can be purchased over the internet at www.arckit.com. Arckit Official Animation from ARCKIT on Vimeo. |
||||||||||||||||||||||||||||||||||||||||||||||||||||||||||||||||||||||||||||||||||||||||||||||||||||||||||||||||||||||||||||||||||||||||||||||||||||||||||||||||||||||||||||||||||||||||||||||||||||||||||||||||||||||||||||||||||||||||||||||||||||||||||||||
ARTICLES AND BOOKLETS Jump directly to: 1931-11 Article in Natuur & Techniek" 1990-06 Article in Verzamelkrant 1993-03 Article in Verzamelkrant 2001-01 Article in Model Collector (English) 2008-10 Halbertsma's Mobaco book 2011-03 Article in Speelgoed & Hobby |
||||||||||||||||||||||||||||||||||||||||||||||||||||||||||||||||||||||||||||||||||||||||||||||||||||||||||||||||||||||||||||||||||||||||||||||||||||||||||||||||||||||||||||||||||||||||||||||||||||||||||||||||||||||||||||||||||||||||||||||||||||||||||||||
8 NOVEMBER 1931 - ARTICLE IN NATUUR EN TECHNIEK DOWNLOAD PDF Scan courtesy Gerard Poort 
|
||||||||||||||||||||||||||||||||||||||||||||||||||||||||||||||||||||||||||||||||||||||||||||||||||||||||||||||||||||||||||||||||||||||||||||||||||||||||||||||||||||||||||||||||||||||||||||||||||||||||||||||||||||||||||||||||||||||||||||||||||||||||||||||
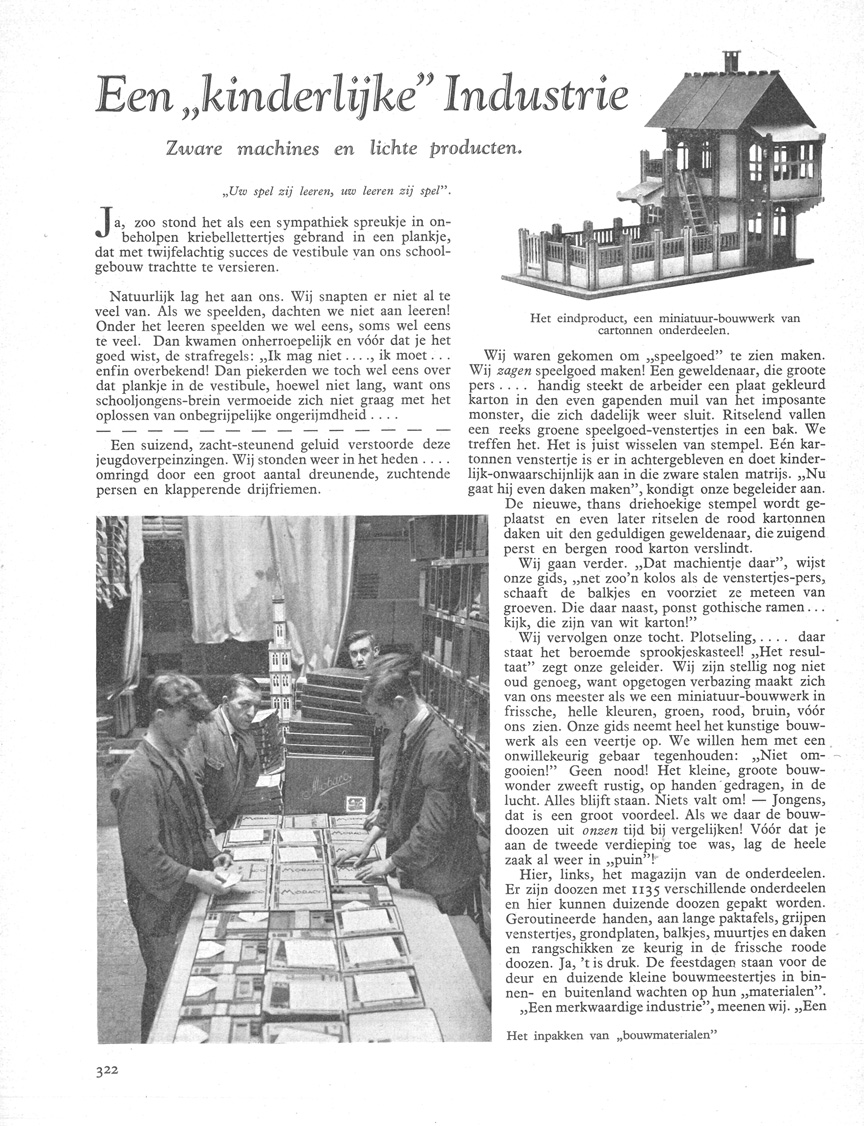  Scans courtesy Alex Geelhoed |
||||||||||||||||||||||||||||||||||||||||||||||||||||||||||||||||||||||||||||||||||||||||||||||||||||||||||||||||||||||||||||||||||||||||||||||||||||||||||||||||||||||||||||||||||||||||||||||||||||||||||||||||||||||||||||||||||||||||||||||||||||||||||||||
HALBERTSMA'S MOBACO BOOK (2008) T. M. Halbertsma put together a 70-page Mobaco book with history and images from various sources. All his material has been incorporated in this website. There are several versions of this book, this one being the most recent (as far as I know).  A4 size 70 pages (including covers) Color copies Text is in Dutch Text version 18 October 2008 See pages DOWNLOAD PDF (33 MB) |
||||||||||||||||||||||||||||||||||||||||||||||||||||||||||||||||||||||||||||||||||||||||||||||||||||||||||||||||||||||||||||||||||||||||||||||||||||||||||||||||||||||||||||||||||||||||||||||||||||||||||||||||||||||||||||||||||||||||||||||||||||||||||||||
 Scans courtesy of Henri de Graaf |
||||||||||||||||||||||||||||||||||||||||||||||||||||||||||||||||||||||||||||||||||||||||||||||||||||||||||||||||||||||||||||||||||||||||||||||||||||||||||||||||||||||||||||||||||||||||||||||||||||||||||||||||||||||||||||||||||||||||||||||||||||||||||||||
JUNE-JULY 1990 - ARTICLE IN VERZAMELKRANT This article is about toy construction systems in general, but mostly about Mobaco and Anker. No new information. It's part of a series about toys on display at Museum Kinderwereld in Roden. DOWNLOAD PDF   Scans courtesy Rien ten Bos |
||||||||||||||||||||||||||||||||||||||||||||||||||||||||||||||||||||||||||||||||||||||||||||||||||||||||||||||||||||||||||||||||||||||||||||||||||||||||||||||||||||||||||||||||||||||||||||||||||||||||||||||||||||||||||||||||||||||||||||||||||||||||||||||
MARCH 1993 - ARTICLE IN VERZAMELKRANT This article is based on information provided by Nick Cranendonk. It gives a broad overview of the history of Mobaco, and asks collectors to contact him. In 1993, Cranendonk wrote the first issue of what was supposed to become a magazine for Mobaco collectors. Once I have his authorization, I will put that first (and only) issue on this website. DOWNLOAD PDF 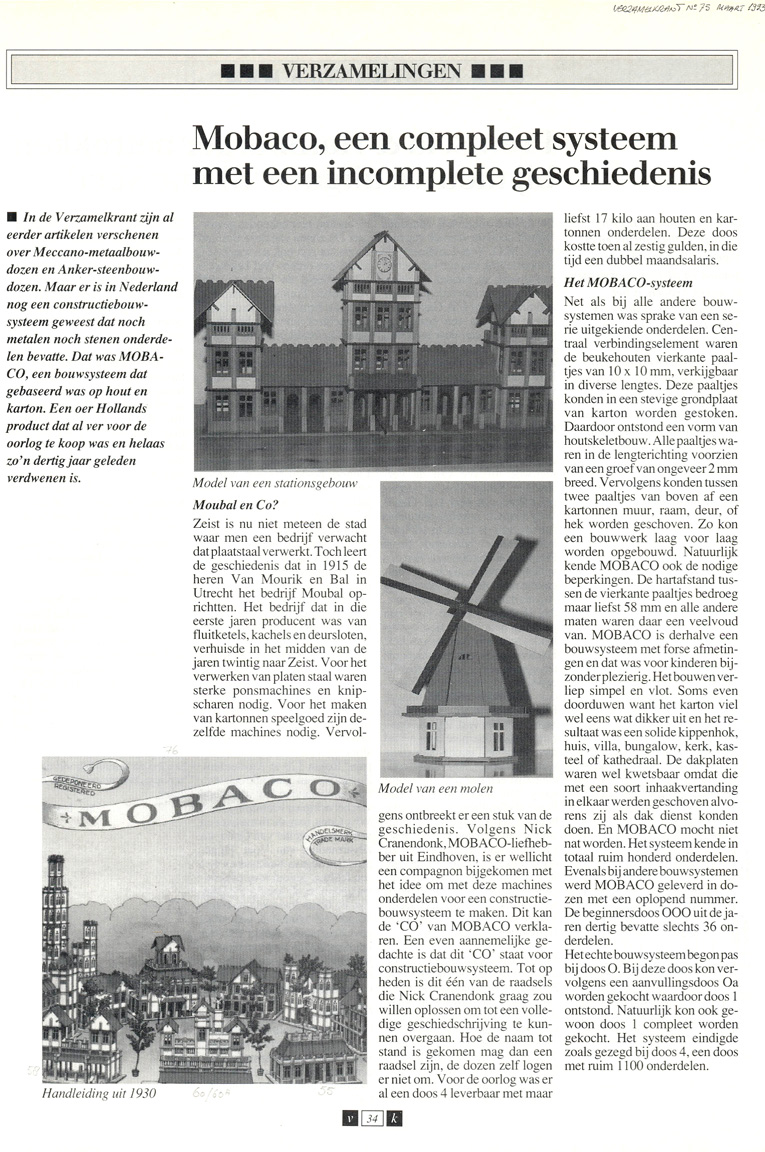 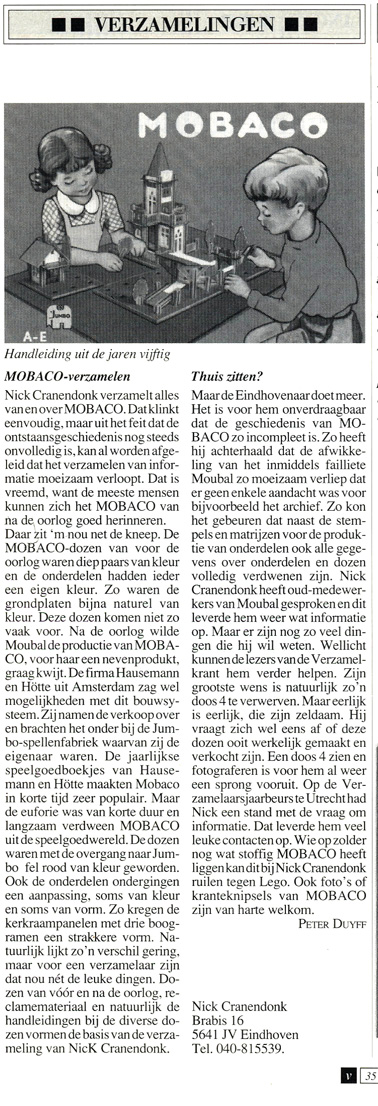 Scans courtesy of Rien ten Bos |
||||||||||||||||||||||||||||||||||||||||||||||||||||||||||||||||||||||||||||||||||||||||||||||||||||||||||||||||||||||||||||||||||||||||||||||||||||||||||||||||||||||||||||||||||||||||||||||||||||||||||||||||||||||||||||||||||||||||||||||||||||||||||||||
JANUARY 2001 - ARTICLE IN MODEL COLLECTOR   Scan courtesy Leen Kalden |
||||||||||||||||||||||||||||||||||||||||||||||||||||||||||||||||||||||||||||||||||||||||||||||||||||||||||||||||||||||||||||||||||||||||||||||||||||||||||||||||||||||||||||||||||||||||||||||||||||||||||||||||||||||||||||||||||||||||||||||||||||||||||||||
MARCH 2011 - ARTICLE IN SPEELGOED EN HOBBY This article gives an overview of the history of Mobaco. Note a Spanish version of the Job de Nijs price list.  Scan courtesy Leen Kalden |
||||||||||||||||||||||||||||||||||||||||||||||||||||||||||||||||||||||||||||||||||||||||||||||||||||||||||||||||||||||||||||||||||||||||||||||||||||||||||||||||||||||||||||||||||||||||||||||||||||||||||||||||||||||||||||||||||||||||||||||||||||||||||||||
| |
||||||||||||||||||||||||||||||||||||||||||||||||||||||||||||||||||||||||||||||||||||||||||||||||||||||||||||||||||||||||||||||||||||||||||||||||||||||||||||||||||||||||||||||||||||||||||||||||||||||||||||||||||||||||||||||||||||||||||||||||||||||||||||||
EXHIBITIONS Jump directly to: 2023-12 Deventer Speelgoedmuseum 2024-02 Gemeentehuis Zeist (under construction) 2024-06 Speelgoedmuseum "Op Stelten" in Oosterhout |
||||||||||||||||||||||||||||||||||||||||||||||||||||||||||||||||||||||||||||||||||||||||||||||||||||||||||||||||||||||||||||||||||||||||||||||||||||||||||||||||||||||||||||||||||||||||||||||||||||||||||||||||||||||||||||||||||||||||||||||||||||||||||||||
2023 - EXHIBITION AT THE DEVENTER SPEELGOEDMUSEUM  There was a colorful Mobaco display at the "Winter Wonderland" exhibition at the Deventer Toy Museum, which ran from December 2023 through February of 2024. The display featured a huge Mobaco building (courtesy Gerard Poort), a Mobaco Wind Mill no. 1 (courtesy Ad de Zwart), some Mobaco sets, and an interactive digital display with additional information about Mobaco. The exhibit was curated by Ben Schräder of the museum. Overview: 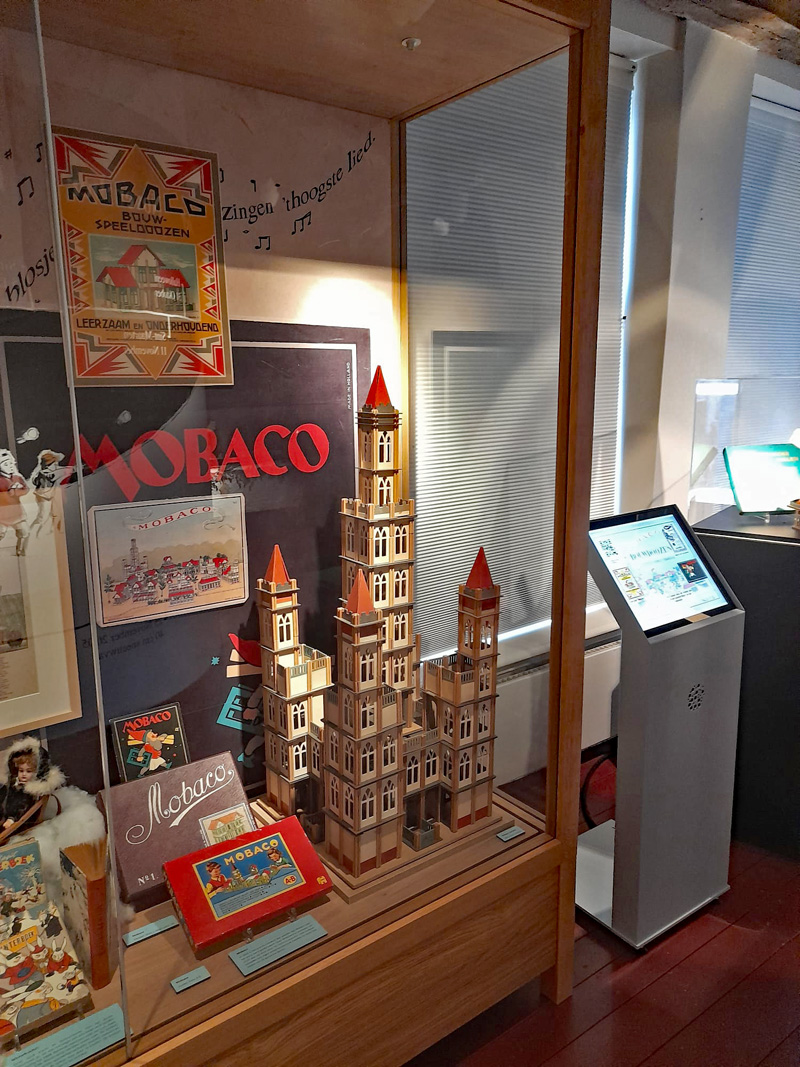 Photo courtesy of Ben Schräder Wind mill no. 1, box and model: 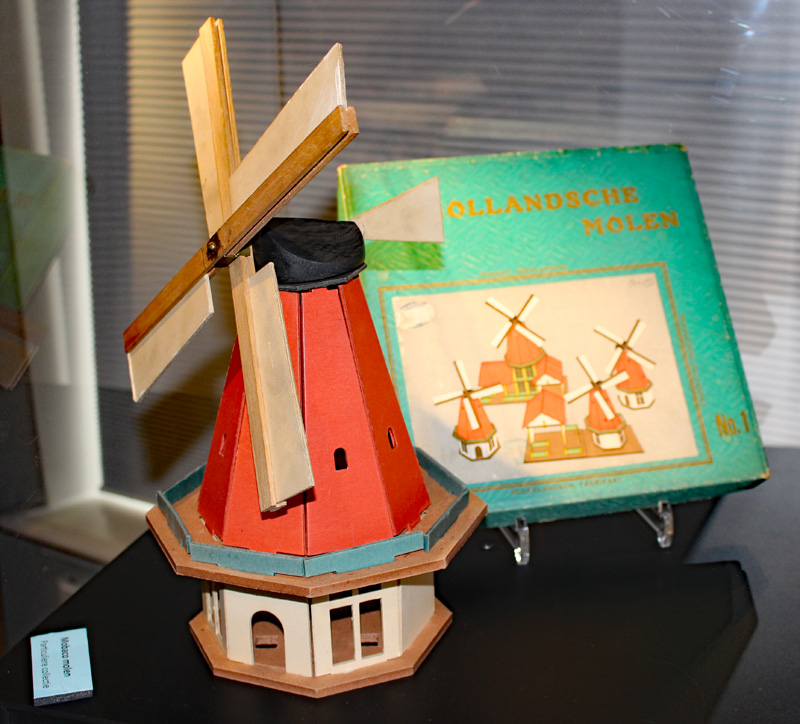 Pre-war Moubal set no. 1, post-war Jumbo Mobaco set A-B and pre-war instruction manual:  Touch screen images:  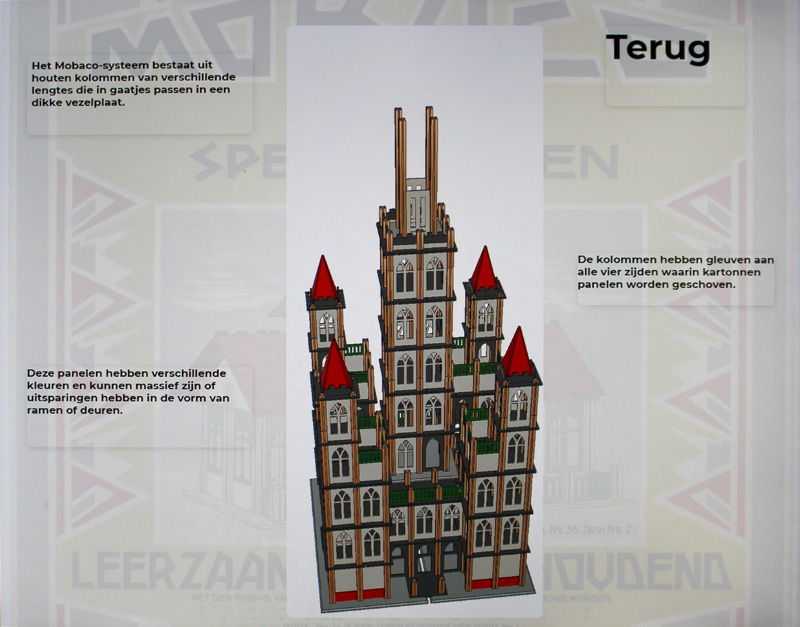 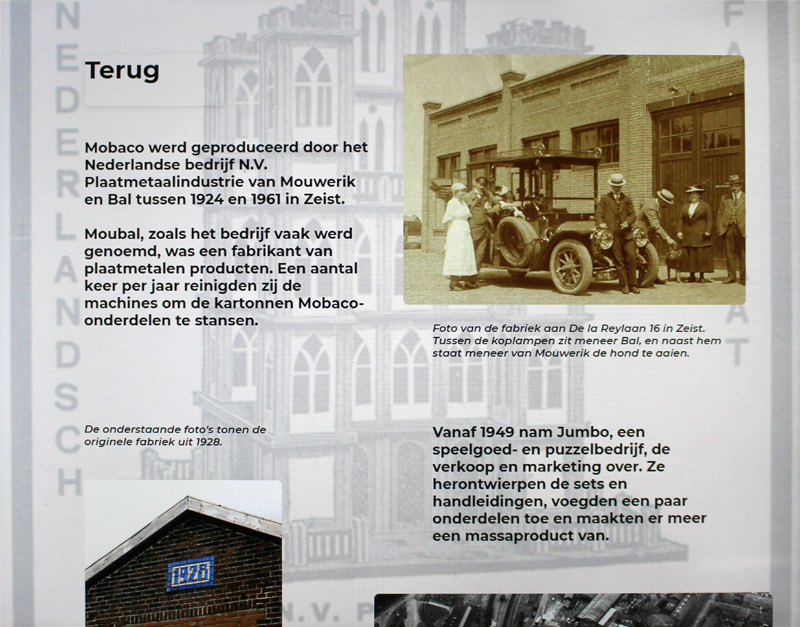 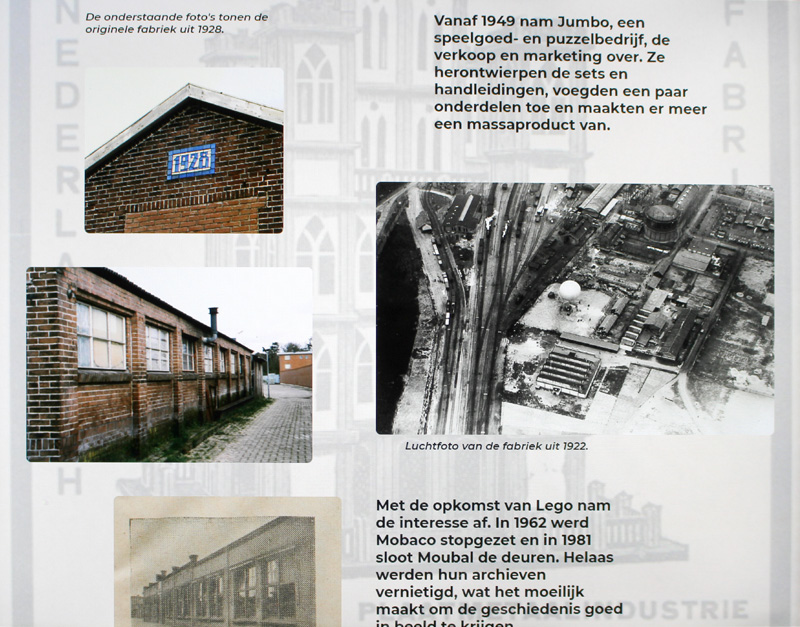 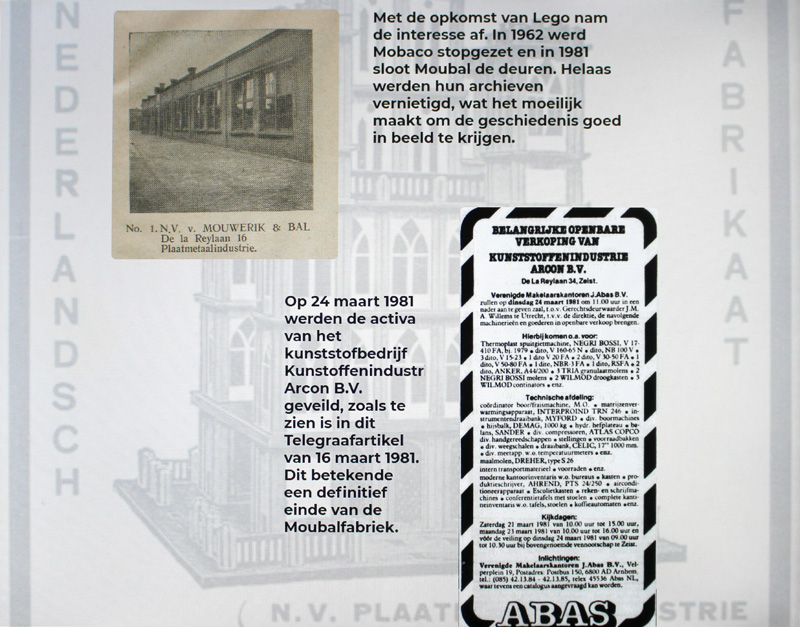   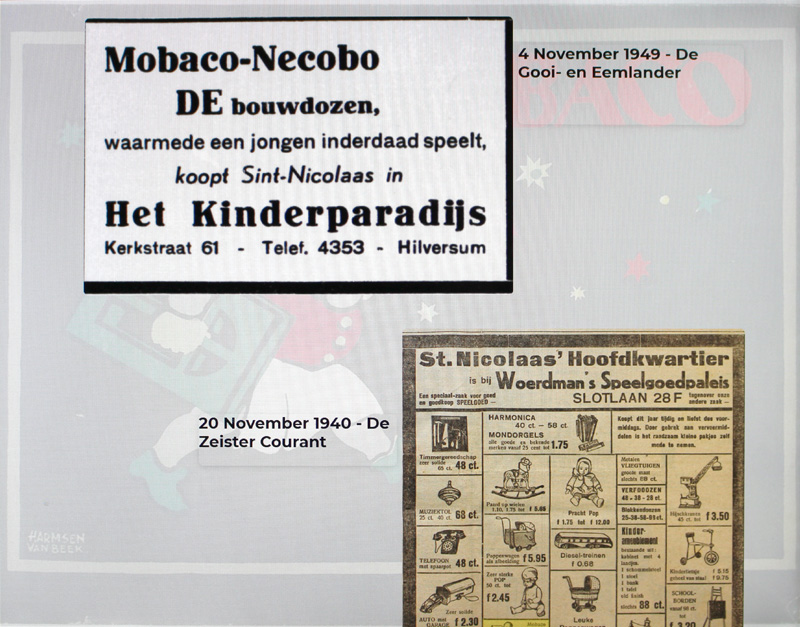  All photo's courtesy CM unless otherwise noted |
||||||||||||||||||||||||||||||||||||||||||||||||||||||||||||||||||||||||||||||||||||||||||||||||||||||||||||||||||||||||||||||||||||||||||||||||||||||||||||||||||||||||||||||||||||||||||||||||||||||||||||||||||||||||||||||||||||||||||||||||||||||||||||||
EXHIBITION - 100 YEARS MOBACO - 1924-2024 - IN ZEIST Held 16 February - 24 May 2024, in the lobby of the town hall in Zeist (the city where Mobaco was made). Exhibition poster (with model by Ida Gerrits):
Links to items related to the exhibition: Lecture (in Dutch) by Caspar Mol about the history of Mobaco, for the Zeister historical society. Video by Fons Pennings. Video about Mobaco by Fons Pennings Video about exhibition by Kees Linnebank for Slotstad RTV Short video inviting people to come to the Mobaco exhibition Invitation to join Mobaco construction afternoons in Zeist Article about the exhibition in De Nieuwsbode (23-02-2024): |
||||||||||||||||||||||||||||||||||||||||||||||||||||||||||||||||||||||||||||||||||||||||||||||||||||||||||||||||||||||||||||||||||||||||||||||||||||||||||||||||||||||||||||||||||||||||||||||||||||||||||||||||||||||||||||||||||||||||||||||||||||||||||||||
 Original courtesy of Evert van Tellingen |
||||||||||||||||||||||||||||||||||||||||||||||||||||||||||||||||||||||||||||||||||||||||||||||||||||||||||||||||||||||||||||||||||||||||||||||||||||||||||||||||||||||||||||||||||||||||||||||||||||||||||||||||||||||||||||||||||||||||||||||||||||||||||||||
EXHIBITION - 100 YEARS MOBACO - 1924-2024 - AT TOY MUSEUM "OP Held 16 June - 1 September 2024 in the museum's large common area. In an adjacent "construction room", children built a Mobaco village on six Wednesday afternoons during the summer holidays. |
||||||||||||||||||||||||||||||||||||||||||||||||||||||||||||||||||||||||||||||||||||||||||||||||||||||||||||||||||||||||||||||||||||||||||||||||||||||||||||||||||||||||||||||||||||||||||||||||||||||||||||||||||||||||||||||||||||||||||||||||||||||||||||||
Overview, at the opening by the museum's
director Annemarie Nieuwenhuijse: Photo courtesy of Gerard Poort North wall, with display cases featuring various themes.  From left to right: - Moubal, with other toys made by Moubal (ELBA, Moba Puzzle, De Groote Manoeuvres) and a Mobaco model of the factory by Gerard Poort. - Poster with a brief Mobaco history, and a display of all Mobaco parts. - Mobaco Marketing, with the colorful gnomes brochure, colorful Moubal price lists and Jumbo advertisements. - Moubal period, 1924-1952, with train station Model 60, house Model 32 with pre-1931 parts, a pre-1931 Set 1 and a 1924 manual for Set 1. - Moubal period, 1924-1952, with train platform Model 60A, house Model 36 with post-1931 parts, a Set 0 with a quiz, and a large gnomes manual. - Moubal period, 1924-1952, with a Set Z building (built by Henri de Graaf), a house with Playmobil, a war set with war parts, an explanation about K-numbers, and a small gnomes manual. - The large "towers model" shown on the cover of the very first manual, built by Gerard Poort. - Jumbo period, 1949-1961, with examples of Jumbo Mobaco models from the A, B and C sets, Jumbo manuals, and special Jumbo parts. All models by Paul Pols except as noted. East wall with three built-in display cases, each with its own theme:  From left to right: - Moubal period, 1924-1952, with a large Windmill No. 2 model (by Ida Gerrits), a Garage no. 2 model (by Paul Pols) and corresponding boxes. - Jumbo period, 1949-1961, with the Village shown on Jumbo boxes, the Jumbo Train Station, both by Paul Pols, and early and later Jumbo boxes. - Inspirations, with look-alike sets by other manufacturers including Edilizia (Italy), Tatami (Argentina), Edilizia Moderna (Italy), El Constructor Infantil Privilegado (Argentiana), L'Édifice (France), Pulko (Germany), Donald Arquitecto (Spain), El Constructor Moderno (Spain) and MiniPlex (Netherlands). Inspirations sets are courtesy of Barend Westerveld, Koos Welling, Ida Gerrits, Caspar Mol. - Paul Pols' model of the Toy Museum, based on a design by Caspar Mol. Paul Pols' model of the toy museum:  With a laser-cut plexiglass roof by Koos Welling:  Poster with a (very) brief history of Mobaco, in introduction to digital Mobaco, and the list of contributors:  Display case in the hallway leading up to the exhibition, with: - a large model from the mythical Set No. 5 (built by Gerard Poort). - a very rare Set No. 3 found in the museum's collection, with the corresponding large gnomes manual.  BUILDING WITH MOBACO For six afternoons in the summer holidays, children were invited to build with real Mobaco. Here they are at work during "de Zomerkaravaan", with a little help from museum volunteers. A good time was had by all!  And the resulting Mobaco village! 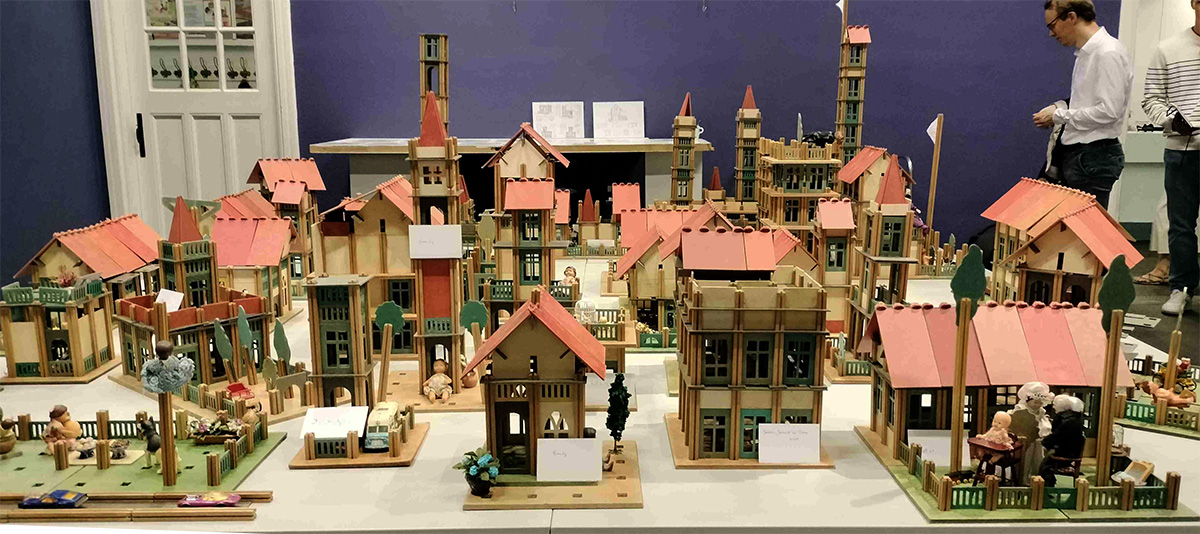 Article by Wouter Voermans in De Stem of 17 August 2024: 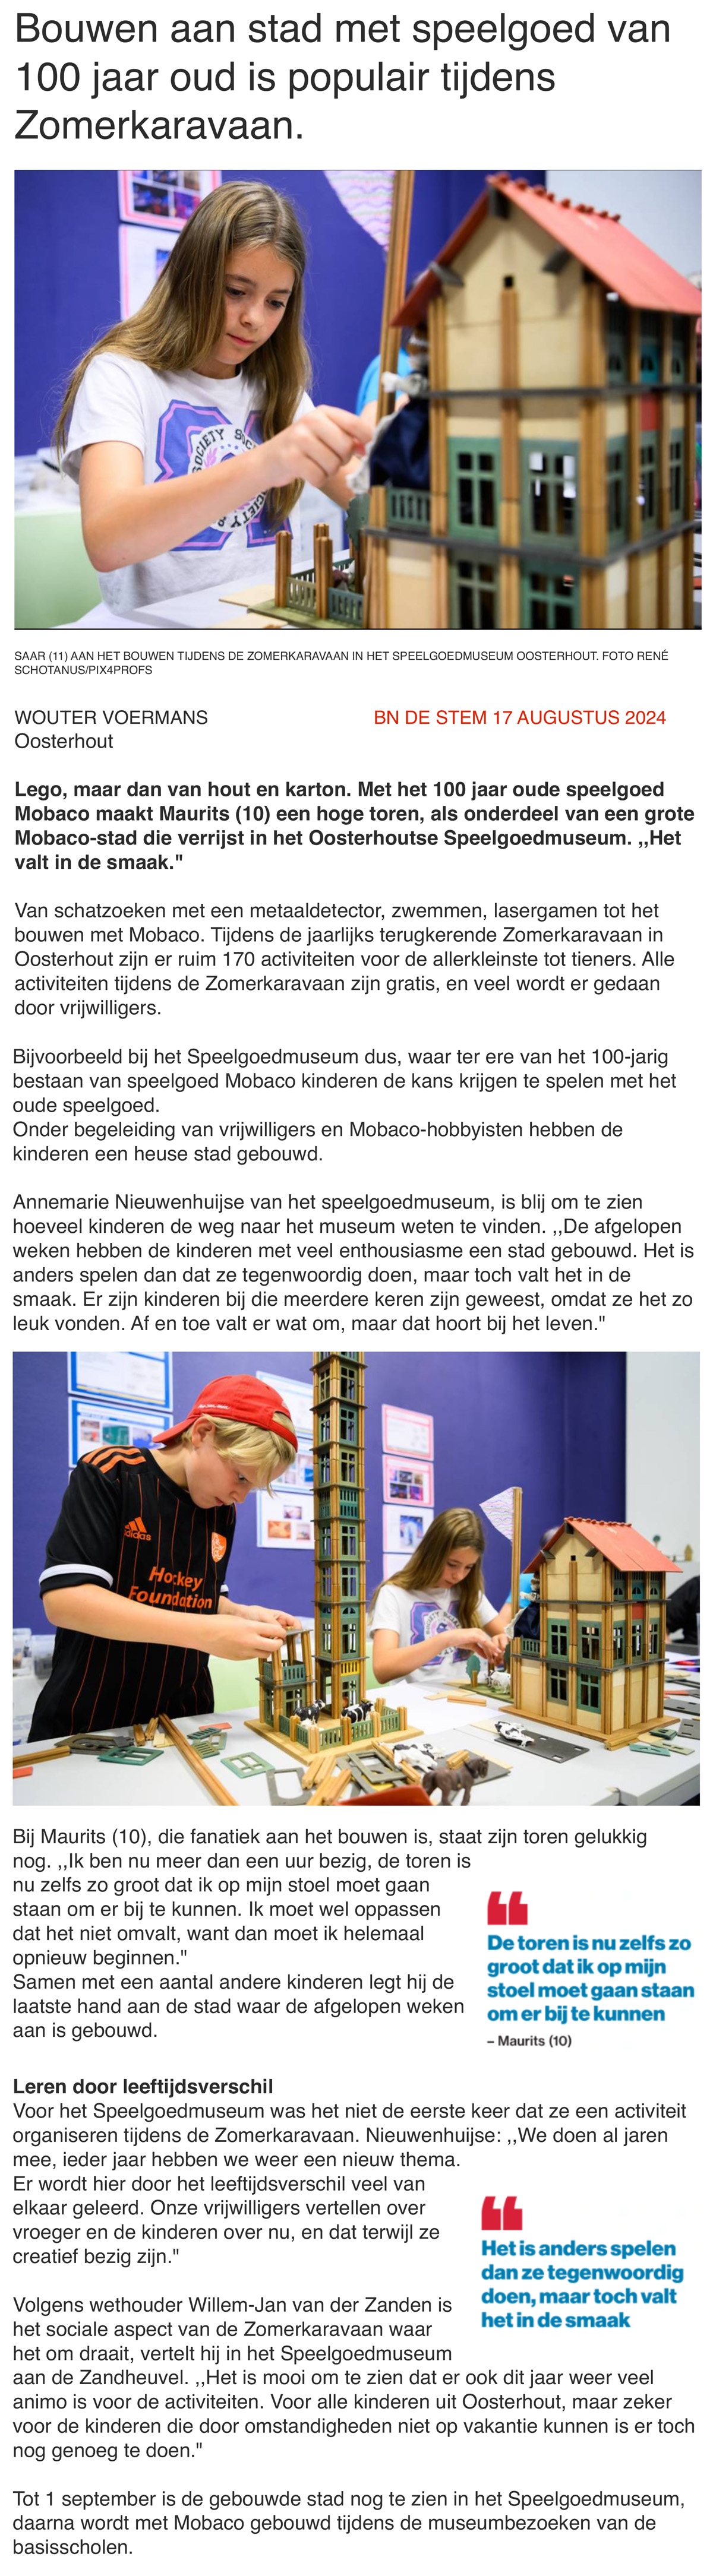 Article courtesy of BN De Stem MOUBAL SET 3 While preparing for the exhibition, we found in the museum's storage an empty Set 3 box from the post-war period. Set 3's are rare as hen's teeth. If people could afford the expenditure, they would buy a Set 4. Those are rare enough, but Set 3's are even rarer. The museum also had a large collection of parts used for building models. Ida Gerrits and Leen Kalden set out to see if they could reconstitute the contents of the Set 3 from the parts bins. Ida has a Set 4 from the same post-war period, so they could compare the numbers stamped on the parts to make sure the reconstitution was historically accurate. They found almost all the parts! This Set 3 was probably full when it was gifted to the museum. Someone had emptied it out and added the contents to the parts collection, not realizing how rare a Set 3 is. Ida and Leen gifted the missing parts to the museum which now has a complete Set 3! Ida and Leen at work. Notice the parts bins in the background:  Photo courtesy of Ida Gerrits Ida with the final result. The set weighs more than what's shown in the price lists. That's probably because these sets were originally made with a cardboard box which is simply not strong enough to support the weight of all the parts. This post-war set is in a factory-made plywood box (with a cardboard lid). It's heavy! Making all the parts fit into the box requires patience and perseverance:  |
||||||||||||||||||||||||||||||||||||||||||||||||||||||||||||||||||||||||||||||||||||||||||||||||||||||||||||||||||||||||||||||||||||||||||||||||||||||||||||||||||||||||||||||||||||||||||||||||||||||||||||||||||||||||||||||||||||||||||||||||||||||||||||||
MISCELLANEOUS Jump directly to: 1931 - Ontwaken - Momenten uit kinderlevens, by Mien Labberton 1953-03 - Moeder - Practisch tijdschrift voor de vrouw in het gezin |
||||||||||||||||||||||||||||||||||||||||||||||||||||||||||||||||||||||||||||||||||||||||||||||||||||||||||||||||||||||||||||||||||||||||||||||||||||||||||||||||||||||||||||||||||||||||||||||||||||||||||||||||||||||||||||||||||||||||||||||||||||||||||||||
1931 - Ontwaken - Momenten uit kinderlevens, by Mien Labberton Story featuring a boy whose little sister just destroyed his Mobaco building:  Image courtesy of delpher.nl 1953-03 - Moeder - Practisch tijdschrift voor de vrouw in het gezin Practical advice to a mother whose son played with Mobaco at the age of 2 and memorized all part numbers, but is unruly:  Courtesy
of delpher.nl, via Leen Kalden Courtesy
of delpher.nl, via Leen Kalden |
||||||||||||||||||||||||||||||||||||||||||||||||||||||||||||||||||||||||||||||||||||||||||||||||||||||||||||||||||||||||||||||||||||||||||||||||||||||||||||||||||||||||||||||||||||||||||||||||||||||||||||||||||||||||||||||||||||||||||||||||||||||||||||||
LINKS |
||||||||||||||||||||||||||||||||||||||||||||||||||||||||||||||||||||||||||||||||||||||||||||||||||||||||||||||||||||||||||||||||||||||||||||||||||||||||||||||||||||||||||||||||||||||||||||||||||||||||||||||||||||||||||||||||||||||||||||||||||||||||||||||
Speelgoedmuseum Roden This Children's Museum in Roden (near Groningen) has (or used to have) a Mobaco display. Brighton Toy Museum They have a very rare Set 4! Set in a series of Victorian railway arches underneath Brighton Station, Brighton Toy and Model Museum is one of the world's key centres of excellence for the preservation and display of toys and models, focusing on the golden age of British toymaking from the first to the fifth decades of the Twentieth Century. Brighton is on Britain's south coast, about 62 miles / 85 km due south of London. Speelgoedmuseum Deventer This museum regularly holds events where you can actually build with Mobaco. Type Mobaco in the search bar to see when. It may also have some sets on display. HONGS & SPELLENLAB HONGS, which stands for Historisch Overzicht Nederlandse GezelschapsSpellen (= Historical Overview of Dutch Games) was a collector's website maintained by Rob van der Linden. It had lots of information on Mobaco, much of which is on this website, and many, many other Dutch toys. The site was taken offline in 2018, but fortunately its contents were eventually migrated to www.spellenlab.be. |
||||||||||||||||||||||||||||||||||||||||||||||||||||||||||||||||||||||||||||||||||||||||||||||||||||||||||||||||||||||||||||||||||||||||||||||||||||||||||||||||||||||||||||||||||||||||||||||||||||||||||||||||||||||||||||||||||||||||||||||||||||||||||||||


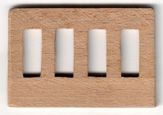

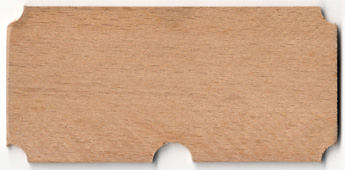


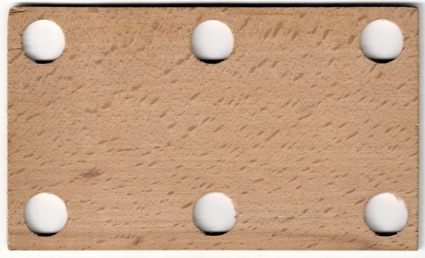

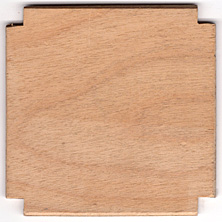
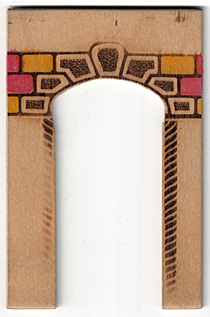
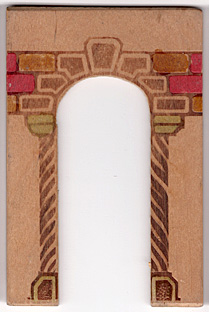


 Front v1
(early) Front v2 (early) Front v3
(later) Back v3 (later)
Front v1
(early) Front v2 (early) Front v3
(later) Back v3 (later) 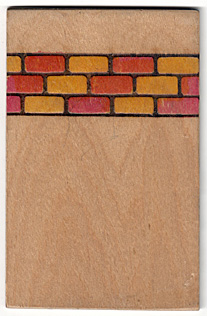


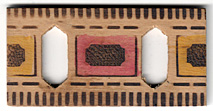
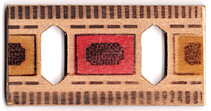

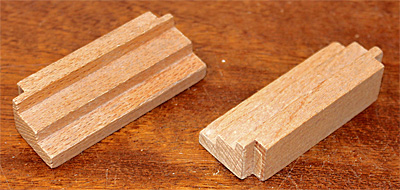
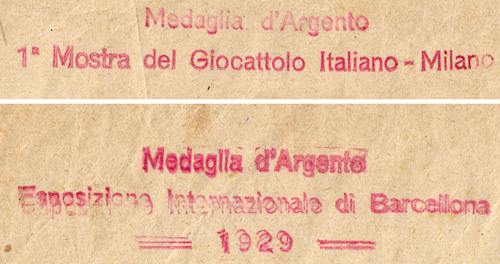
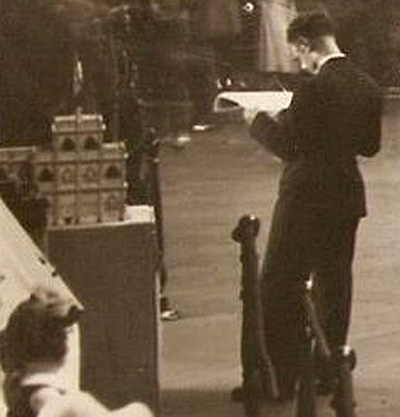
.jpg)